
How to Remove a Garbage Disposal Without Replacing It
Step-by-step: safely remove a garbage disposal, install a standard basket strainer, reconnect the drain trap, and handle the dishwasher hose so your sink drains normally without a grinder.
I have nothing against garbage disposals, but I’ve met plenty of homeowners who do. Maybe yours is noisy, always smells a little “mystery soup,” or you’d rather not have one more appliance under the sink waiting to leak at the worst possible time. Whatever the reason, you can absolutely remove a disposal and convert the sink back to a normal basket strainer so it drains like a standard setup.
This is a very doable Saturday project if you take your time, kill the power correctly, and keep a hand under that disposal so it doesn’t drop like a bowling ball into your cabinet.
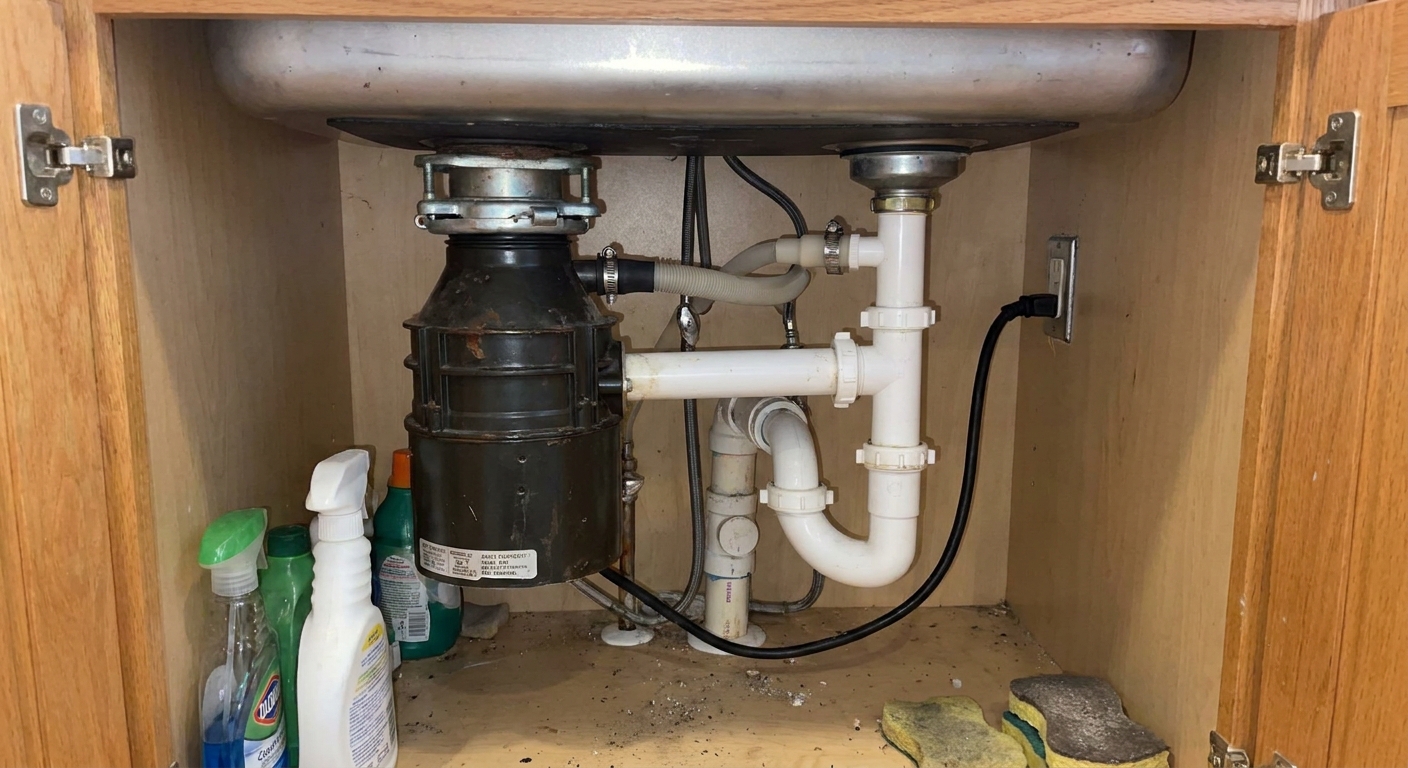
Before you start: what you’re changing
A garbage disposal acts like the sink’s drain body and connects to the P-trap. When you remove it, you need a new drain body in the sink, which is typically a standard 3-1/2 inch kitchen basket strainer. Then you reconnect the P-trap to the strainer’s tailpiece so water has a normal path to the wall drain.
If your dishwasher currently drains into the disposal, you will also need to reroute that hose to a proper connection (or temporarily cap it during the swap) so it does not dump water into your cabinet.
Tools and parts to have on hand
Tools
- Bucket and a few old towels
- Slip-joint pliers (or Channel-Locks)
- Flathead screwdriver
- Needle-nose pliers (helpful for clips)
- Putty knife or old plastic scraper
- Flashlight or headlamp
- Small piece of wood (to support the disposal) or a helper
Parts
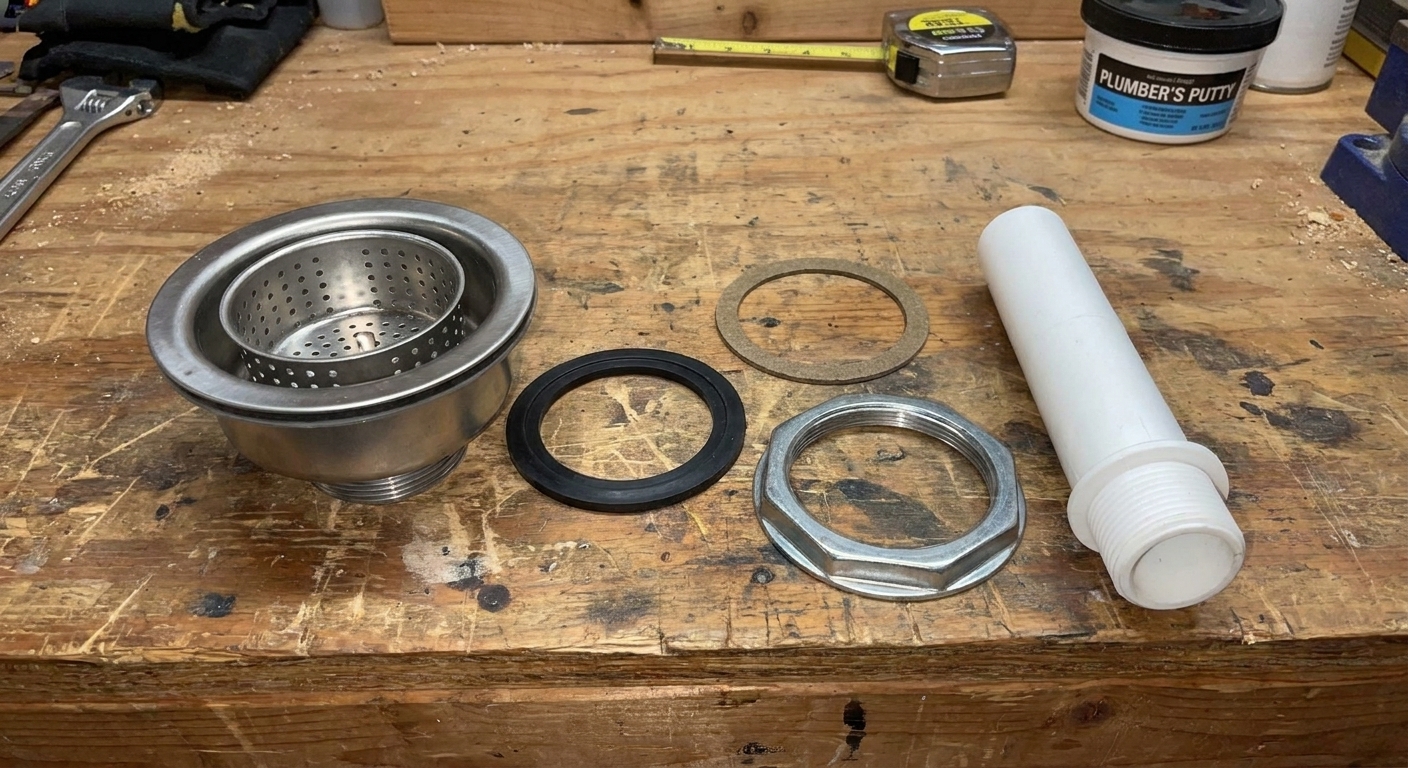
- Kitchen basket strainer (3-1/2 inch standard)
- Plumber’s putty or a rubber gasket supplied with the strainer (use what the strainer manufacturer calls for)
- New tailpiece if not included with the strainer (often 1-1/2 inch)
- Dishwasher hose cap (or a barbed end cap sized to your hose) and a hose clamp
- Optional: new P-trap kit (1-1/2 inch) if your existing slip nuts are crusty or don’t match up cleanly after the swap
Carpenter confession: I’ve reused exactly zero old, brittle slip-joint washers and felt good about it. If yours look flattened, cracked, or hard as a hockey puck, replace them.
Safety first: shut off power the right way
Do this before touching anything under the sink. Garbage disposals can be hardwired or plug-in. Either way, you must cut power so there is zero chance of the unit turning on while your hands are nearby.
If your disposal plugs into an outlet
- Unplug it under the sink.
- Turn the switch on at the wall and confirm nothing happens.
If your disposal is hardwired
- Turn off the correct breaker.
- Confirm it is off with a non-contact voltage tester at the disposal wiring compartment before you handle any wires.
If you are not 100 percent sure whether it’s hardwired, treat it like it is until you verify. Under-sink wiring is not the place for guesswork.
Step 1: Clear space and set a trap for water
- Empty the cabinet and put down towels.
- Place a bucket under the P-trap.
- Take a quick photo of the plumbing and wiring. Future-you will appreciate it.
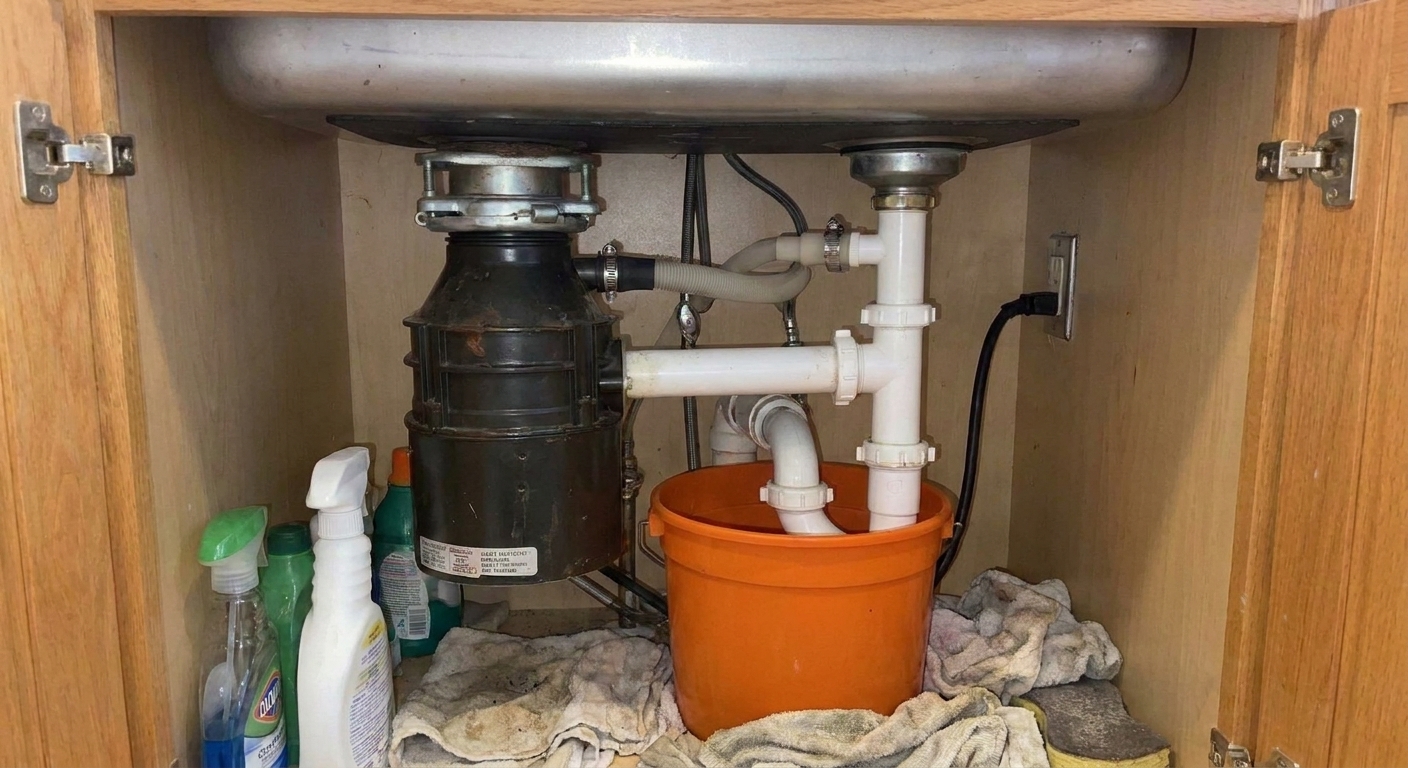
Step 2: Disconnect the dishwasher drain hose (if present)
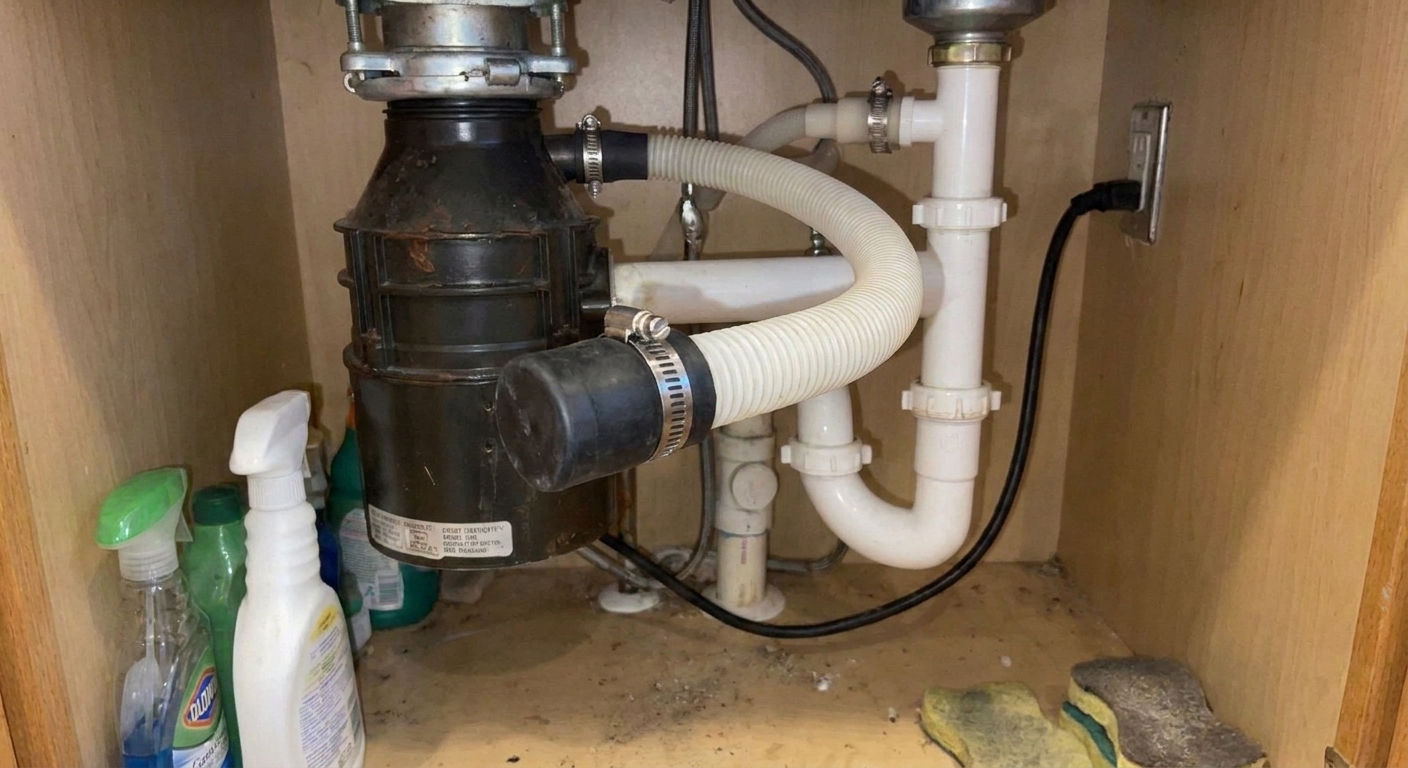
Look for a smaller flexible hose coming from the dishwasher area and attaching to a nipple on the side of the disposal.
- Loosen the hose clamp (screw-type or spring clamp).
- Twist and pull the hose off the disposal nipple.
- If you are not reconnecting it immediately, cap the hose with a proper dishwasher hose cap and clamp it tight.
Important: Do not just shove a bolt in the hose and call it good. Use a real cap made for this job and secure it with a clamp.
Do not run the dishwasher with the drain hose capped. That cap is only there to control drips while you’re working. If the dishwasher tries to pump out against a sealed hose, it can blow the cap off, flood your cabinet, or damage the pump.
If you plan to keep using the dishwasher, you will need to route that hose to a dishwasher branch tailpiece (and sometimes an air gap, depending on local practice). The key for now is: keep it from leaking into the cabinet while the disposal is off.
Step 3: Disconnect the drain pipe from the disposal
Most disposals have a discharge tube that connects to the P-trap using a slip nut.
- Hold the trap steady and loosen the slip nut with pliers.
- Let the water drain into the bucket.
- Remove the discharge tube from the disposal if it is bolted on (usually two screws), or leave it attached until the disposal is off if that is easier for your setup.
Tip: If the trap is glued (less common under kitchen sinks), stop here and consider calling a plumber. Disposal removal is easy. Cutting and rebuilding glued drain assemblies is a different level of commitment.
Step 4: Support the disposal before you release it
This is the part where people get surprised by the weight. Even a smaller disposal is awkward and heavy.
- Slide a small block of wood under the disposal to take some weight, or have a helper hold it.
- Do not rely on the mounting ring alone once you start unlocking it.
Step 5: Remove the disposal from the mounting ring
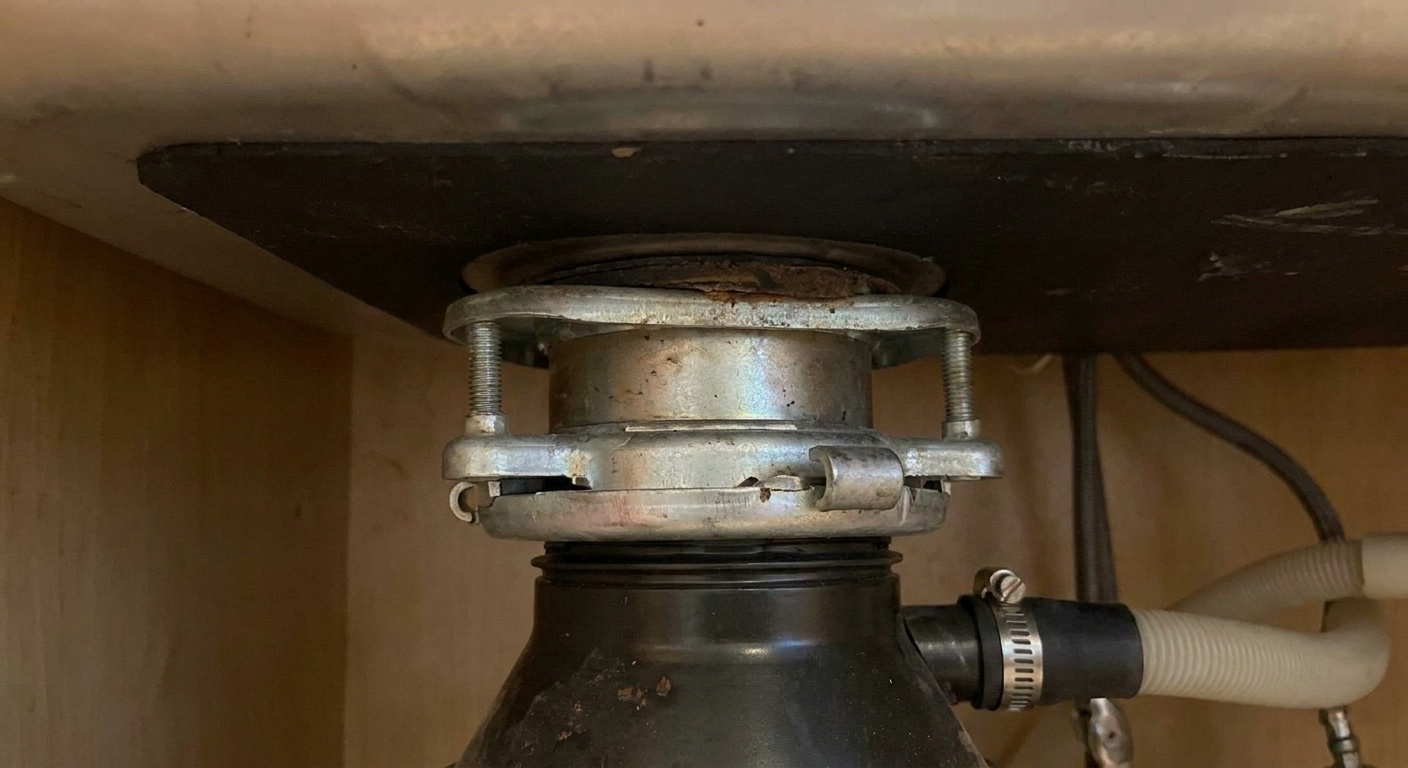
Most disposals use a three-lug mounting ring below the sink.
- Find the metal mounting ring directly under the sink flange.
- Use a flathead screwdriver to tap the ring and rotate it until it releases.
- Lower the disposal straight down and out.
If it feels stuck, double-check that the discharge tube and dishwasher hose are fully disconnected and not acting like an anchor.
Step 6: Disconnect electrical (hardwired disposals only)
If your unit was plugged in, you can skip this.
- Confirm the breaker is still off.
- Remove the small wiring cover plate on the disposal.
- Use a voltage tester to verify no power.
- Disconnect the wire nuts and separate the wires.
- Remove the cable clamp and pull the cable free.
Safety note: If that cable will remain in the cabinet, it must terminate in an approved electrical box with a cover. Do not leave loose wires hanging in open air. If you are not comfortable doing that portion, bring in an electrician for a quick, safe finish.
Step 7: Remove the old sink flange and mounting hardware
With the disposal out, you’ll see the disposal’s mounting assembly under the sink. You need to remove it so a basket strainer can go in.
- Under the sink, loosen the mounting screws or the large lock ring (varies by brand).
- Remove the mounting ring and any fiber or rubber gaskets.
- From above, push the old sink flange up and out.
Scrape old putty from the sink opening and clean the surface so the new strainer seals well.
Step 8: Install the basket strainer
Your basket strainer kit may seal with plumber’s putty (common on stainless sinks) or with a rubber gasket (common for some sinks and some manufacturer instructions). Follow the strainer’s instructions first. If both options are allowed, I typically use plumber’s putty on a standard stainless kitchen sink unless the sink or strainer specifically calls for silicone or a gasket-only seal.
Basic basket strainer install
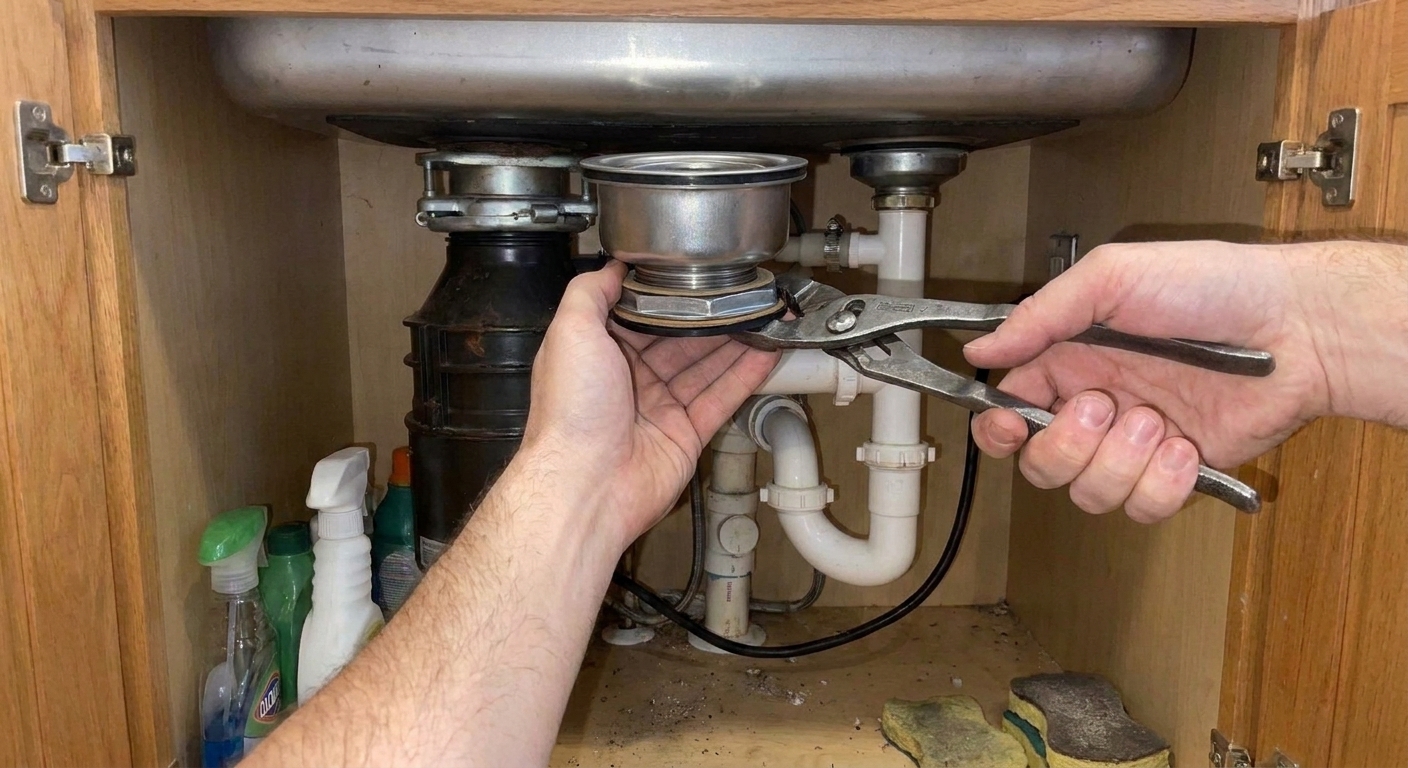
- Roll plumber’s putty into a rope and press it under the lip of the strainer (or position the rubber gasket as directed).
- Drop the strainer into the sink hole from above.
- From below, install the gasket and friction ring (if included), then thread on the locknut.
- Hold the strainer centered and tighten the locknut firmly. Do not go gorilla-tight and deform anything.
- Wipe away any putty squeeze-out from above.
- Attach the tailpiece to the strainer outlet. Make sure the slip-joint washer is oriented correctly (tapered side facing the direction of compression).
Step 9: Reconnect the P-trap so everything lines up
Now you’re essentially plumbing a normal kitchen sink drain.
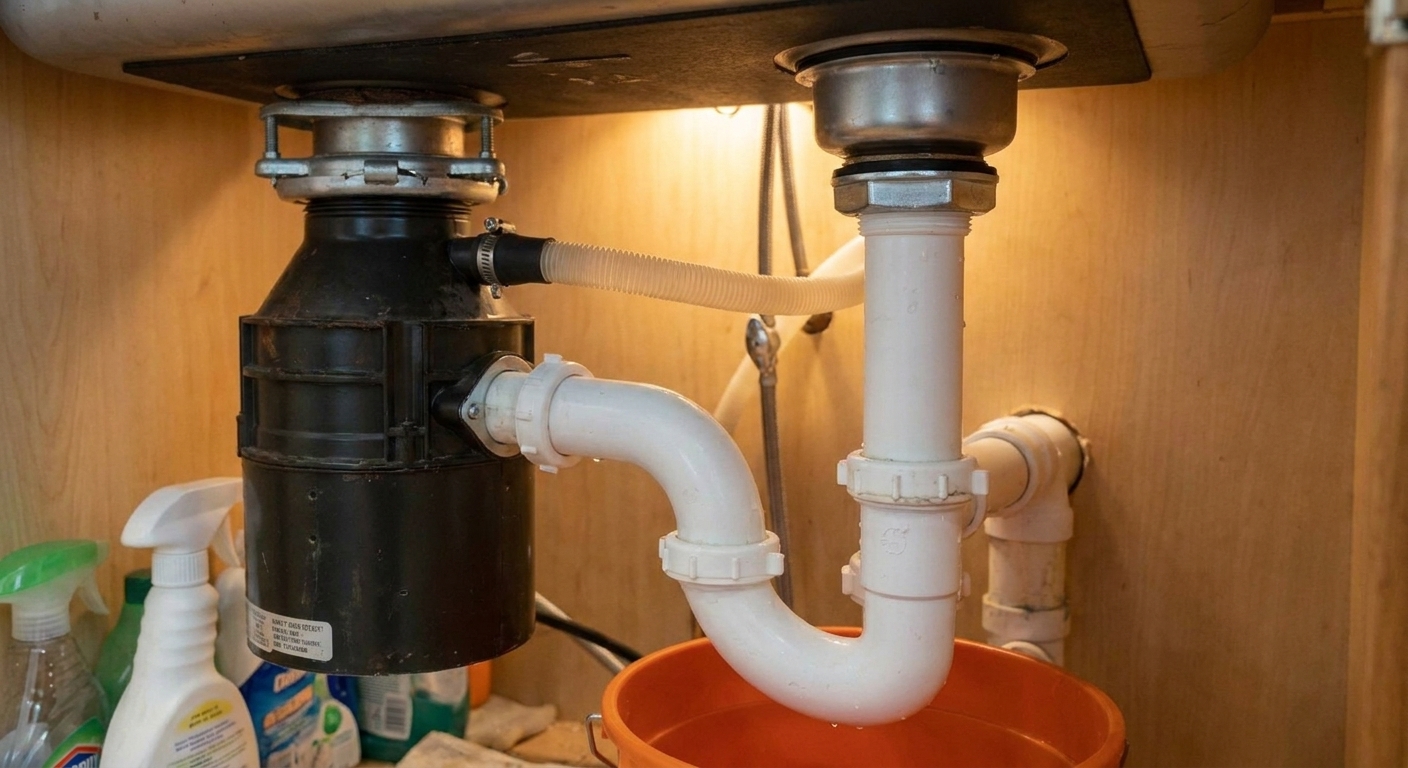
- Dry-fit the P-trap to the new tailpiece and to the wall drain.
- Adjust the trap arm length and orientation so the pipes meet without strain.
- Hand-tighten slip nuts first, then snug them with pliers about a quarter-turn more.
If the new tailpiece sits higher than your old disposal outlet, you may need to shorten the vertical tailpiece (some are cut-to-length) or replace the trap arm for a better fit. The goal is simple: no forced angles and no cross-threaded nuts.
Step 10: Leak test like you mean it
Test the basket strainer seal
- Put the stopper in and fill the sink partway with water.
- Look under the sink for drips around the strainer body.
- Release the water and watch while it drains.
Test the slip joints
- Run hot water for a minute and check every slip nut.
- Wipe joints with a dry paper towel. It shows moisture fast.
Dishwasher line check
- If the dishwasher hose is still capped, just check that the cap and clamp are seated and dry.
- Do not run the dishwasher until the hose is connected to a proper drain point (dishwasher branch tailpiece or other approved setup).
If a slip joint leaks, first try a gentle snug. If it still leaks, loosen it, realign the pipe, and make sure the washer is seated correctly. Most “mystery leaks” are just slightly crooked joints.
What to do with the open space and leftover connections
If you removed a plug-in disposal
You can leave the outlet in the cabinet as-is. Just keep it dry and do not overload it with a tangle of appliances.
If you removed a hardwired disposal
You cannot leave that cable floating. The safe options are: terminate it in a covered electrical box with a cover, convert it to a receptacle in an approved box, or remove the cable back to its source. If any of that sounds fuzzy, this is a great time to hire an electrician for a small service call.
If you plan to keep using the dishwasher
Long-term, the dishwasher drain needs a proper connection to the sink drain, typically through a dishwasher branch tailpiece (and sometimes an air gap, depending on local practice). A capped hose is only a temporary mess-prevention move while you work, not a usable “final” setup.
Common hiccups (and how to get past them)
The mounting ring will not rotate
- Make sure the disposal is supported so it is not binding the ring.
- Use a screwdriver and tap the ring lugs gently with a hammer.
- Spray a little penetrating oil on the ring tabs if they are rusty, then try again.
The sink hole looks gross or uneven
- Scrape away old putty and mineral buildup completely.
- Clean and dry the area before seating the new strainer.
- Do not stack extra putty to “make up” for a bad surface. Clean first.
The trap no longer lines up
- Try a new trap kit with a longer trap arm.
- Adjust the wall arm depth and angle if it is a slip-joint connection.
- If you have glued fittings at the wall, consider bringing in a plumber for that portion.
When to call in a pro
- Your disposal is hardwired and you are not comfortable making the wiring safe afterward.
- The drain at the wall is glued and would need cutting and rebuilding.
- You discover corrosion, cracked piping, or active leaking shutoff valves while you are in there.
No shame in tapping out on the parts that can cause real damage. Plenty of homeowners DIY the disposal removal and basket strainer, then hire out the electrical or glued-drain adjustments.
Quick FAQ
Do I need a special basket strainer after removing a disposal?
No. Most kitchen sinks use a standard 3-1/2 inch basket strainer. Buy a quality one with solid hardware and a tailpiece that matches your drain size (usually 1-1/2 inch).
Can I just remove the disposal and leave the drain open for a while?
I would not. An open drain under the sink is a fast way to invite sewer gas into your kitchen and spill water everywhere. If you are not installing the strainer the same day, at least temporarily seal the sink drain opening from above and cap any open drain piping.
Is it okay to reuse the old P-trap?
Sometimes, yes. If the nuts spin freely, the washers are in good shape, and everything lines up without forcing, you can reuse it. If it is brittle, cracked, or crusted with corrosion, replace it while you have the cabinet emptied.