
How to Replace a Toilet Wax Ring
Water around the toilet base or a sewer smell? Learn how to pull and reseat the same toilet with a new wax (or wax-free) ring, tighten it down without rocking, and test for leaks.
If you’ve got water showing up around the base of your toilet or that unmistakable sewer smell that makes you question every life choice you’ve ever made, the culprit is often the wax ring (also called the closet seal). Often, not always. A loose flange, a rocked-out toilet, or even water tracking down from the tank can pull off a pretty convincing impersonation. The good news: replacing the seal is a very doable DIY job. The less good news: it involves lifting a toilet, which is awkward in the same way carrying a sleeping toddler is awkward.
I’m going to walk you through reseating the same toilet with a new wax or wax-free ring. We’ll stop once the flange is sound. This is not the day we rebuild a flange or clear a clog. We’re just restoring the seal between the toilet and the drain.
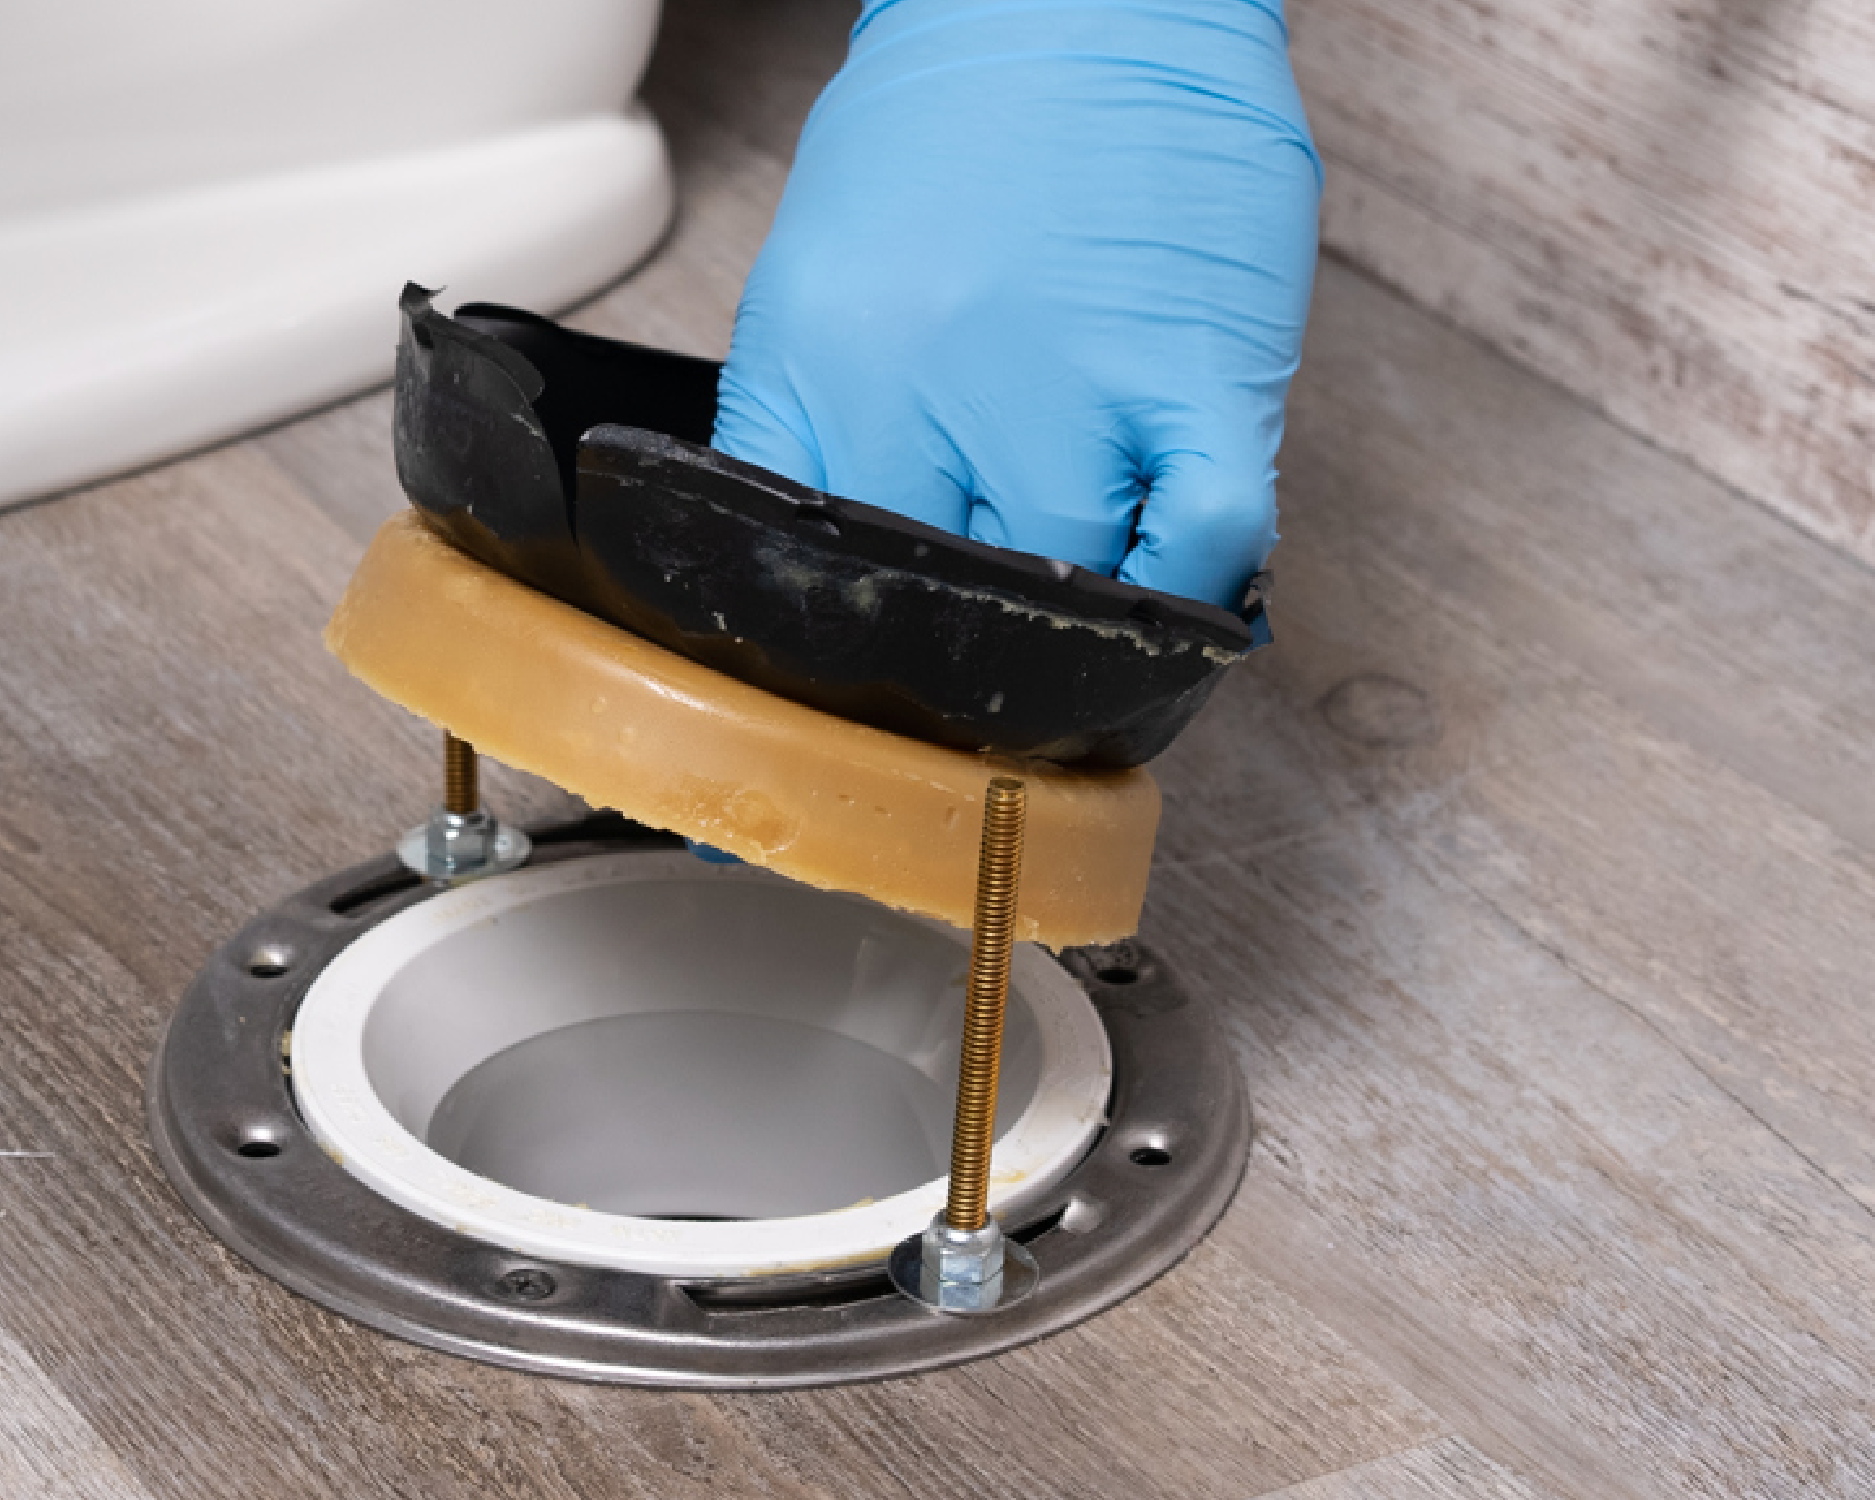
Signs the wax ring is bad
A failing wax ring usually shows up in a few predictable ways:
- Water around the base after flushing, especially seeping out on one side.
- Sewer odor that comes and goes, often worse after flushing.
- Loose, rocking toilet that has been wiggling for a while.
Before you blame the wax ring, do a quick check: wipe the floor dry, flush once, then watch the base. If water appears right at the floor line, that often points to the seal. Also take 10 seconds to confirm water is not tracking from above: run a dry paper towel under the tank, around the supply connection, and along the outside of the bowl. Condensation, a slow supply-line drip, or tank hardware can all end up pooling at the base and fooling you.
Tools and materials
You do not need a plumber’s truck. You do need a few basics and a willingness to kneel on the floor for 30 minutes.
Tools
- Adjustable wrench or socket set
- Small bucket or pan
- Sponge or small cup
- Utility knife (optional)
- Putty knife or plastic scraper
- Rubber gloves
- Rags or paper towels
Materials
- New wax ring or wax-free ring sized for your toilet
- New closet bolts (recommended, inexpensive, and saves headaches)
- Toilet shims (only if needed for rocking)
- Bathroom-grade caulk (optional and used carefully, see below)
Tip from my carpenter days: Buy two wax rings if you are new to this. If the toilet doesn’t land squarely the first time, you cannot reuse a wax ring you already squished.
Wax vs wax-free
Both can work great when installed correctly.
- Traditional wax ring: Cheap, reliable, and the default choice. Best when the toilet flange is at the right height and the floor is stable.
- Wax ring with a plastic horn: Helpful when the flange is a touch low or you want a little extra guidance into the drain opening. It is not a cure for a badly low flange. Also, do not use one if it interferes with the drain opening or the manufacturer instructions for your toilet or flange setup say otherwise.
- Wax-free ring: Often uses rubber and foam components. Nice if you want the ability to reposition the toilet during install or if you have small alignment issues.
Either way, the key is the same: the toilet has to sit solidly on the floor with no rocking, and the seal has to be centered on the flange opening.
Replace the wax ring
1) Shut off the water
Find the shutoff valve behind the toilet (usually low on the wall). Turn it clockwise until it stops. If the valve is stubborn, do not force it like you are trying to open a pickle jar. Gentle pressure. If it will not turn, you may need to stop and address the valve before proceeding.
2) Empty the tank and bowl
Flush to empty most of the tank. Then:
- Sponge out the remaining water in the tank into a bucket.
- Sponge or cup out the water left in the bowl. The drier the toilet, the cleaner the lift.
This is the difference between a mildly gross job and a “why is my sock wet” job.
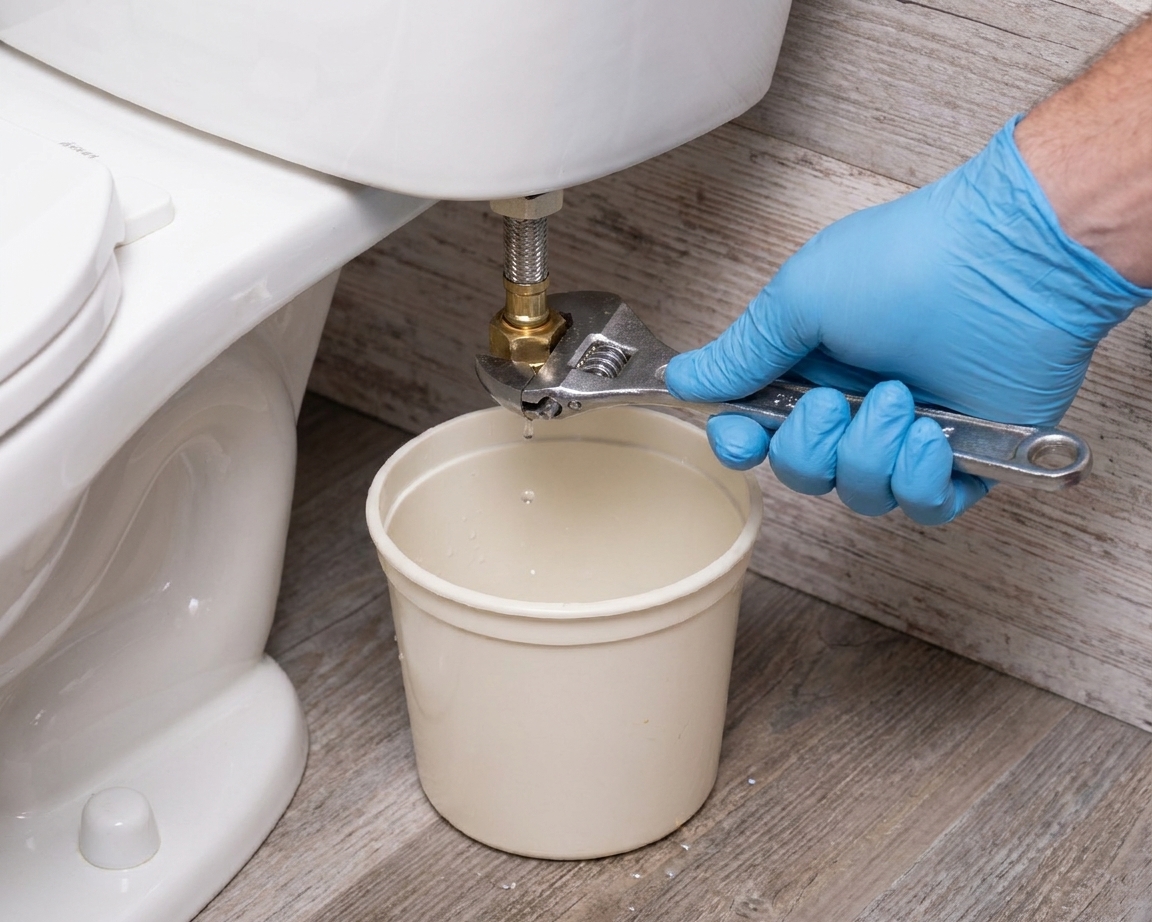
3) Disconnect the supply line
Place a small bucket under the fill valve connection beneath the tank. Unscrew the supply line nut by hand if you can, or with a wrench if needed. Expect a little water.
4) Remove the caps and nuts at the base
Pop off the plastic caps at the base of the toilet (if present). Use a wrench to remove the nuts on the closet bolts.
If the nuts spin but do not come off, the bolt may be turning. You can press down gently on the bolt with a screwdriver while turning the nut. Worst case, you may need to cut the bolt. If you cut, plan on replacing the bolts, which I recommend anyway.
5) Break the seal and lift the toilet
Rock the toilet gently side to side to break the wax seal. Once it loosens, lift straight up. Toilets are heavier than they look, and they are shaped like they were designed specifically to be difficult to carry.
Set the toilet on an old towel or a piece of cardboard.
Safety note: Toilets are awkward and often 60 to 100+ pounds depending on model. If your back is questionable or the bathroom is tight, grab a helper. Also watch your fingers around the bolt ends and porcelain edges.
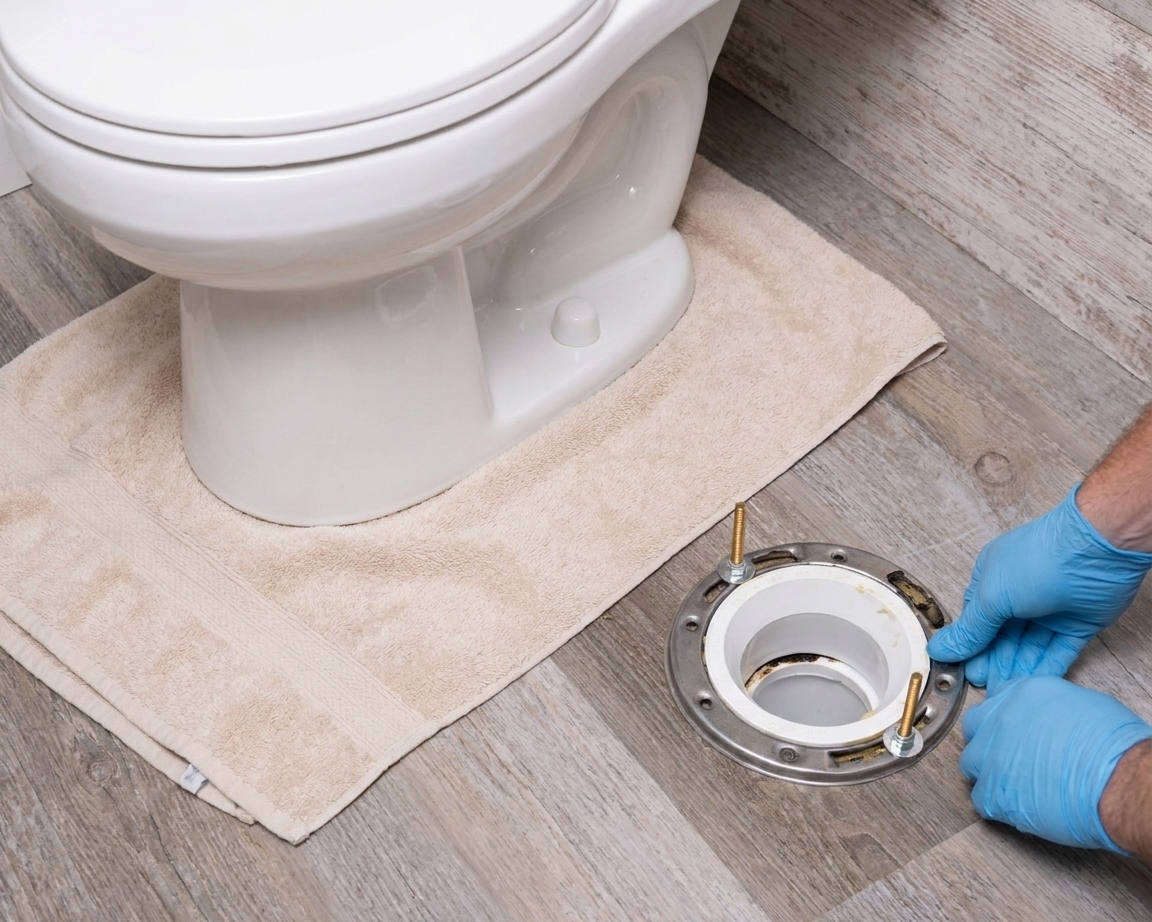
6) Block the drain and scrape the old wax
Before you do anything else, loosely stuff a rag into the drain opening. This helps keep sewer gas down and also keeps hardware from taking a one-way trip into your plumbing. Just remember to pull it out before you reset the toilet.
Now scrape old wax off:
- the bottom horn of the toilet outlet
- the flange area around the drain opening
Use a putty knife or plastic scraper and wipe up with paper towels. Get it clean enough that the new ring can seat properly.
Flange check (we stop if this is not sound): The flange should feel solid and not be broken or lifting. If it is cracked, missing chunks, or loose from the floor, that is beyond a simple wax-ring reset.
Quick flange-height reality check: A common target is a flange that sits on top of the finished floor or up to about 1/4 inch above it. If it is below the finished floor, you often need an extender or repair solution. Follow the flange and toilet manufacturer guidance and local code where it applies.
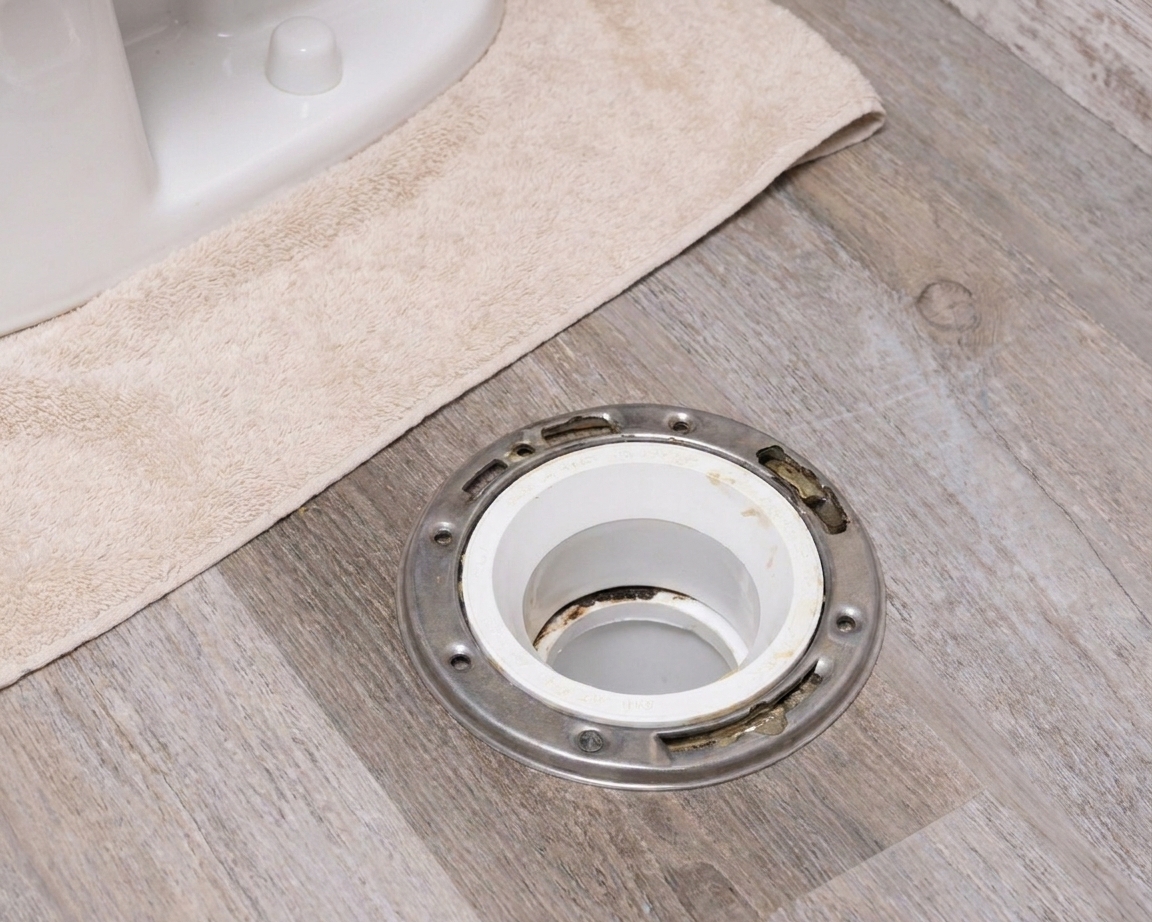
7) Install new closet bolts
Slide the new bolts into the flange slots and position them at about the 3 o’clock and 9 o’clock positions. Many bolt kits include little plastic washers to hold the bolts upright. Use them. They make the reset much less annoying.
8) Set the new wax ring or wax-free seal
Follow the instructions on your specific ring, but these are common best practices:
- Wax ring: Many DIYers press the wax ring onto the toilet outlet horn. Others place it on the flange. Either can work, but I prefer placing it on the toilet so it moves with the toilet and stays centered during the lift and lower.
- Wax-free: Usually installs on the flange in layers. Dry-fit the pieces before you commit so you know how it aligns.
Do not stack two standard wax rings unless the product specifically allows it or you are using an approved extender-style setup. If your flange height is wrong, that is a different fix than “replace the wax ring.”
9) Lower the toilet straight down
This is the moment where patience pays you back.
- Line up the bolt ends with the holes in the toilet base.
- Lower the toilet straight down without sliding it around.
- Once it touches down, press down with your body weight to compress the wax or seal.
Try not to twist. Twisting can smear wax and ruin the seal.
10) Tighten the nuts evenly
Add washers and nuts. Tighten each side a little at a time, alternating left and right.
- Snug is the goal, not “as tight as possible.”
- Use a hand wrench, not an impact driver. Porcelain does not need that kind of confidence.
- Porcelain can crack if you over-tighten. It is an expensive sound when that happens.
Stop when the toilet feels solid and does not rock.
Small finishing detail: If the bolts are too tall for the caps to snap on, trim the excess bolt length after everything is snug. A hacksaw works, and a little painter’s tape on the porcelain can help prevent scuffs.
11) Fix rocking with shims
If the toilet rocks even with snug bolts, your floor is uneven or the toilet is sitting on a high spot. Do not keep cranking down on the nuts.
Instead:
- Slide plastic toilet shims under the base at the rocking points.
- Recheck stability.
- Trim shims with a utility knife so they are not sticking out.
A toilet that rocks will eventually break the seal again, no matter how perfect the wax ring is.
12) Reconnect water and test
Reconnect the supply line to the fill valve. Turn the shutoff valve on slowly (counterclockwise). Let the tank fill.
Now test like you mean it:
- Flush 3 to 5 times.
- Check for water around the base.
- Look underneath the tank connection and the supply line for drips.
If you had a sewer smell issue, it should improve quickly once the seal is restored.
Caulk the base?
This is one of those topics that can start an argument at a hardware store checkout line.
My practical homeowner take:
- Caulk can help keep mop water and minor splashes from getting under the base.
- Caulk can also hide leaks if you completely seal the toilet and a leak starts again.
If you caulk, I like leaving a small gap at the back of the toilet uncaulked so a future leak has a place to show itself. Use bathroom-grade caulk and keep the bead neat and minimal. Also, if you are in a place with picky inspections or specific plumbing rules, check local code or inspector preference on whether the base should be fully caulked.
Troubleshooting
“It still smells like sewage”
- Double-check you replaced the ring and that the toilet is tight and stable.
- Make sure the toilet is not rocking, even slightly.
- If the smell persists with no leak and the toilet is solid, the odor may be coming from another drain or vent issue. That is separate from a wax ring replacement.
“It leaks only when someone sits on it”
This usually screams movement. Rocking breaks seals. Shim the toilet so it sits dead solid, then ensure the bolts are snug. If it feels solid but still leaks under load, suspect a cracked bowl/base or flange or subfloor damage.
“The bolts won’t line up”
Before you lift the toilet, dry-position the bolts so they are symmetrical. Little adjustments at the flange make a big difference. Some folks use drinking straws slipped over bolts as guides. Not glamorous, but it works.
“I dropped the toilet and messed up the wax ring”
It happens. That is why I sometimes buy two rings. Pull it back up, scrape the messed-up wax, and start over with a new ring. Reusing a squished ring is asking for a repeat performance next week.
When to call for backup
A simple wax ring replacement is a great DIY win, but pause and get help if:
- The flange is broken, severely corroded, or loose.
- You see rotted subfloor around the toilet.
- The toilet drain opening is backing up and you suspect a clog. That is a different problem than a bad seal.
- You find water that clearly started above the base, like a tank-to-bowl gasket leak, tank bolts, or constant condensation.
No shame in drawing the line. The goal is a safe, solid toilet that does not leak and does not stink. Bonus points if you never have to think about wax rings again.
Final checklist
- Shutoff valve fully on, no drips at the supply line
- Toilet does not rock at all
- Bolts snug, caps replaced (optional)
- Multiple test flushes with a dry floor around the base
- No sewer odor after flushing
If you hit all five, you did it. Go wash your hands like you mean it, then enjoy the quiet confidence of a bathroom that behaves itself.