
How to Replace a Bathroom Faucet
Replace a bathroom faucet from under the sink: shut off the stops, disconnect supply lines, remove the old faucet, install the new one, and hook up the pop-up drain and linkage.
The first time I replaced a bathroom faucet in my own 1970s fixer-upper, I thought the “hard part” would be the shiny faucet on top. Nope. The hard part was under the sink, doing yoga poses around a drain trap while a rusty mounting nut laughed at my wrench.
Good news: you can absolutely do this. A bathroom faucet swap is mostly an under-sink job. You shut off the angle stops, disconnect the supply lines, remove the old faucet, drop in the new one, then reconnect the pop-up drain and linkage. Take it slow, keep a towel handy, and you will be washing your hands with a drip-free faucet before dinner.
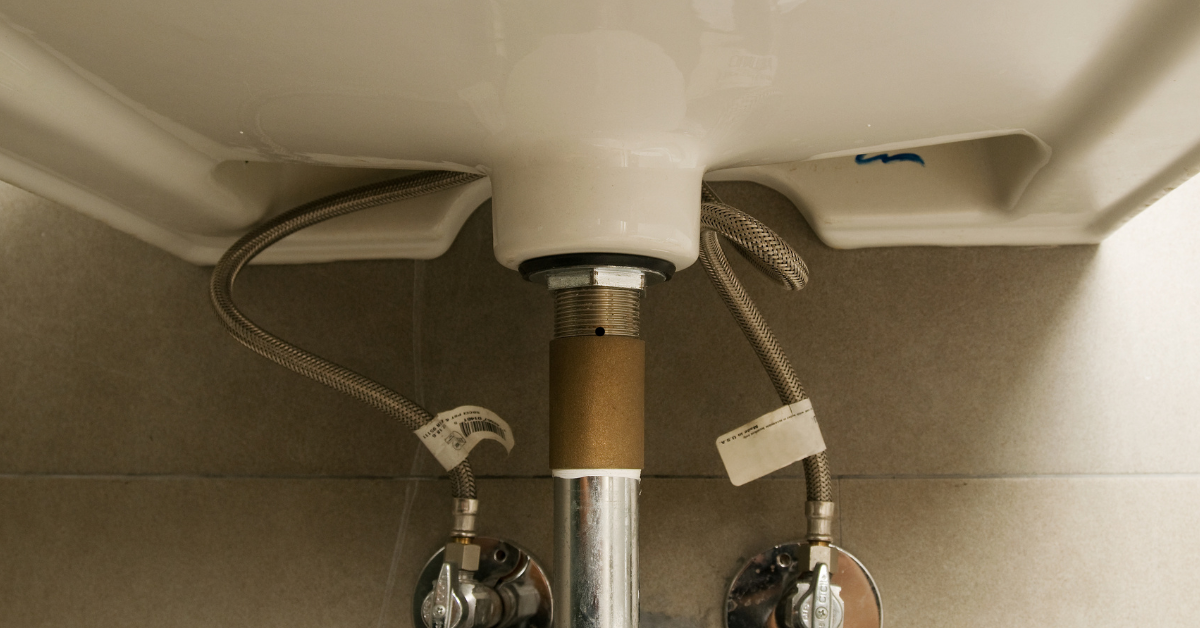
Before you start
Replace or repair?
If your faucet handle is stiff or the spout drips, sometimes you can fix it by replacing a cartridge or washers. This guide is for a full fixture swap: the faucet body comes out and a new faucet goes in, including reconnecting the pop-up drain linkage behind the faucet.
Check your sink holes
- Single-hole sink: usually a single-handle faucet. Some faucets use an optional deck plate to cover extra holes.
- Three-hole sink: can be a two-handle widespread faucet (three separate pieces), a centerset faucet (one piece that uses three holes), or a single-handle faucet with a deck plate.
Look on top of the sink before you buy anything. Under-sink work is annoying enough without a return trip.
Plan for 60 to 120 minutes
A clean install can be an hour. Add time if the old hardware is corroded, the shutoff valves do not shut off cleanly, or the old faucet was installed with a heroic amount of plumber’s putty.
Tools and supplies
Tools
- Basin wrench (highly recommended for tight faucet nuts)
- Adjustable wrench or channel-lock pliers
- Phillips and flathead screwdriver
- Utility knife or plastic putty knife
- Bucket and a few old towels
- Headlamp or work light (your future self says thanks)
- Small wire brush (helpful for crusty threads)
Supplies
- New bathroom faucet kit (confirm it includes the pop-up drain assembly if you plan to replace it)
- New supply lines if needed (many pros replace them during a faucet swap)
- Plumber’s putty or silicone (use what your faucet instructions call for)
- Painter’s tape (optional, protects finishes while you work)
Safety note: Do not mix plumber’s putty with porous stone tops unless the putty is labeled safe for stone. Some putties can stain marble or granite. When in doubt, use a thin bead of clear silicone.
Step-by-step: Replace the faucet
1) Clear the cabinet
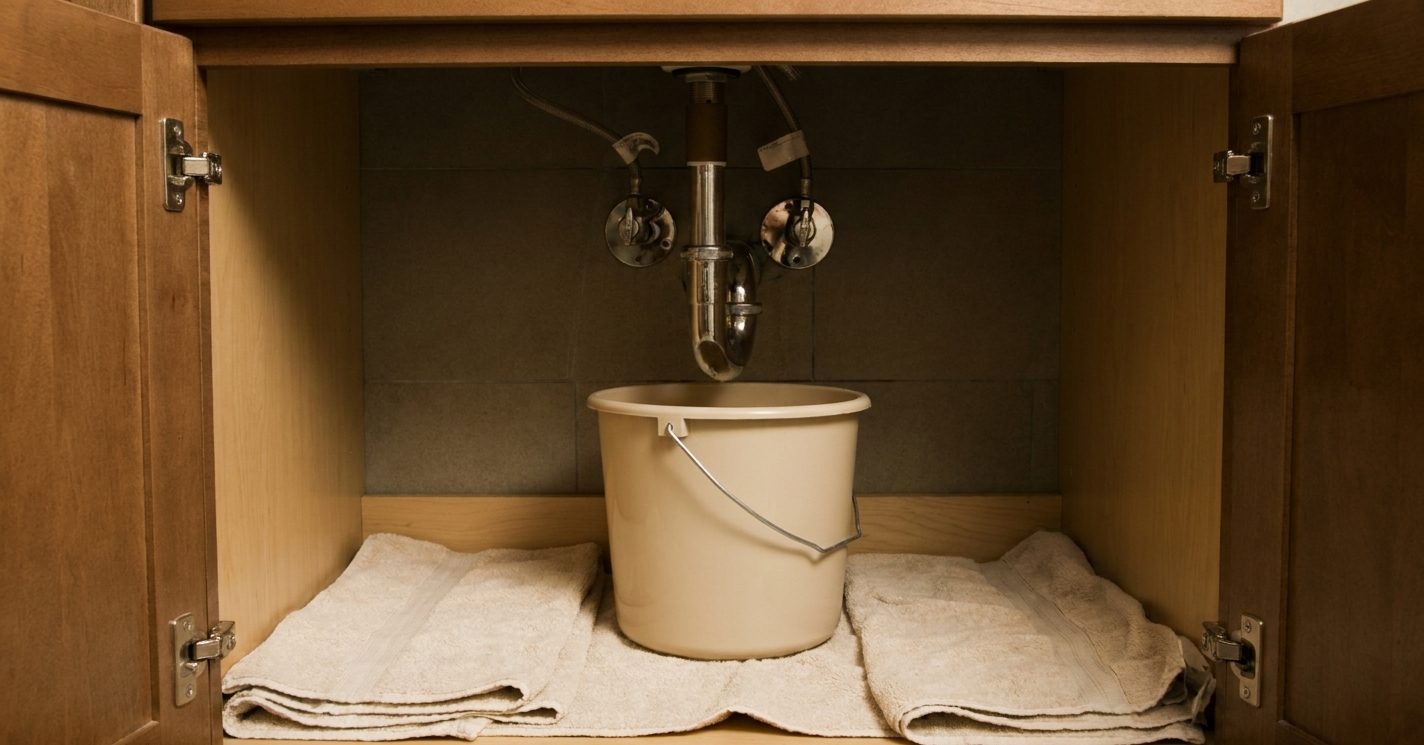
Pull everything out from under the sink. Put a towel down to catch drips and give your tools a soft landing. Set a bucket under the supply connections.
2) Shut off the water
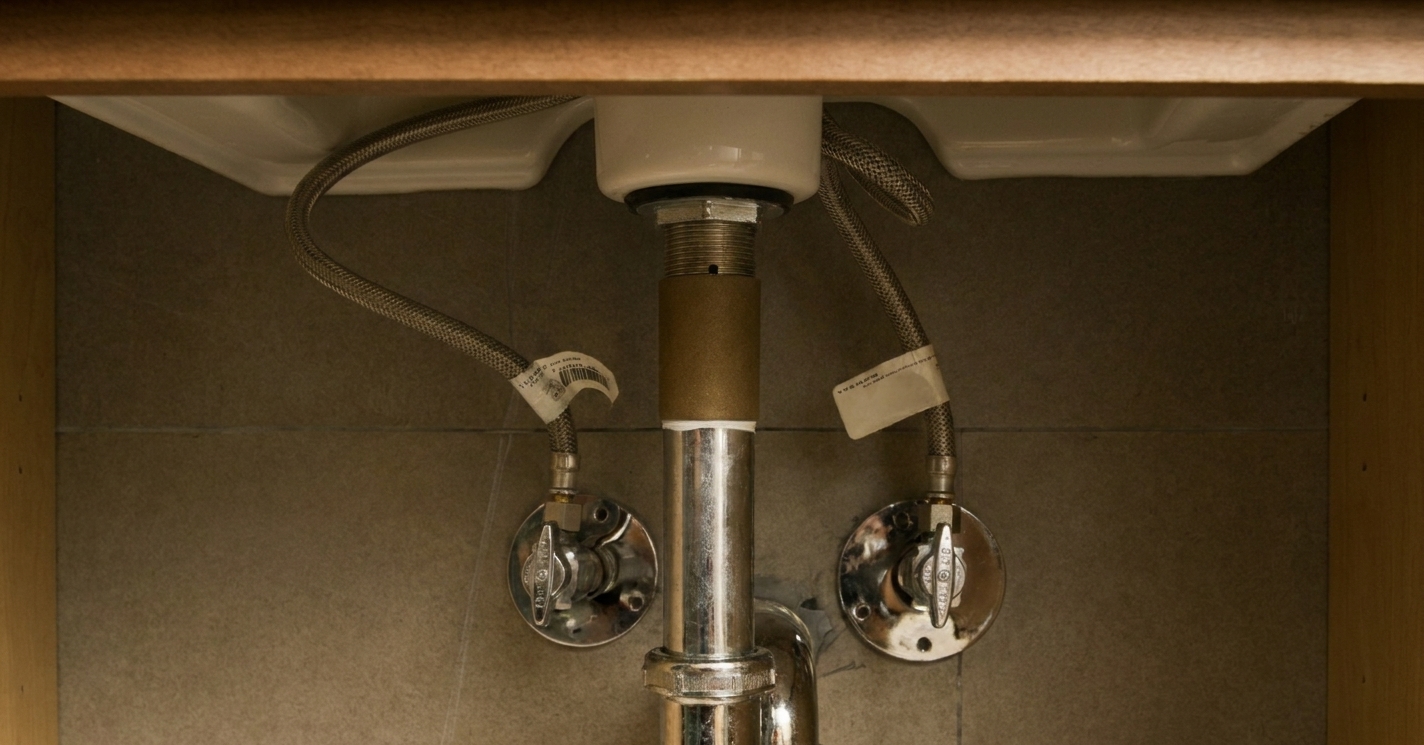
Under the sink you should see two shutoff valves, one for hot and one for cold. Turn them clockwise until they stop. Then open the faucet on top to relieve pressure and confirm the water is off.
- If the valves turn but never stop the water fully, you may need to shut off the house water and replace the stops.
- If the valves are seized, do not force them hard enough to snap the stem. A little penetrating oil and gentle back-and-forth can help.
- If you use penetrating oil, spray lightly and avoid finished cabinet surfaces. Old stops sometimes start leaking when disturbed, so keep a towel handy and use minimal force.
3) Disconnect the supply lines
Place your bucket under the connections. Use an adjustable wrench to loosen the nuts where the supply lines connect to the shutoff valves. A little water will drain out. That is normal.
If your faucet has built-in flexible hoses that connect to the stops, disconnect those instead. If it uses separate supply lines to the faucet shanks, disconnect them at the faucet as well.
- Quick sizing reality check: Many shutoff valves are 3/8 inch compression, while the faucet end might be 1/2 inch IPS (swivel nut with a rubber washer), 1/2 inch MIP, or an integrated hose. Match what you have before you start so you do not get stuck mid-project.
4) Disconnect the pop-up linkage
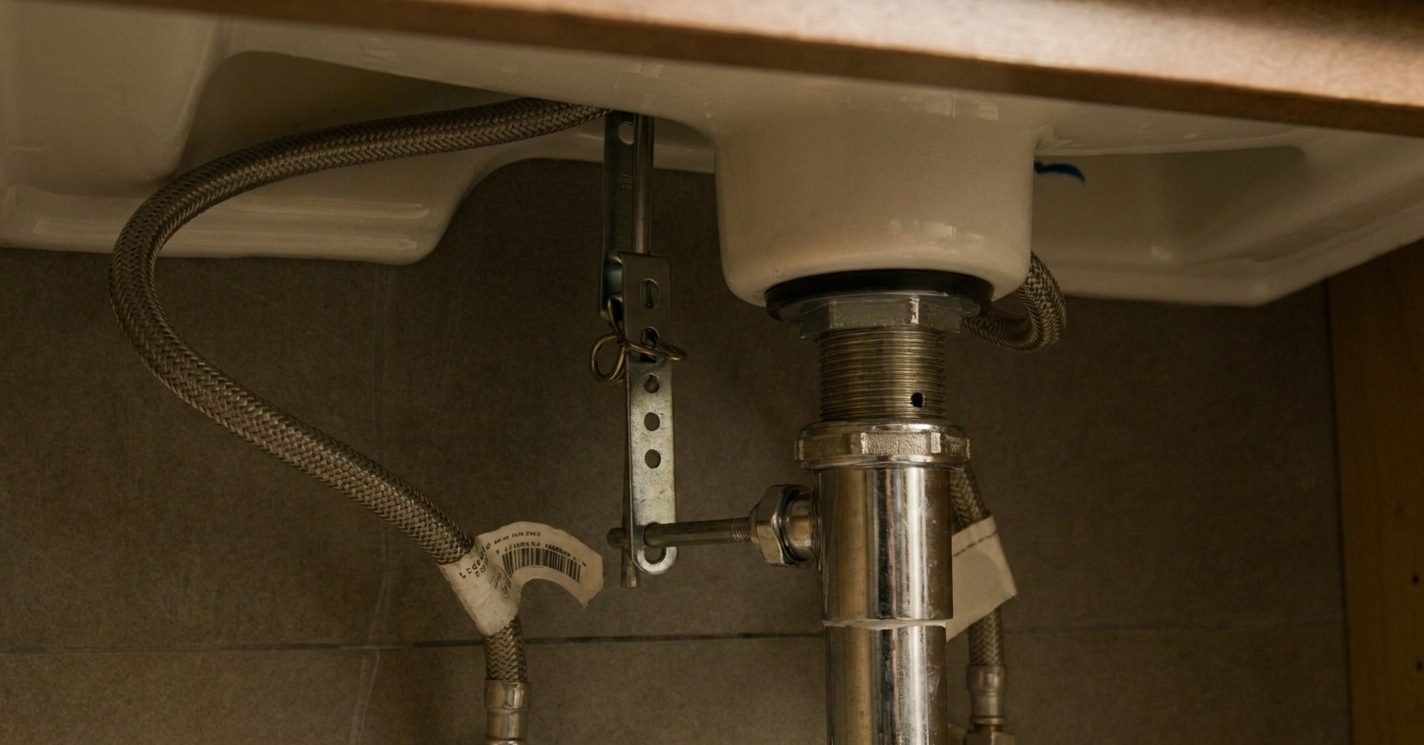
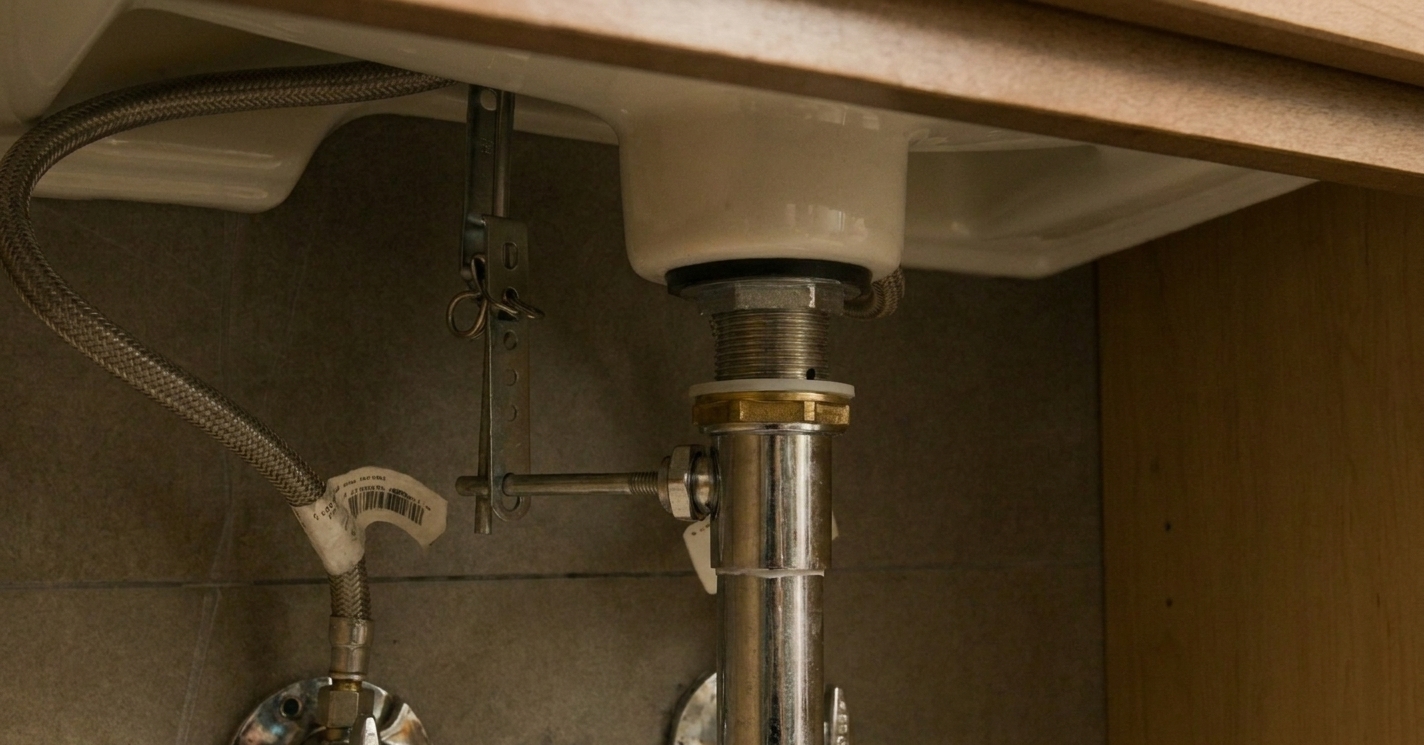
At the back of the drain assembly (on the tailpiece) you will see a thin metal (or plastic) rod system that makes the stopper open and close.
- Pull the lift rod up out of the faucet (from above) or loosen its set screw if your model uses one.
- Under the sink, unclip the spring clip that connects the horizontal pivot rod to the vertical strap.
- Unscrew the pivot rod nut on the back of the drain tailpiece and slide the pivot rod out.
Set these parts aside if you are reusing them. If your new faucet includes a new drain and stopper, you will likely replace most of this hardware.
5) Remove the old faucet
Look up under the sink at the bottom of the faucet. Most faucets are held by mounting nuts on threaded shanks, or a mounting plate with screws.
- Use a basin wrench for hard-to-reach mounting nuts.
- If the nuts are corroded, brush the threads and apply penetrating oil. Give it 5 to 10 minutes.
- As a last resort, you can carefully cut off plastic nuts, or use a multi-tool on metal hardware if there is room. Go slow so you do not nick the sink.
Once the mounting hardware is off, lift the faucet out from the top. If it feels glued down, rock it gently and slice old putty with a plastic putty knife.
6) Clean the sink deck
Scrape away old putty or silicone and wipe the surface clean. This is one of those small steps that prevents future leaks and keeps the new faucet sitting flat.
7) Install the new faucet
Dry-fit the faucet first so you understand how the gasket, deck plate (if used), and shanks line up with your sink holes.
- If your faucet uses a rubber or foam gasket, it usually goes between the faucet base and the sink.
- If it calls for putty or silicone, apply a thin, even bead under the base or deck plate. Do not overdo it. Squeeze-out is messy.
From above, set the faucet in place and keep it centered and straight. From below, install the washers and mounting nuts or bracket. Tighten evenly. Snug is the goal, not gorilla-tight.
Don’t crack the sink: Overtightening can crack a porcelain sink or distort a thin metal sink. Tighten until the faucet is stable and does not wiggle, then stop.
8) Install or reconnect the drain
Some faucets come with a matching pop-up drain. If yours does and the old drain is ugly or corroded, it is usually worth installing the new one while you are here.
One important catch: drain assemblies are not one-size-fits-all. Make sure the drain matches your sink style (overflow vs no overflow) before you commit to swapping it.
If you are installing a new pop-up drain
- From below, loosen the locknut on the drain body (this is what actually “holds” most drain flanges in place).
- Once the locknut is loose, unthread the drain body and remove the old flange from above.
- Clean the sink’s drain opening thoroughly.
- Seal the new flange as your instructions specify. A common setup is plumber’s putty under the flange on top, with a rubber gasket below the sink, then the locknut. Some brands specify silicone only, especially on certain finishes or materials.
- Drop the flange into the hole from above. From below, thread the drain body/locknut assembly on and tighten while keeping the flange aligned.
- Wipe away squeeze-out on top.
If you are reusing the existing drain
Leave the drain body in place and focus on reconnecting the linkage to the stopper mechanism.
9) Hook up the pop-up linkage
This is the part that makes people invent new words, but it is very doable.
- Insert the stopper into the drain from above (if you removed it).
- Slide the pivot rod into the back of the drain body so it catches the hole at the bottom of the stopper.
- Thread on the pivot rod nut and tighten hand-snug plus a little more. Do not crush the washer.
- Attach the pivot rod to the clevis strap using the spring clip.
- Drop the lift rod down through the faucet and connect it to the strap with the little clamp or screw, depending on the faucet.
- Test: pull the lift rod up and down. Adjust the connection point on the strap until the stopper fully seals when closed and fully opens when lifted.
10) Connect the supply lines
Connect the faucet hoses or shanks to the shutoff valves using the proper supply lines.
- Start threads by hand to avoid cross-threading.
- Tighten with a wrench until snug.
- Tape tip: Do not put plumber’s tape on compression threads or on swivel nuts that seal with a rubber washer (common on braided supply lines and many faucet hoses). Tape is for pipe-thread joints where the threads are part of the seal (NPT), like some adapters or certain valve connections.
If you are installing new braided supply lines, make sure they are the correct length. Too short puts stress on the valve. Too long makes a tangled mess but still works.
11) Turn water on and check for leaks
Close the faucet handles on top. Then slowly open the hot and cold shutoff valves under the sink.
- Check every connection with a dry paper towel: valve connections, faucet connections, and around the drain.
- Run the faucet for a full minute, then shut it off and check again.
- Fill the sink, then drain it while watching the pop-up and drain connections.
If you see a drip, tighten the connection a tiny bit and recheck. Small adjustments usually fix it.
Nice extra step: If your faucet has an aerator, remove it and run the water for 30 to 60 seconds to flush out any grit that got stirred up during the swap. Then reinstall the aerator.
Troubleshooting
Shutoff valves will not stop water
If water still flows strongly with the valves closed, the valves may be worn out. You can shut off the main water and replace the angle stops, or call a plumber if that is outside your comfort zone. If the valves mostly stop the water but you get a slow trickle, you can often work with a bucket, but expect more mess.
Mounting nuts are stuck
- Soak with penetrating oil and give it time.
- Use a basin wrench for better bite.
- Try tightening slightly first, then loosening.
- If the faucet is junk anyway, cutting hardware is sometimes the fastest path. Protect the sink and go slow.
Faucet wobbles
Usually the mounting nut is not tight enough, or the mounting bracket is not seated flat. Retighten evenly while keeping the faucet aligned from above.
Pop-up does not seal or open
Adjust where the clevis strap connects to the lift rod. One hole difference can change everything. Also confirm the pivot rod is actually hooked through the stopper’s hole, not just poking into the drain body.
Leak at the drain flange
That often means the putty or silicone did not seat well, a gasket is out of place, or the locknut is not tight enough. You may need to disassemble, clean, and reseat it. Annoying, yes. But fixable.
When to call a pro
- The shutoff valves are leaking, seized, or do not stop water and you cannot shut off the home’s main with confidence
- You see corrosion or damage on the supply pipes that makes connections unreliable
- Your sink or countertop is cracked, loose, or flexing
- You are swapping sinks or changing plumbing layout, not just the faucet
Quick FAQ
Do I need plumber’s tape?
Usually no. Most bathroom faucet supply connections seal with a compression ring (ferrule) or a rubber washer, not the threads. Plumber’s tape is for pipe-thread (NPT) joints where the threads help seal. Follow your faucet instructions.
Should I replace supply lines?
If the supply lines are old, kinked, corroded, or have plastic nuts that look tired, I replace them. They are cheap insurance against leaks.
Can I reuse the old pop-up drain?
Yes, as long as it is in good shape and matches your sink (overflow vs no overflow). If your new faucet includes a matching drain and your old one is crusty, replacing it usually looks better and saves future headaches.
How tight is “snug”?
Tight enough that it does not leak and the faucet does not move, but not so tight that you deform parts or stress the sink. If you have to put your whole shoulder into it, you have gone too far.