
How to Replace a Bathroom Sink Pop-Up Stopper
Fix a bathroom sink pop-up that won’t seal or won’t lift. Learn how the stopper, pivot rod, and clevis strap work together, then swap the parts and test for leaks.
In my house, a bathroom sink pop-up is one of those tiny parts that can wreck your whole morning routine. One day it will not hold water, the next it will not lift, and suddenly you are standing there poking it with a toothbrush like that is a long-term plan.
The good news: replacing a pop-up stopper and its linkage is a very manageable DIY fix. You do not need to replace the whole faucet, and often you do not even need to replace the entire drain body. You are just swapping the moving parts that make the stopper seal and move.
Quick note on compatibility: this guide is for a traditional pop-up drain with a lift rod behind the faucet. If you have a push-button (click-clack) drain or a grid drain, the parts and steps are different.
Know what you are replacing
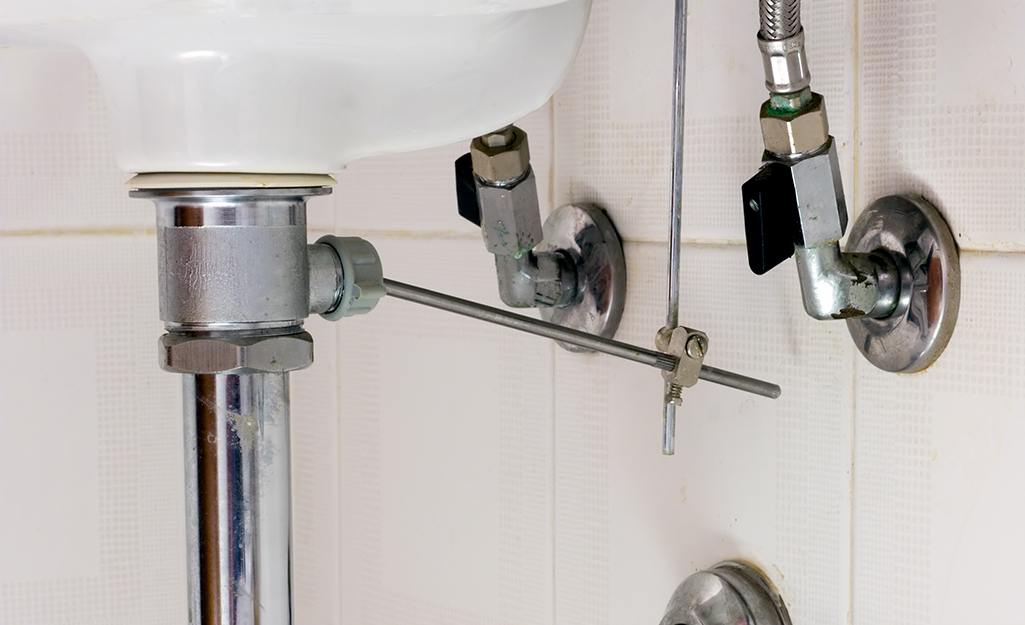
A typical bathroom sink pop-up has a few parts that work as a team:
- Stopper: The piece you see in the sink. It seals against the drain opening (sometimes with a rubber seal or gasket, sometimes just by fit).
- Pivot rod: The horizontal rod that goes into the drain pipe behind the sink. It catches the bottom of the stopper and moves it up and down.
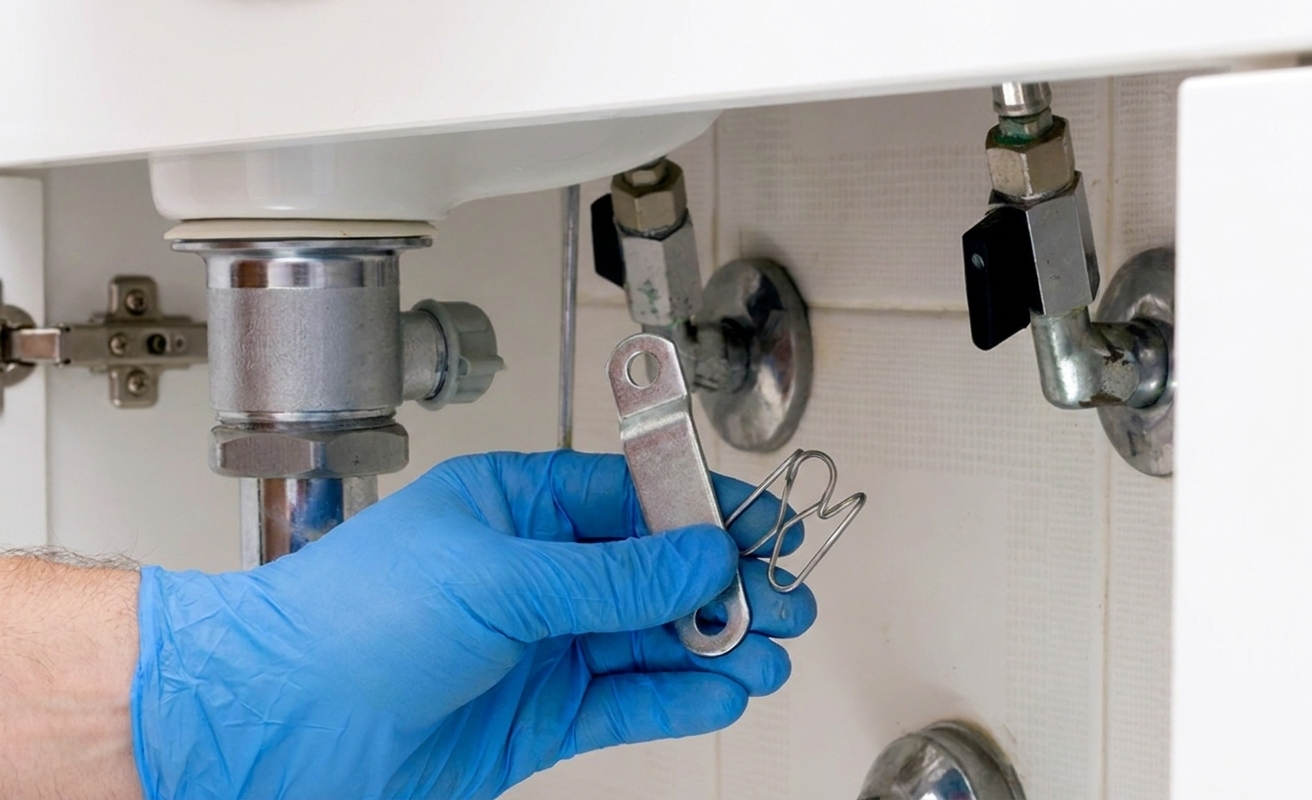
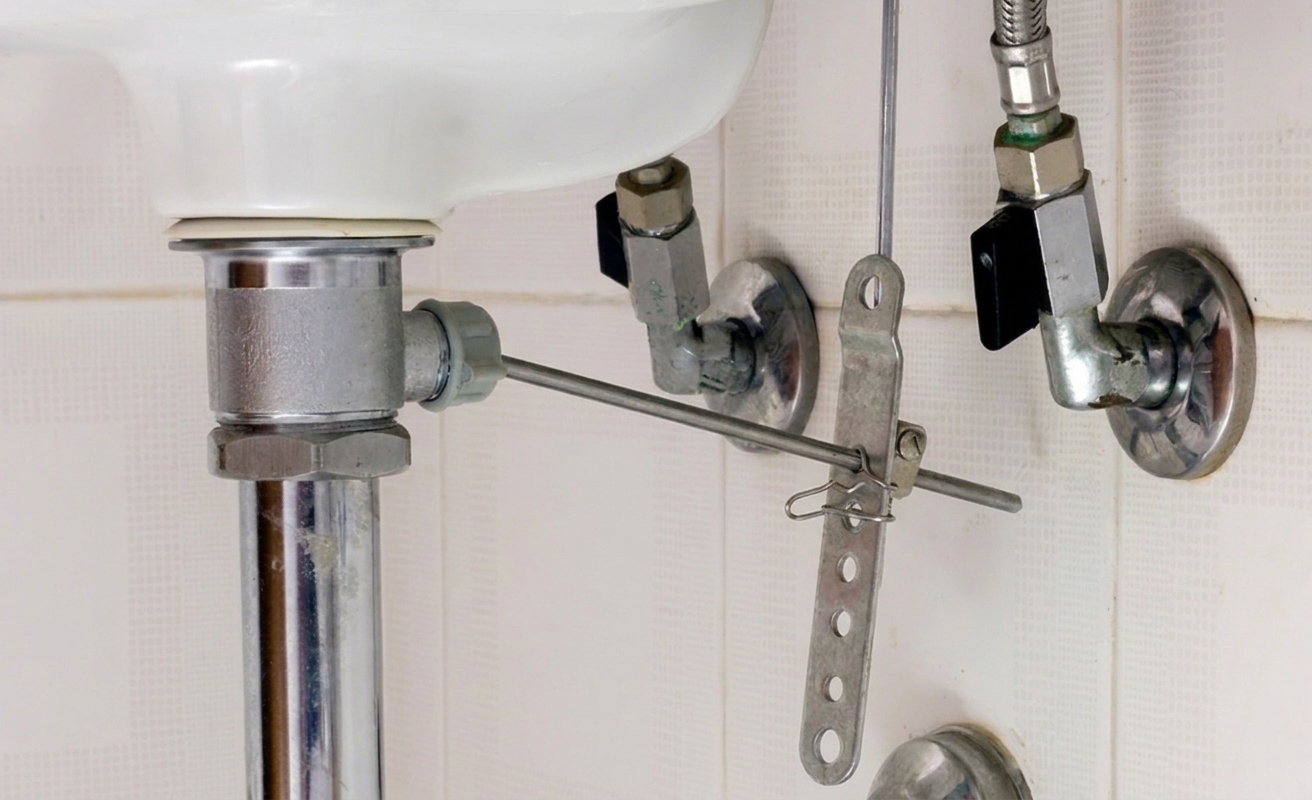
- Clevis strap (clevis bar): The flat strip with a row of holes. It connects the pivot rod to the lift rod.
- Clevis clip (spring clip): The little clip that holds the pivot rod in one of the clevis strap holes.
- Lift rod: The vertical rod behind the faucet that you pull up and push down.
If your stopper will not seal, the stopper itself is often worn, pitted, crusted up, or just not pulling down squarely. If it will not lift, the pivot rod connection or clevis clip position is usually the culprit. Either way, it is the same basic under-sink repair.
Quick diagnosis
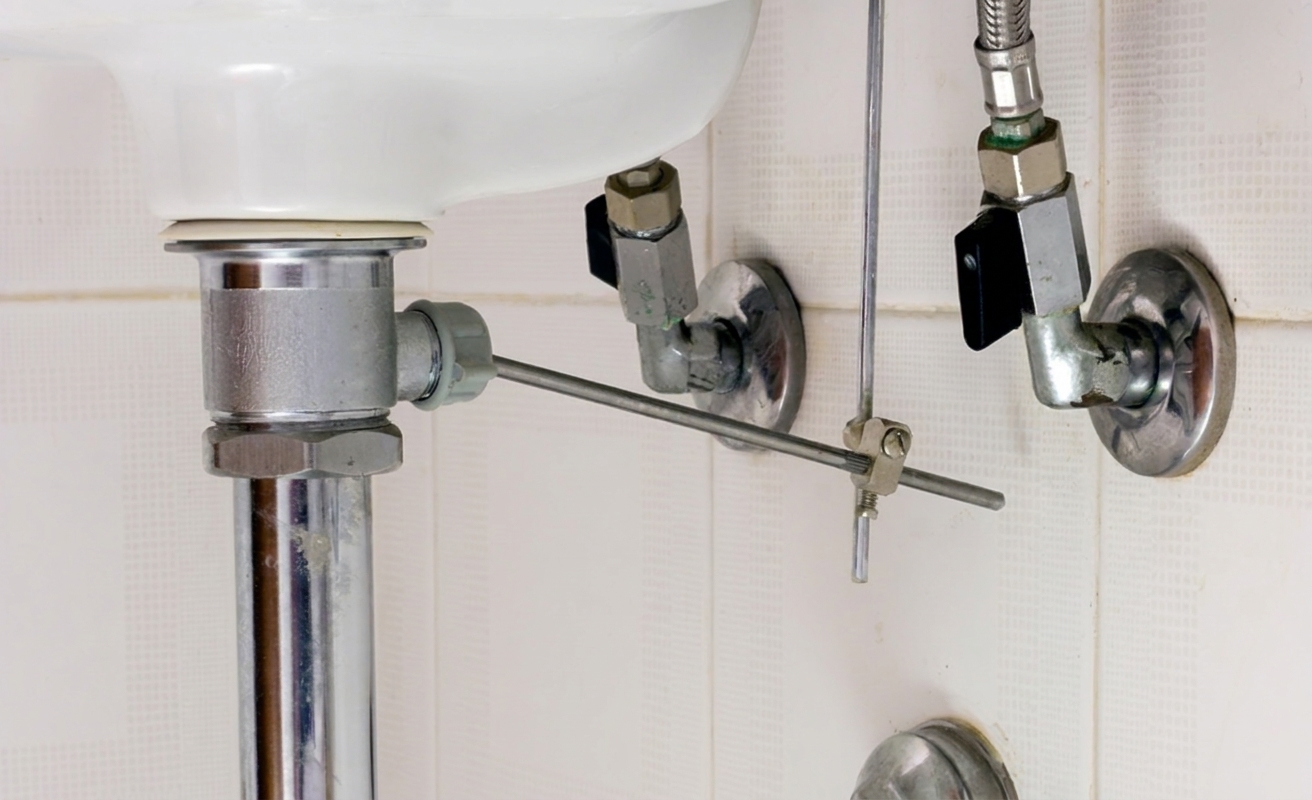
If it will not hold water
- The underside seal is worn or crusted up (if your stopper has a rubber seal or gasket).
- The stopper is not sitting squarely in the drain opening.
- The pivot rod is not catching the stopper correctly, so it cannot pull the stopper down tight.
If it will not lift (or barely lifts)
- The clevis clip popped off, or the pivot rod slipped out of the strap hole.
- The pivot rod nut is too tight, binding movement.
- The pivot rod ball is worn, or the rod is bent.
Before you buy parts, look under the sink and move the lift rod up and down. If the clevis strap moves but the stopper does not, the pivot rod is not engaging the stopper. If nothing moves, you likely have a disconnected clip or a missing link piece.
Tools and parts
Tools
- Small bucket or pan (you will catch drips)
- Adjustable wrench or channel-lock pliers
- Flashlight or headlamp
- Old toothbrush or rag (for gunk)
- Optional: needle-nose pliers (for stubborn clips)
Parts
- Replacement pop-up stopper that matches your drain style
- Optional: pivot rod kit (rod, ball, nut, and sometimes washers)
- Optional: clevis strap and clevis clip (these are cheap and worth replacing if yours are corroded)
Tip from a former carpenter who has worked in too many cramped vanities: bring the old stopper or pivot rod with you to the store. “Universal” is a hopeful word in plumbing.
Safety and prep
- Clear the cabinet so you can actually get your shoulders under there.
- Put a towel down and set a small bucket under the drain.
- Do not overtighten plastic nuts if your drain has plastic parts. Snug is good. Hulk-tight is how cracks happen.
- Do not lose tiny parts: I like to set a towel in the bottom of the cabinet and keep a small cup or magnetic tray nearby for the clip and nut.
Safety reminder: Under-sink work is awkward. Take a minute to set a light, get stable footing, and protect your eyes if you are scraping off old mineral buildup.
Replace the stopper and linkage
1) Disconnect the lift rod
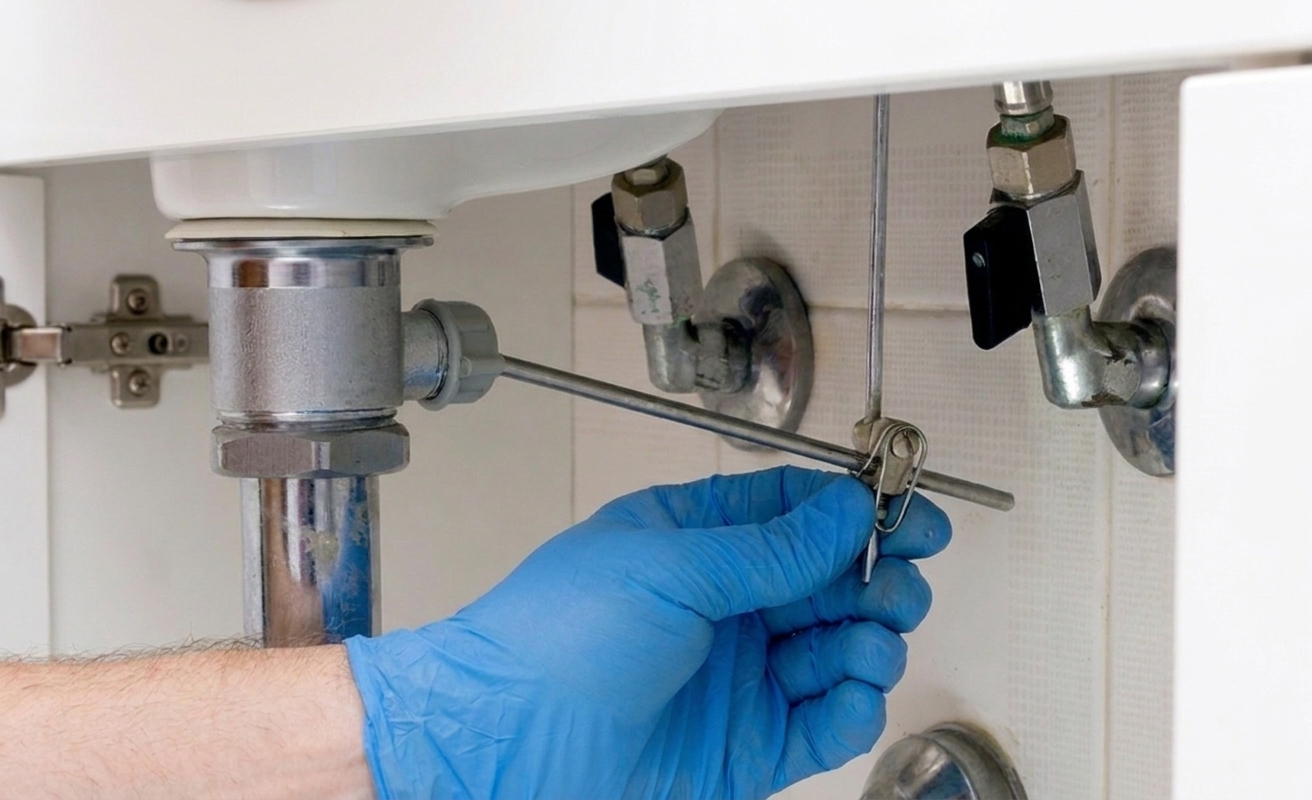
Under the sink, find the clevis strap hanging down behind the drain pipe. You will see the pivot rod passing through one of the strap holes and held in place by a spring clip.
- Squeeze the clevis clip and slide it off the pivot rod.
- Pull the pivot rod end out of the clevis strap hole.
The lift rod can stay in place. You are just freeing the pivot rod so you can remove it from the drain.
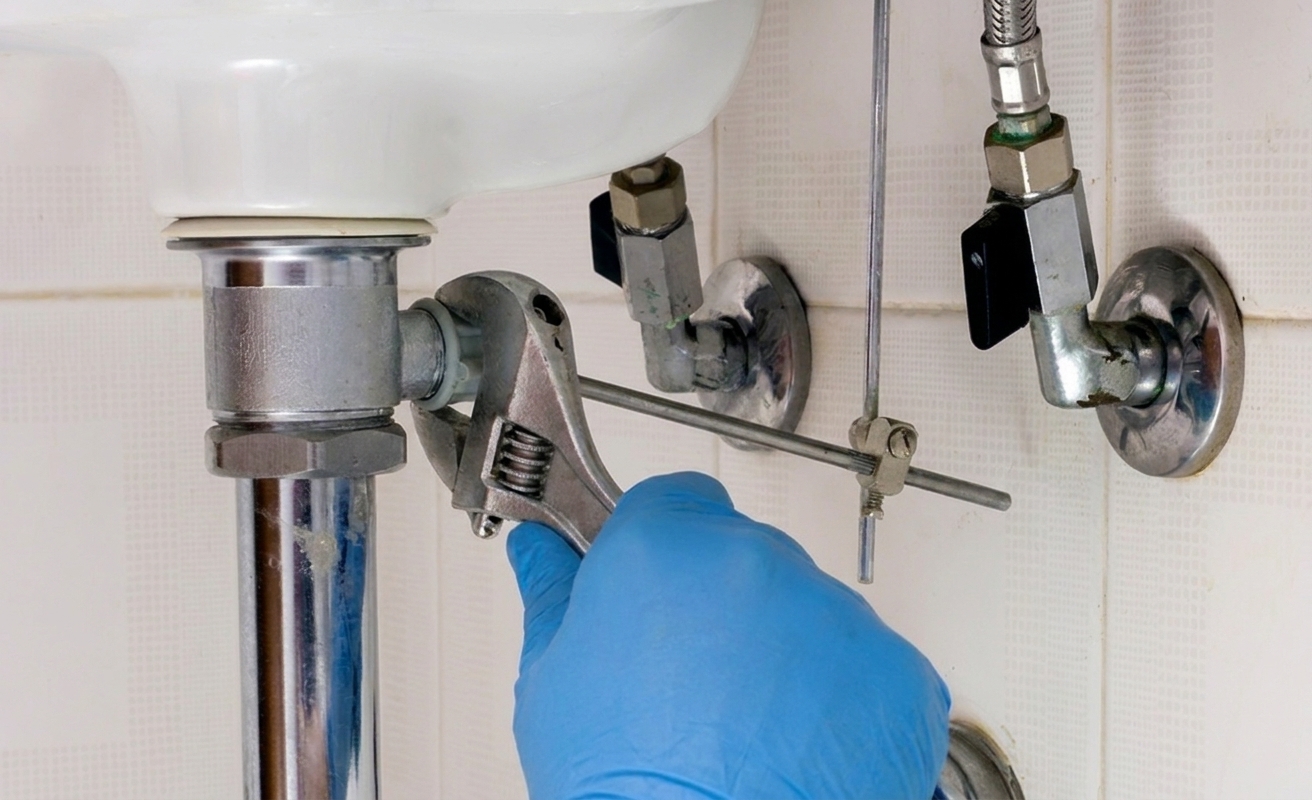
2) Remove the pivot rod
Follow the pivot rod to where it enters the drain pipe. There will be a retaining nut holding the pivot ball in place.
- Put your bucket directly underneath.
- Loosen the pivot rod nut by hand if you can. If it is stuck, use an adjustable wrench and go gently.
- Pull the pivot rod straight out.
A little water may drip out. That is normal.
3) Pull the old stopper
Back at the sink, lift the stopper straight up and out of the drain opening.
If it fights you, wiggle while pulling. Sometimes the pivot rod was holding it in a weird position, and it just needs a little persuasion.
4) Install the new stopper
Drop the new stopper into the drain opening. Most stoppers have a slot, hole, or eye on the lower stem where the pivot rod will catch.
Rotate the stopper so that slot or hole roughly faces toward the back of the sink, toward the pivot-rod opening in the drain.
5) Reinstall the pivot rod
- Slide the pivot rod back into the drain opening.
- As you push it in, you should feel the rod tip catch the stopper stem.
- Thread the retaining nut back on and snug it up.
Important: the pivot rod nut needs to be tight enough not to leak, but loose enough that the rod pivots smoothly. If the stopper moves stiffly, back the nut off a touch.
6) Reconnect the clevis strap
This is where you fine-tune how high the stopper lifts and how well it seals.
- With the lift rod in the down position, hold the stopper seated in the drain.
- Choose a hole on the clevis strap that lines up with the pivot rod end.
- Push the pivot rod through that hole.
- Slide the clevis clip back on to lock it in place.
If your stopper does not go down far enough to seal, move the clip to a different hole so the geometry pulls the stopper lower when the lift rod is down. Small changes matter here. One hole can make the difference between “kind of works” and “works like new.”
Test it
1) Seal test
- Push the lift rod down to close the stopper.
- Fill the sink several inches with water.
- Wait 2 to 3 minutes.
If the water level drops, first try a small adjustment to the clevis strap hole so the stopper pulls down tighter. Also check that the stopper is centered and sitting flat.
2) Leak test under the sink
- While the sink is holding water, look under the vanity with a flashlight.
- Check the pivot rod nut area for slow drips.
- Pull the lift rod up and let the sink drain, then check again while water is flowing.
If you see a drip at the pivot rod nut, snug it slightly. If it still drips, the pivot ball washers may be mis-seated, cracked, or worn. Many pivot rod kits include new washers for exactly this reason.
Stop and reassess if you see steady leaking If water is running down the outside of the drain body or pooling fast, do not keep tightening blindly. Overtightening can crack plastic parts or distort washers. Take it apart, inspect the washers, and reassemble carefully.
Common problems
The stopper spins or sits crooked
- Rotate the stopper so the pivot rod properly engages the slot, hole, or eye.
- Make sure the pivot rod is actually going through the stopper stem opening, not pushing against the side of it.
The stopper will not go fully down
- Move the clevis clip to a different hole on the clevis strap.
- Confirm the lift rod is traveling freely and not hitting the faucet body or a supply line under the sink.
The stopper closes, but it leaks slowly
- Clean mineral buildup on the drain opening where the stopper seals.
- Try a new stopper if the underside seal surface is hard, nicked, uneven, or just no longer mating cleanly to the drain.
The pivot rod leaks after reassembly
- Slightly tighten the retaining nut.
- If it still leaks, replace the pivot rod ball washers (often easiest by swapping the whole pivot rod kit).
When this is not the fix
This guide sticks to replacing the stopper and linkage. It is time to move to a bigger repair if:
- The drain body is corroded through, cracked, or visibly damaged.
- The threads where the pivot rod nut tightens are stripped.
- You see cracking around the pivot-rod opening.
- You cannot stop a leak even with new pivot ball washers and careful reassembly.
In those cases, you are looking at a full drain-body replacement. That is a different job than a stopper swap.
FAQ
Do I need plumber’s putty for this?
Not for a simple stopper and pivot rod replacement. Plumber’s putty is typically used when installing or reinstalling the drain flange at the sink. Here, you are working with the moving parts, not reseating the flange.
Is a “universal” pop-up stopper actually universal?
Sometimes. The safest bet is matching what you have: bring the old stopper and, if possible, the pivot rod to the store. There are subtle differences in stem length and how the pivot rod engages the stopper.
Why does my stopper only lift a little?
Most often, the clevis clip is in the wrong hole on the clevis strap. Reposition it so the lift rod gets more travel. Also check that the pivot rod nut is not overtightened and binding movement.
Does this apply to click-clack drains?
No. A click-clack drain is spring-loaded and does not use a lift rod, pivot rod, clevis strap, or clip. The fix is usually replacing the push-button cartridge or the whole drain assembly.
How long should this take?
If everything comes apart normally, plan on 20 to 40 minutes including adjustments and testing. The first time under a tight vanity might take a little longer, and that is completely normal.