
How to Replace a Leaky Bathroom Sink Drain
Stop leaks at the sink flange, tailpiece, or slip joints by replacing the bathroom sink drain assembly. Step-by-step tips for putty, locknut tightening, and trap hookup.
I have built plenty of bathrooms where everything was brand new, perfectly plumb, and still managed to develop a slow drip at the sink drain. It is almost always the same story: the flange seal fails, a slip joint gets bumped, or the drain body corrodes just enough to never quite tighten up again. The good news is you can replace a bathroom sink drain in an hour or two with basic tools and a little patience. No heroics required.
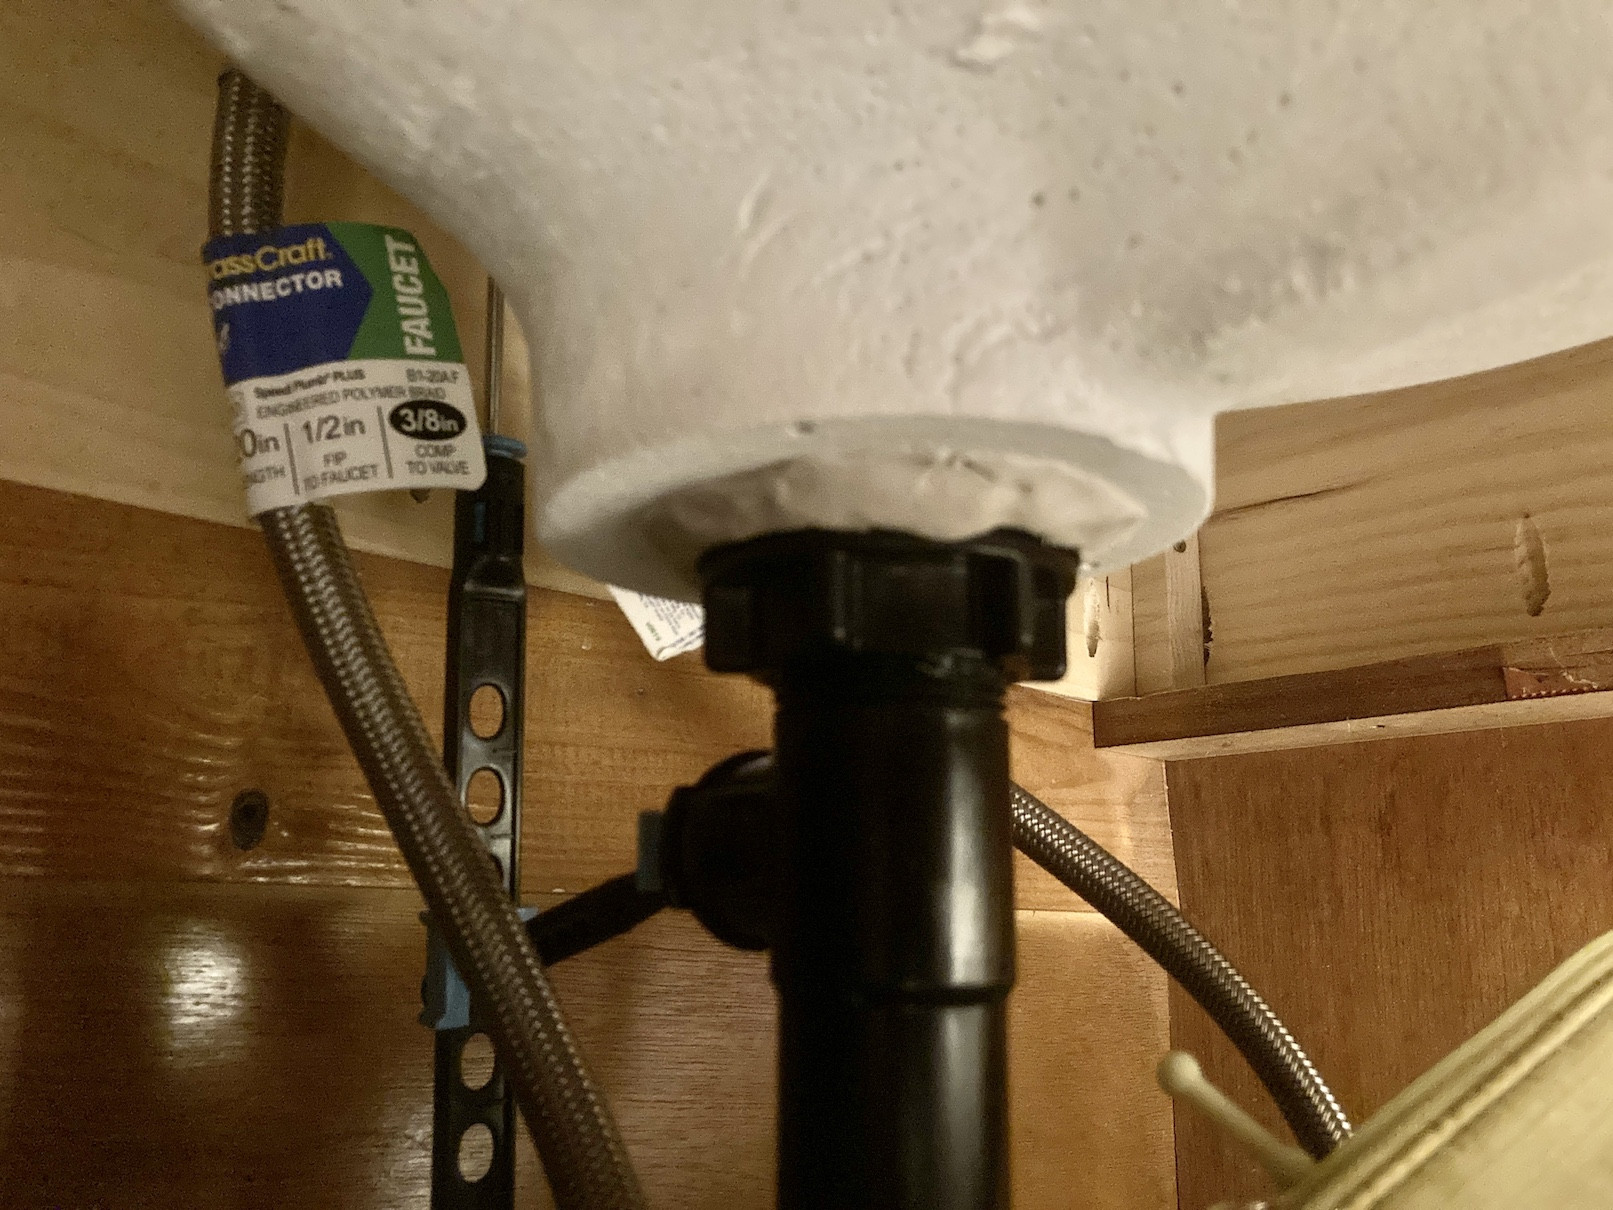
This guide focuses on replacing the drain body and sealing it correctly. If your issue is a slow drain from gunk or hair, that is a different project. A leaky drain is a parts swap, not a clog-clearing job.
Quick diagnosis: where is it leaking?
Before you buy parts, run water for 30 to 60 seconds and watch with a dry paper towel in your hand. Wipe each joint and see where it turns wet first.
- Dripping from the top of the drain flange (water appears around the drain opening and then shows up below): the seal under the flange has failed, or the locknut loosened. On some sinks, water can also sneak out through the overflow path if the overflow gasket is bad or the sink has a crack near the drain.
- Dripping from the large nut directly under the sink (the locknut area): failed gasket, cracked drain body, or the nut is cross-threaded or bottomed out.
- Dripping at the tailpiece nut or trap joints (smaller slip nuts): usually a misaligned connection, worn slip washer, or over-tightening that deformed the washer.
If the drain body is pitted, cracked, or has green crusty corrosion, replacement is the right call. If everything looks fine but the flange seal is suspect, you can sometimes re-seat it. In real life, though, once I am under a sink with tools out, I prefer replacing the whole drain assembly so it is done.
Tools and materials
Tools
- Channel-lock pliers or a large adjustable wrench
- Small adjustable wrench (helpful for tight vanity spaces)
- Flathead screwdriver (for some stopper linkages)
- Utility knife or plastic putty knife (for scraping old putty)
- Bucket and a few rags
- Flashlight or headlamp
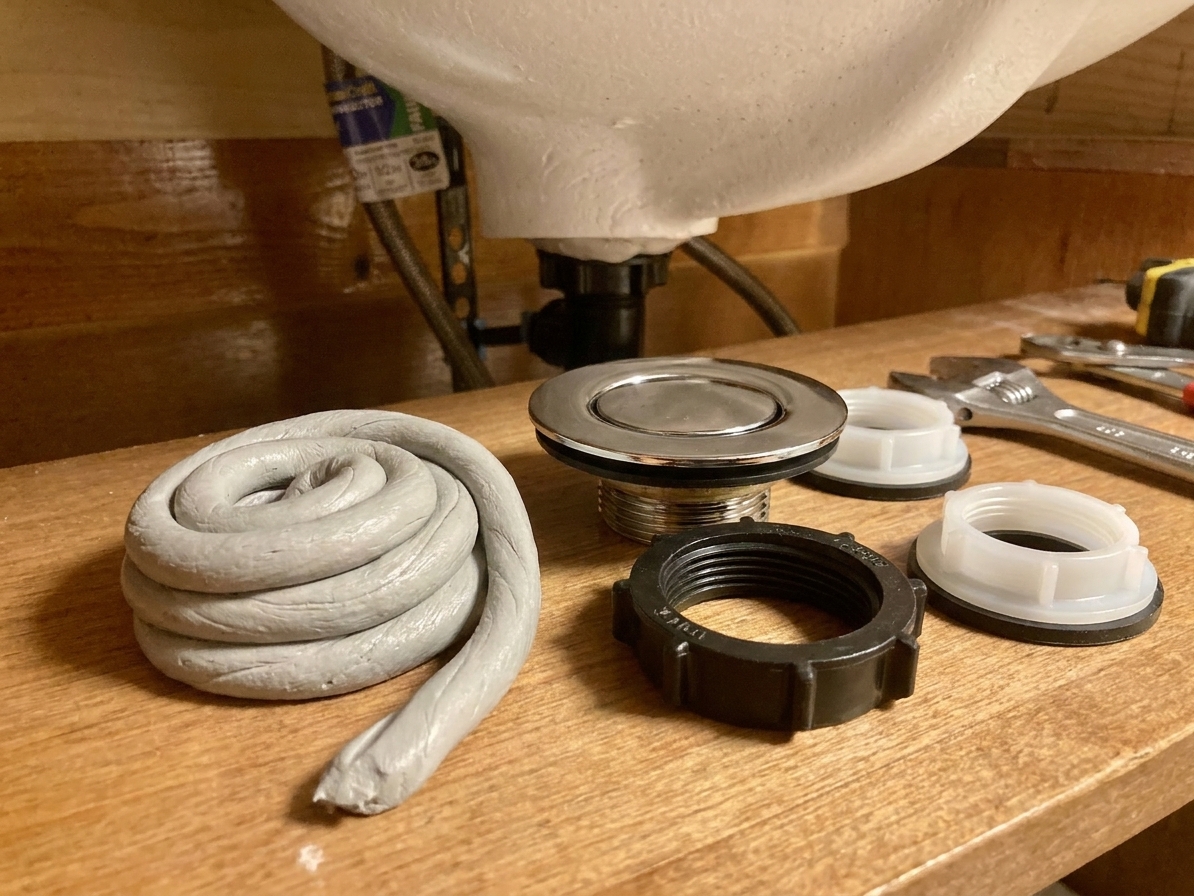
Materials
- New bathroom sink drain assembly (match finish and style)
- Plumber's putty or 100% silicone sealant (choose based on sink material, more on that below)
- New P-trap or slip-joint washers if yours are old or distorted (optional but often worth it)
- Teflon tape is generally not needed for slip joints, but can help on some threaded metal-to-metal connections depending on the drain design
Choosing a drain size: Many bathroom sink tailpieces are 1-1/4 inch, but you will also see 1-1/2 inch traps and wall stub-outs in plenty of homes. Reducer washers and trap adapters are normal. Take a picture and bring the old parts to the store if you are unsure.
Overflow or no overflow: If your sink has an overflow opening near the top of the bowl, buy a drain labeled with overflow (it has side holes). If your sink has no overflow, use a no overflow drain. This is one of the easiest ways to buy the wrong part.
Putty or silicone? Simple rule
Under the drain flange, you need a flexible seal.
- Plumber's putty is the classic choice for porcelain and many metal sinks. It stays workable and seals well.
- Silicone is safer for porous stone (marble, granite, cultured marble) and some composite sinks where putty can stain or react. When in doubt, check the sink manufacturer guidance.
Putty usually seals right away, while silicone may need cure time. Either way, follow the drain manufacturer instructions if they call for one specific sealant.
Step-by-step: replace the drain
1) Clear the cabinet
Pull everything out from under the sink. Lay an old towel in the cabinet bottom and place a bucket under the trap. Even if you are careful, there is always water waiting in the P-trap.
2) Shut off the water (optional)
You do not have to shut off the water to replace a drain, but I usually do. It prevents accidental faucet bumps while your hands are under there. Turn both stops clockwise until snug.
3) Disconnect the pop-up (if any)
Many bathroom sinks have a pop-up stopper operated by a lift rod behind the faucet.
- Find the pivot rod entering the back of the drain body (a small rod with a retaining nut).
- Unscrew the retaining nut by hand or with pliers. Pull the rod straight out.
- From above, lift the stopper out of the drain.
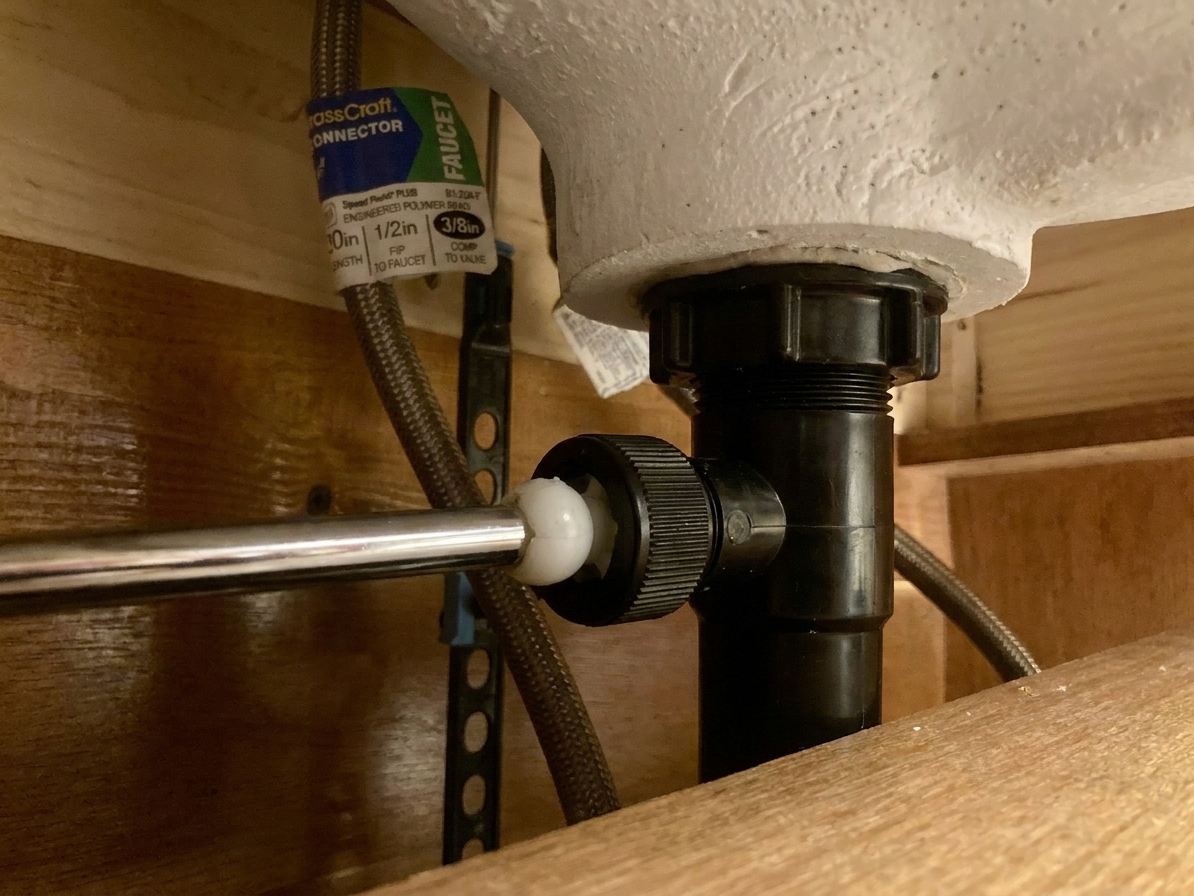
If you have a push-button stopper (click-clack style), there is usually no linkage underneath. You can typically unscrew the stopper from above later, depending on the model.
4) Remove the P-trap
Loosen the slip nuts by hand first. If they are stuck, use channel-locks gently. Support the trap as you remove the last few threads and tip it into the bucket.
- If the trap is plastic, be extra gentle. Old plastic gets brittle.
- Note the direction of the slip washers (the tapered side typically faces the joint it is sealing).
Quick trap reality check: If the trap is corroded, cracked, or keeps seeping even with fresh washers and proper alignment, replace it. A new trap is cheap compared to cabinet damage.
5) Remove the old drain
Look up at the underside of the sink. You will usually see, in order:
- A large locknut
- A rubber gasket and sometimes a fiber or plastic friction ring
- The bottom of the drain body
Hold the drain flange from above if it wants to spin. From below, loosen the locknut with pliers or a wrench. Once it is off, slide the gaskets down and push the drain body upward through the sink hole, then lift it out from above.
6) Clean the sink opening
This is the unglamorous step that prevents repeat leaks.
- Scrape away old putty or silicone from the top surface around the drain hole.
- Wipe with a rag so the surface is clean and dry.
Any leftover lumps can create a channel for water. I have seen brand-new drains leak because someone skipped this step and tightened the nut against a crusty ring of old putty.
7) Set the new flange
From above the sink:
- Roll plumber's putty into a rope about the thickness of a pencil.
- Wrap it under the flange lip, making a complete ring.
- Press the flange into the sink hole and center it.
If using silicone instead, apply a consistent bead under the flange lip, then press the flange into place.
8) Tighten the locknut
From below the sink, slide the gasket(s) up in the correct order per the drain instructions. Thread on the locknut by hand first to avoid cross-threading.
Then tighten:
- Snug the locknut while keeping the flange centered and level.
- Tighten another small amount with pliers or a wrench.
Important: Do not go full gorilla here. Over-tightening can warp a plastic drain, squeeze out all the putty, or even crack a porcelain sink. You want firm and secure, not punished.
Wipe away the putty squeeze-out from the top with your finger and a rag. If you used silicone, clean squeeze-out using the solvent recommended by the silicone manufacturer (often denatured alcohol for uncured silicone). Test in an inconspicuous spot first, especially on plastic finishes, painted surfaces, or stone.
Finish tip: If you are using pliers on visible chrome or brass parts, put a rag between the jaws and the metal so you do not chew up the finish.
9) Reinstall the stopper (if applicable)
Drop the stopper in from above. Insert the pivot rod from behind so it catches the hole in the stopper. Tighten the retaining nut hand-tight plus a small tweak. Reconnect the clevis strap and lift rod if you had to disconnect them.
Test the stopper up and down before you put the trap back. It is much easier now than later.
10) Reconnect the tailpiece and trap
Most new drains come with a tailpiece, or your drain body itself may extend down as the tailpiece. Dry-fit everything first so you are not fighting alignment.
- Slide the slip nut onto the pipe.
- Slide the tapered washer on next (taper usually points toward the fitting it is sealing).
- Push pipes together fully, then thread the slip nut on by hand.
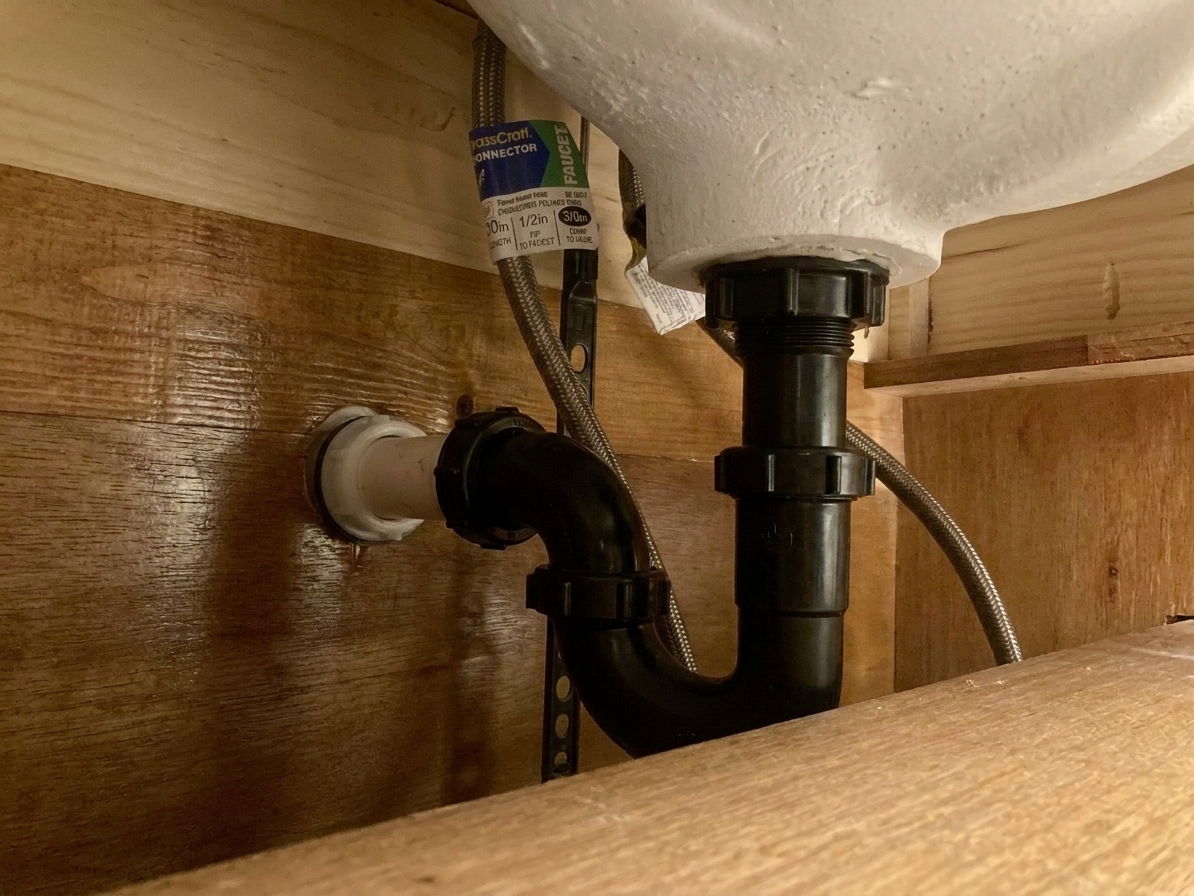
How tight? Hand-tight is often enough, then give it about a quarter turn more with pliers if it seeps. Over-tightening can distort the washer and cause leaks that never stop.
Leak test order
- Run water with the stopper open for 1 to 2 minutes. Check all slip joints and the locknut area.
- Fill the sink halfway with the stopper closed. Watch the flange area inside the bowl.
- Release the stopper and let the sink drain fast. This is when weak slip joints show themselves.
Use a dry paper towel to touch each joint. A towel finds moisture faster than your eyes do.
Common repeat leaks
- Not cleaning old putty or silicone fully. New sealant cannot do its job on a bumpy, greasy surface.
- Cross-threading the locknut. If it does not spin on smoothly by hand, back it off and start again.
- Mixing up washer direction. A reversed tapered washer is a classic slow drip.
- Over-tightening slip nuts. This can deform the washer and create a permanent leak path.
- Misaligned trap. If you have to force pipes into position, they will try to spring back and leak.
FAQ
Why does my drain leak only when the sink is full?
That usually points to the flange seal under the drain lip or the stopper area if you have a pop-up. If your sink has an overflow, a bad overflow seal can also show up only when the water level gets high.
Can I reuse the old rubber gasket and washers?
You can, but I rarely do if they are flattened, cracked, or stiff. New washers are cheap insurance, and they eliminate a lot of mystery drips.
Do I need pipe dope or Teflon tape?
Slip joints seal with washers, not tape. On most lavatory drains, you do not need tape at all. If your drain has a threaded metal-to-metal section (less common), follow the drain manufacturer directions.
What if my wall pipe does not line up with the new drain?
Minor misalignment is normal and is why traps are slip-joint. If it is off by a lot, you may need a different tailpiece length, a trap extension, or a new trap with the right configuration. Avoid bending rigid metal parts into place. That is leak city.
When should I call a plumber?
If the leak is actually coming from inside the wall, if the shutoff valves do not work and you need to disconnect water lines, or if you find rotted cabinet flooring and suspect long-term damage, it is time to bring in help.
My final tip
After you think you are done, leave a dry paper towel under the trap and locknut area and check it again in an hour. Slow drips love to wait until you have put everything back in the vanity and moved on with your life. Catching it early is the difference between a quick tweak and a soggy cabinet floor.