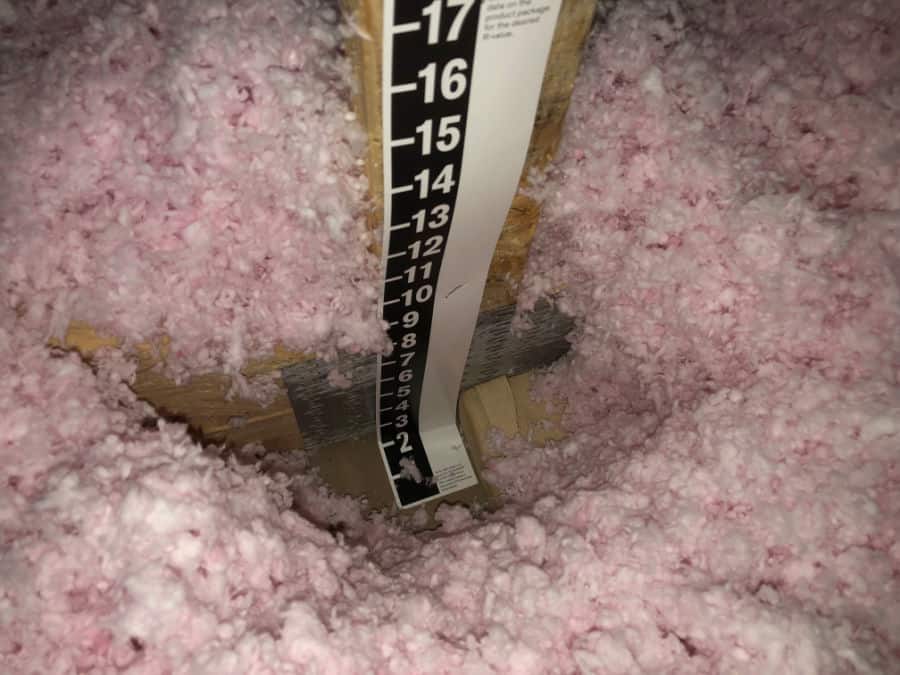
R-value targets by climate zone, plus an easy way to estimate the R-value of the insulation already on your attic floor using depth in inches.
The Homeroom Fix
October 25, 2026
•
By Marcus Delgado
How to Install Attic Insulation Baffles
Learn how to install attic insulation baffles (rafter vents) at the eaves so soffit intake stays open. Includes chute placement, fastening tips, and what happens if insulation buries them.
The first time I crawled into the attic of my 1970s Michigan fixer-upper, I found the classic “mystery draft” combo: skimpy insulation and a whole bunch of soffit vents that were basically suffocated by fiberglass. The fix is not glamorous, but it is one of the best bang-for-your-buck attic upgrades you can do: install insulation baffles, also called rafter vents or ventilation chutes.
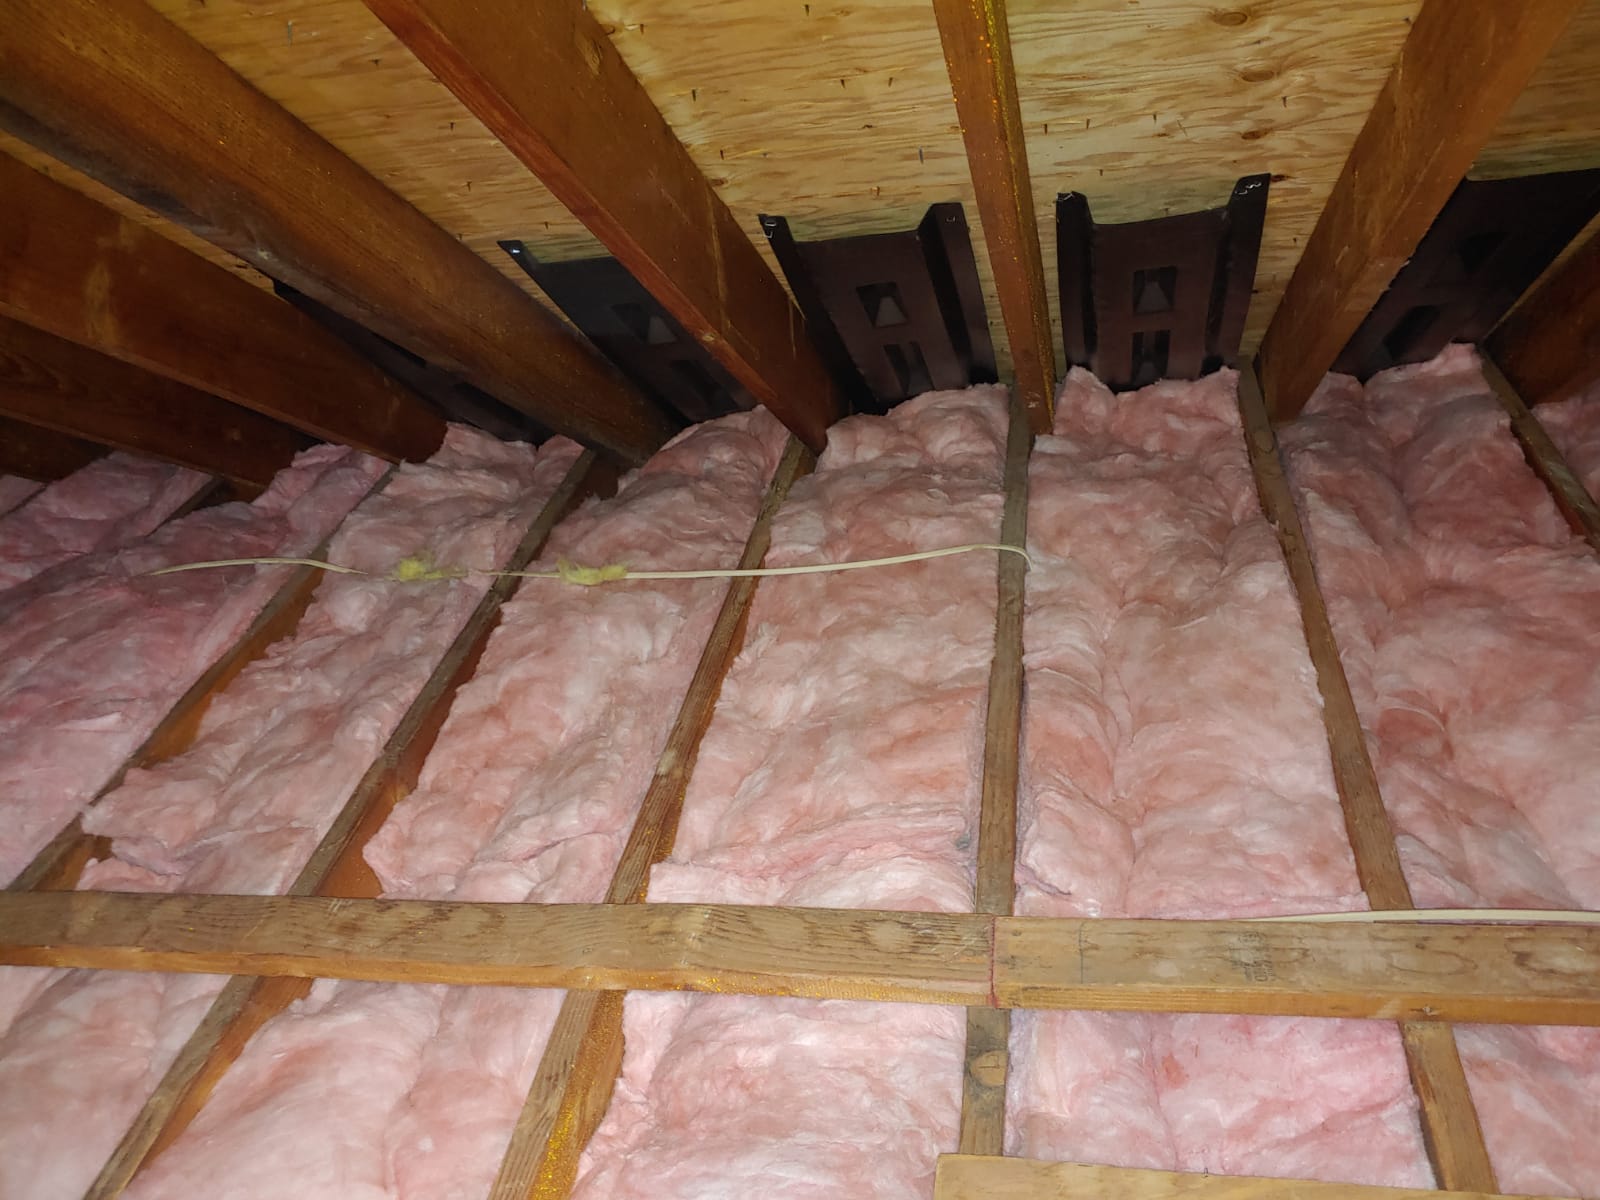
Baffles create a clear air pathway from the soffit intake up into the attic, even after you pile on more insulation. This stays focused on the eaves where the baffles live, not at the attic hatch.
What attic baffles do (and why they matter)
Your attic ventilation system works like your lungs: intake in, exhaust out. Most homes with vented attics pull fresh air in through soffit vents at the eaves and let warm, damp air escape through ridge vents or roof vents higher up.
When insulation slides into the eaves and blocks the soffit intake, you can end up with:
- Higher energy bills because attic temps swing harder
- Moisture problems like damp sheathing, musty smells, and eventually mold risk
- Ice dams in cold climates when a too-warm upper roof melts snow and the water refreezes at the colder eaves
Baffles are simple channels that keep that intake airway open so air can move from the soffit up past the insulation. Most create roughly a 1 to 2 inch air space. The goal is to keep that channel open, straight, and uncrushed.
Before you start: confirm soffit intake
Quick reality check before you buy a stack of baffles: not every soffit that looks vented is actually open.
- From outside: Look for vented soffit panels or round or strip vents.
- From inside the attic: At the eaves, you may see tiny specks of daylight, but do not count on it. Screens, dark soffit cavities, and small perforations can hide the light.
- Better checks: On a windy day you can sometimes feel air movement. You can also use a smoke pencil or a stick of incense near the eave area to see if air is pulling in.
- Common problem: The holes were never cut through the plywood behind the vented soffit panel. If you see solid wood with no openings, the “vent” is decorative until that gets opened up.
If you are not sure what you are looking at, it is worth snapping a photo and taking a closer look before moving forward.
When baffles make sense (and when they do not)
Baffles are for vented attics where you have soffit intake and a clear path to an exhaust vent like a ridge vent or roof vents. They are not used the same way in unvented roof assemblies, and they are usually not part of a roofline insulated with spray foam (a compact roof). If your attic is unvented or you are not sure which type you have, pause and confirm before you start adding ventilation parts.
Tools and materials
Materials
- Insulation baffles (foam or plastic). Buy the width that matches your rafter spacing (commonly 16 inches or 24 inches on center).
- Fasteners: 3/8 inch to 1/2 inch staples for a staple gun, or short roofing nails, or cap staples if you have them.
- Optional: One-part spray foam (minimal-expansion) or caulk for sealing gaps at the top plate if you are air-sealing while you are there.
- Optional: Cardboard or foam board to build a dam at the attic perimeter if you need to hold blown-in insulation back from the eave area.
Tools
- Headlamp or work light
- Tape measure
- Utility knife
- Staple gun
- Knee pads or a kneeling board (your future self says thank you)
Safety gear
- Respirator or at least a good dust mask (especially with old fiberglass)
- Safety glasses
- Gloves
- Long sleeves
And the big safety reminder: only step on framing members. Drywall ceilings are not flooring.
Where baffles go
Baffles install in the rafter bays at the eaves, right where the roof meets the attic floor. They sit against the underside of the roof sheathing and create a tunnel from the soffit area up into the attic.
They do not go at the attic hatch, on the hatch door, or across the attic floor in random spots. Think: edge of the attic, every rafter bay that has soffit intake below it.
How high to run the baffle
Here is the practical goal: when you are done insulating, you should still have a clear, open air channel from the soffit up past the top of your insulation.
- In many DIY situations, that means running the baffle about 6 to 10 inches above the final insulation height, but the real rule is: keep it high enough that the top stays above the insulation line.
- If you are blowing in insulation to a higher R-value, extend the baffle higher or overlap another baffle so you do not bury it.
In real attic terms, I like to install the baffle so I can still see the top edge after the insulation is in. If I cannot see it, I cannot trust it is not buried.
Step by step: install attic baffles
1) Clear the rafter bay
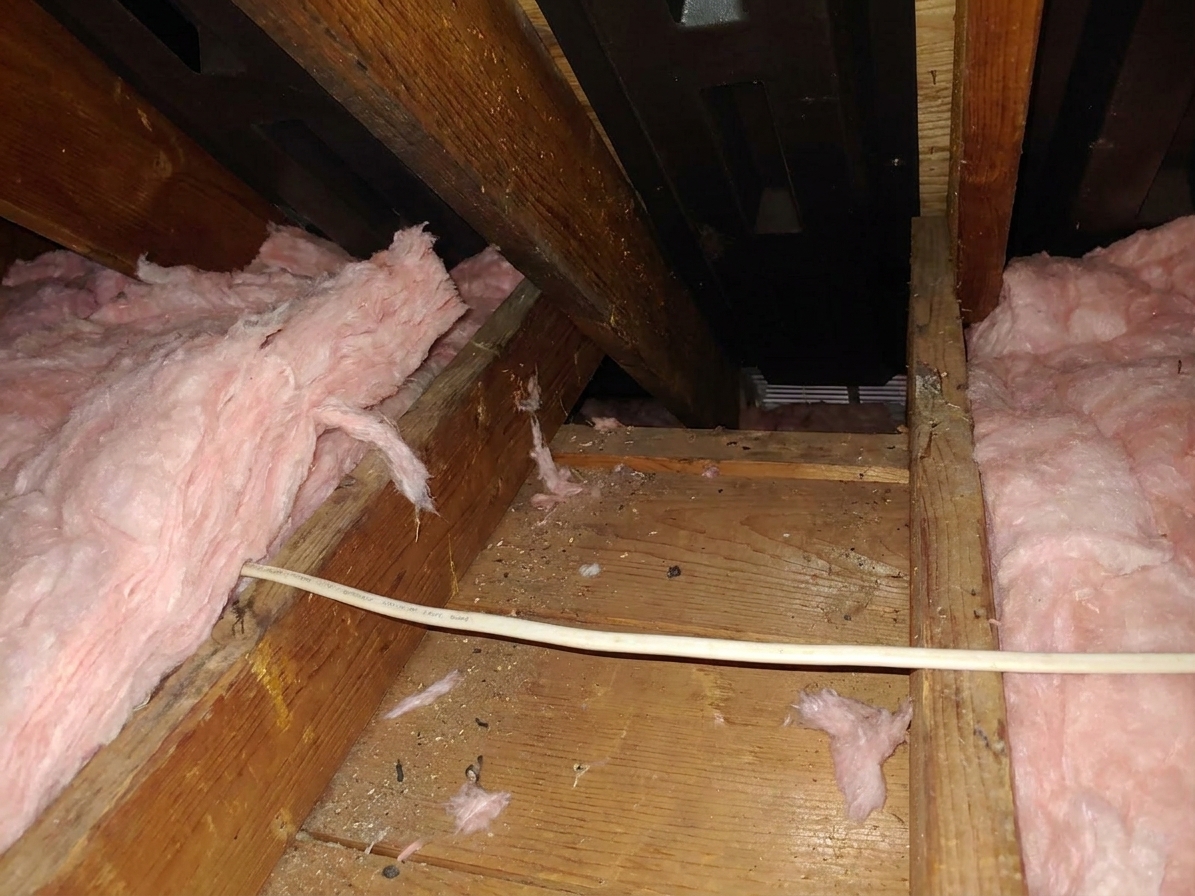
Gently pull back any insulation that is stuffed into the eave area. You want to expose the rafter bay and the top plate area so you can work.
If you have old, dusty fiberglass, move slowly. Fluff in the air is the enemy of comfortable breathing.
2) Locate the intake path
Look down toward the soffit. In many homes you will see an opening into the soffit cavity or the back side of the vent area. Your baffle needs to start low enough that air can enter it from that intake zone.
If the bay seems blocked, figure out what you are actually looking at first. Sometimes it is just insulation clumps or debris. Sometimes it is solid soffit backing, a frieze block, or other wood that was never opened for ventilation. Clear loose material, but do not start cutting wood unless you are certain it is intended to be opened and you are not compromising structure.
3) Dry-fit and keep the channel depth
Most baffles are designed to flex and fit between rafters. Dry-fit one first. If it is too wide, trim it carefully with a utility knife.
You want the baffle to sit tight to the underside of the roof sheathing, centered in the bay, with room at the edges to staple it to the rafters. As you fit it, do not crush it. The whole point is maintaining that built-in air channel.
4) Fasten to the rafters
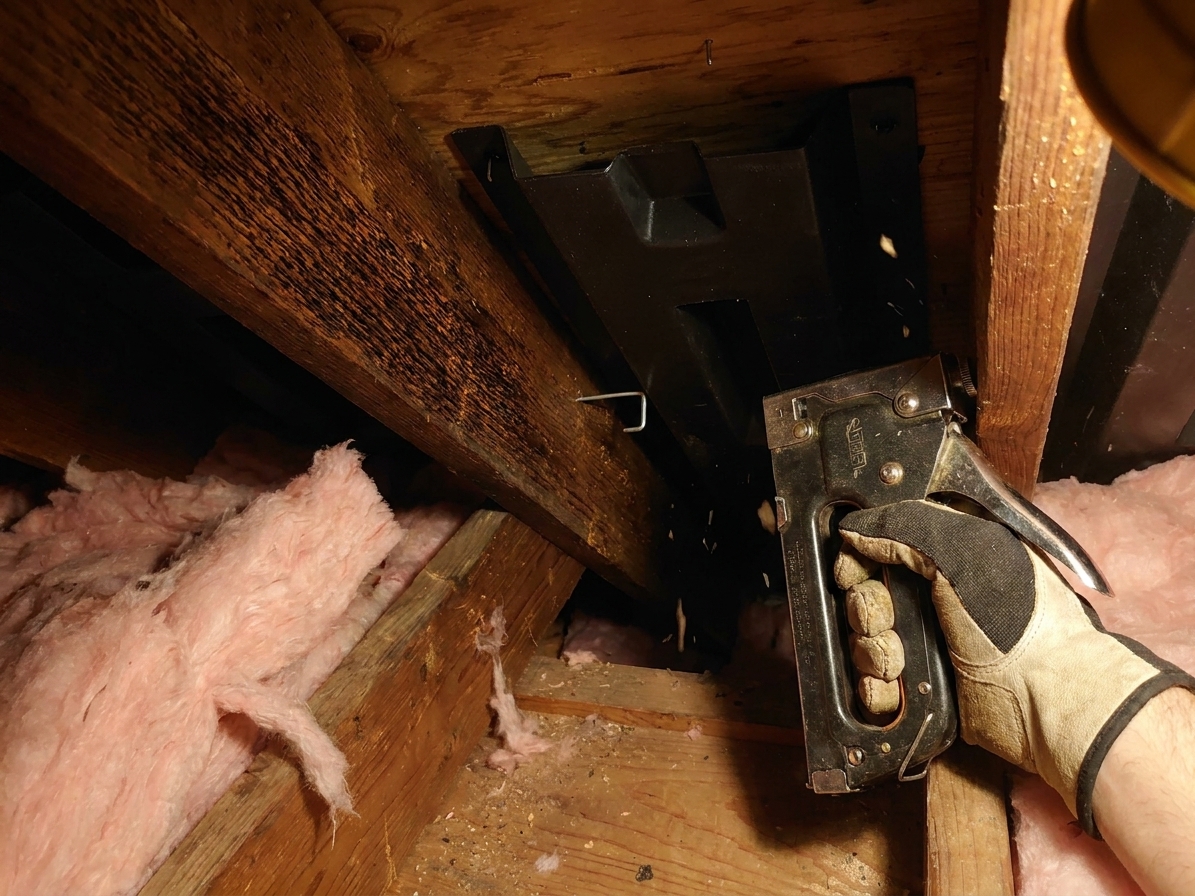
Staple or nail the baffle flange to each rafter. In many bays it is easiest to seat the bottom near the soffit end first, then fasten your way upward. If your baffle has manufacturer instructions, follow those.
- Use enough staples so it will not sag or pop loose when insulation gets near it.
- Keep the baffle straight so the air channel is not pinched.
If your rafter bay is long or you need more height, overlap a second baffle above the first by a couple inches and fasten both edges.
5) Keep the chute open at the bottom
This is where a lot of DIY installs go sideways. The bottom of the baffle must not be crushed or blocked by insulation, and you should not spray foam into the soffit vent area.
If you are working with blown-in insulation or you know the eave area tends to fill up, add an insulation dam at the attic perimeter to keep insulation from drifting into the soffit zone. This also helps with “wind washing,” where moving air at the eaves steals performance from the top of your insulation.
6) Put insulation back without compressing it
Once the baffle is secure, you can lay batts back in place or blow insulation in. The key is to keep insulation out of the air channel and avoid compressing what you already have. Compressed insulation loses R-value.
- With batts: Cut batts to fit around framing. Do not jam batts into the eaves.
- With blown-in: Blow evenly and keep an eye on the baffle tops. If you cannot see the baffle top anymore, you may be burying it.
If insulation buries the baffle
Do not let insulation cover the baffle opening. If insulation buries the baffle or packs into it, you can choke off soffit intake and defeat the whole purpose of installing baffles.
Here is what buried baffle problems look like in real life:
- Reduced airflow: Intake air cannot make it into the attic ventilation path.
- Moisture stays trapped: Warm, damp air lingers, increasing condensation risk on the underside of the roof deck.
- Ice dam potential rises: A warmer upper roof can melt snow, and runoff can refreeze at colder eaves.
If you suspect yours are buried, pull insulation back and re-open the channel. Sometimes you need to extend the baffle higher so it remains visible above the insulation line.
Pro tips from the crawl space
Install baffles before adding insulation
If you are planning to top off your attic insulation, do the baffles first. Crawling over fresh blown-in insulation is like trying to walk through a ball pit with a headlamp on.
Do not block exhaust vents
This article is about soffit intake, but the system needs exhaust too. Ridge vents, gable vents, and roof vents should stay clear and unobstructed.
Air-seal the right boundary
Air-sealing belongs at the attic floor level (top plates and ceiling penetrations). The soffit-to-attic ventilation path needs to stay open. In other words: seal the ceiling, not the vents.
Watch for wiring and recessed lights
Stay mindful around electrical. If you see questionable wiring, open junction boxes, or older recessed can lights that are not insulation-contact rated, stop and address it properly. In many cases the safest path is replacing with an IC-rated, airtight fixture or using an approved cover, then insulating as allowed.
My rule of thumb: If I am not 100 percent sure what I am looking at in an attic, I stop and get clarity. Attics are where small mistakes can become expensive ones.
Quick FAQ
Do I need baffles in every rafter bay?
You need baffles in the rafter bays that connect to soffit intake and have insulation on the attic floor below. In many homes, that means most bays along the eaves.
Foam or plastic baffles, does it matter?
Both can work. Foam tends to be stiffer and seals a bit nicer if you fit it well. Plastic is common and affordable. The most important thing is that it stays in place, maintains the intended channel depth, and does not get crushed.
Can I use cardboard as a baffle?
I do not recommend it. Cardboard can sag, absorb moisture, and get crushed. Purpose-made baffles are cheap insurance and easier to fasten securely.
Should I air-seal at the eaves too?
If you can access gaps at the top plates, small penetrations, or open wall cavities, air-sealing is a great upgrade. Just avoid blocking the soffit intake path and do not spray foam into soffit vents.
Bottom line
Attic insulation baffles are one of those quiet upgrades that make the whole house behave better. Install them at the eaves, run them high enough that they stay above your final insulation height, fasten them securely to the rafters, and do not let insulation bury the chute. Once that airflow path is protected, you can add insulation with confidence and keep soffit intake doing its job for the long haul.