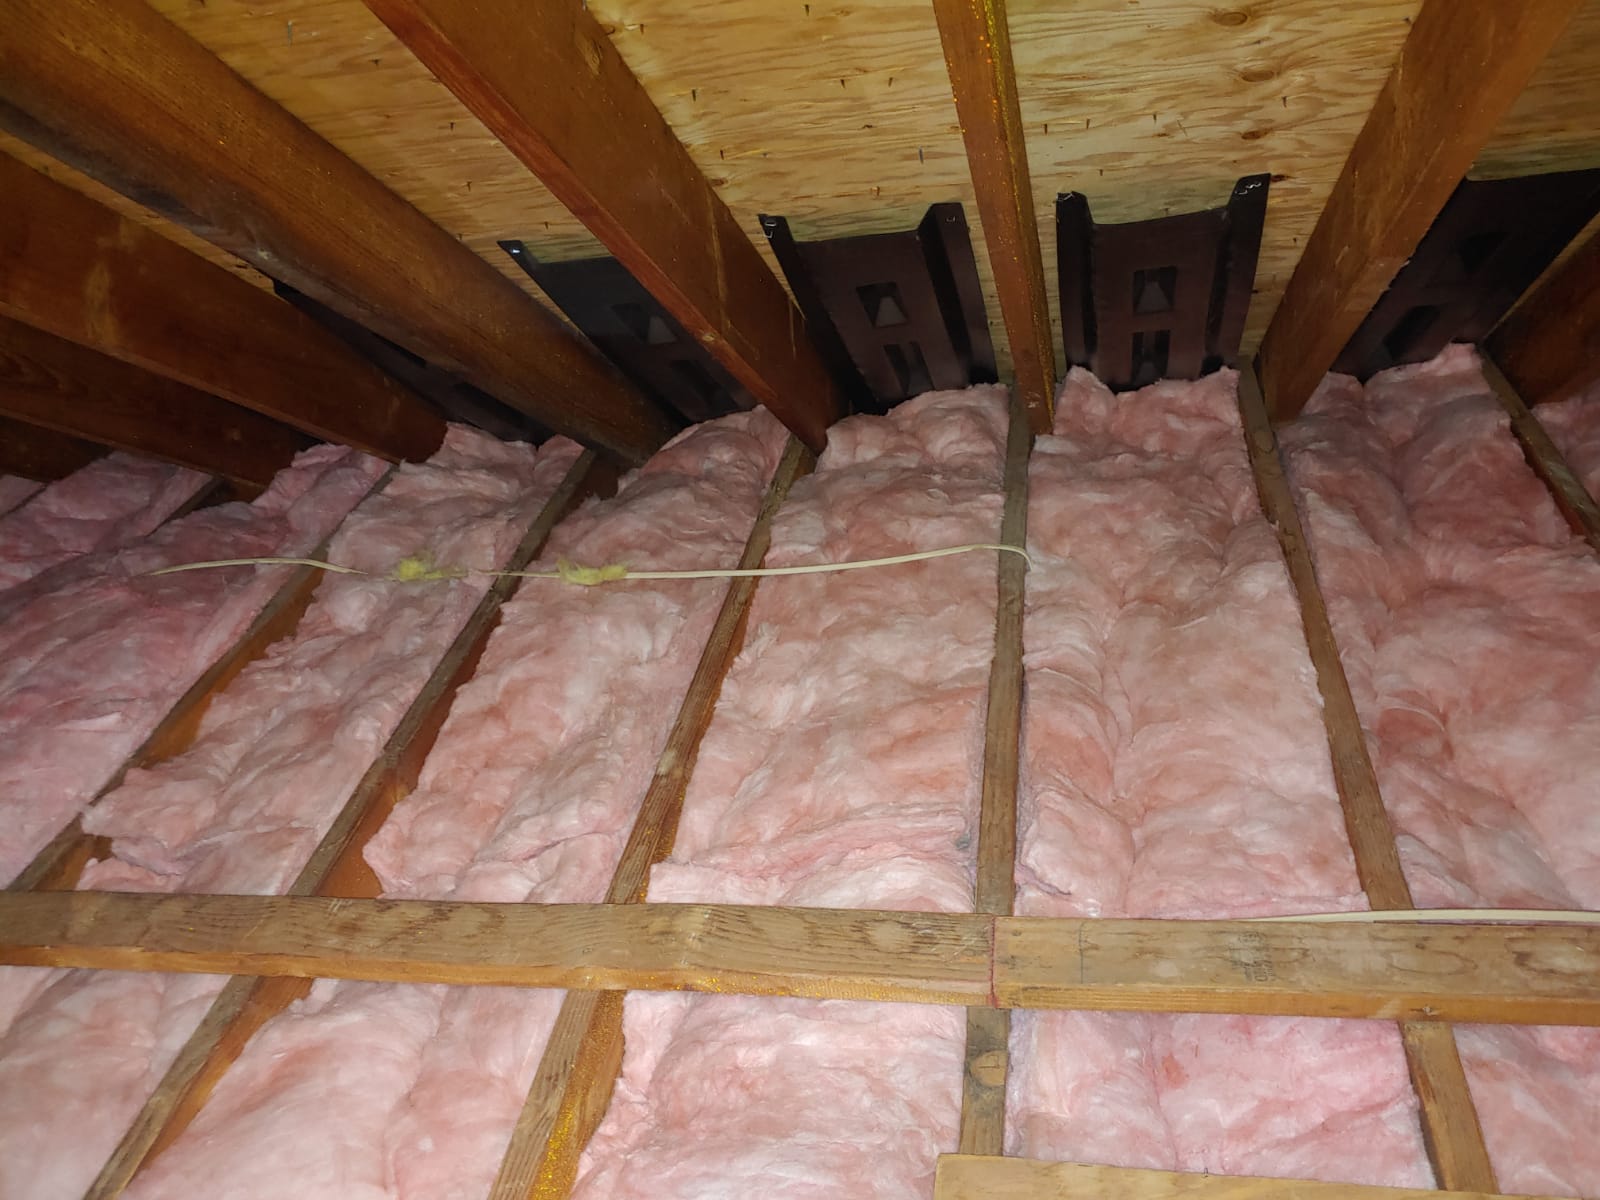
Step-by-step: fit rafter baffles at the eaves, keep soffit vents clear, run chutes above insulation, fasten them securely, then insulate without blocking air...
The Homeroom Fix
October 25, 2026
•
By Marcus Delgado
How to Air Seal an Attic Before Adding Insulation
Seal the attic floor before insulation buries the leaks. Learn what to foam or caulk, what to avoid, and which penetrations need special clearances for safety.
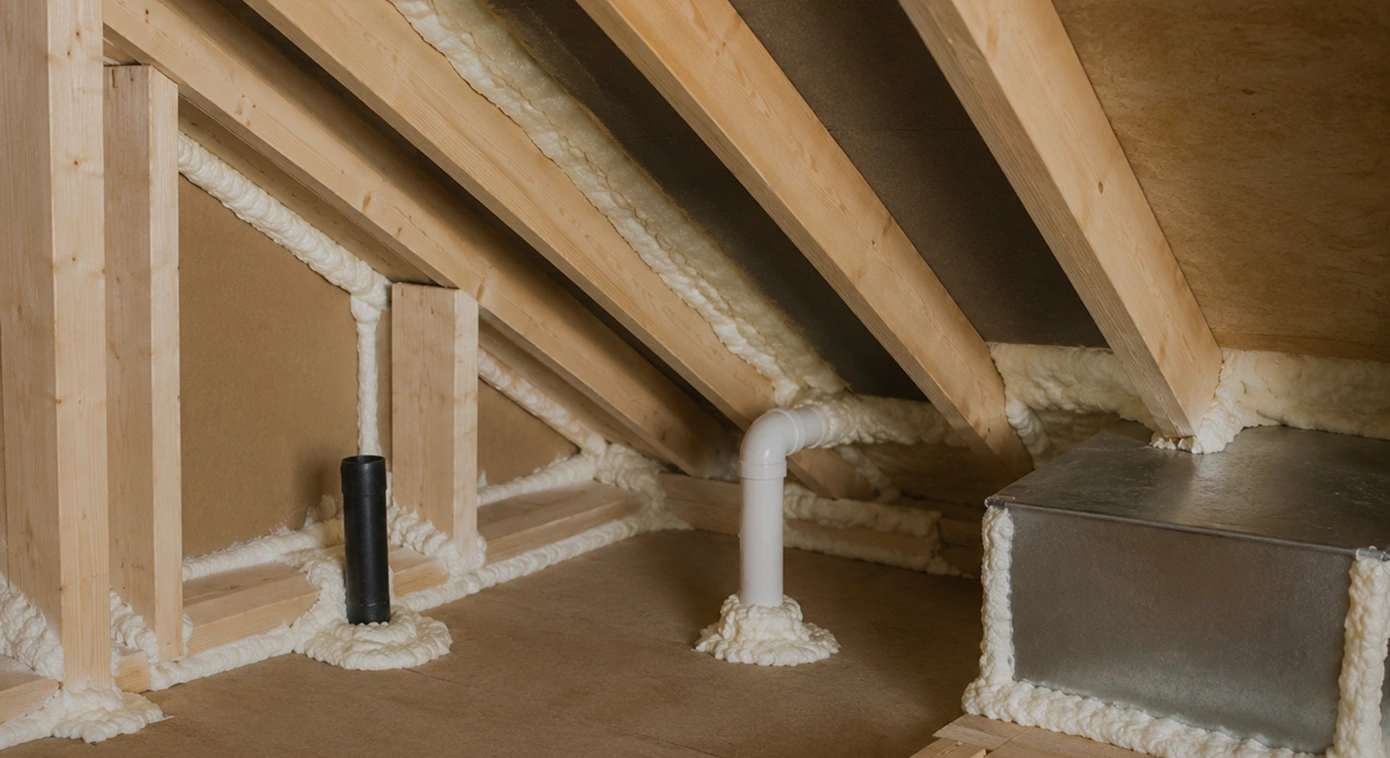
The biggest attic insulation mistake I see homeowners make is skipping the boring part: air sealing first. Insulation slows heat transfer, but it does not stop air movement. If your ceiling has little gaps and bypasses, your heated (or cooled) air will still sneak into the attic, and your insulation will sit there like a puffy winter coat worn with the zipper open.
The good news is you only have to do this once, and it is easiest before you bury everything under a foot of fluffy insulation. This guide walks you across the attic floor and calls out the common leak spots you can safely seal with caulk or foam, plus the spots that require special materials or clearances.
Safety and prep first
Attics are where good intentions go to trip hazards. Take five minutes to set yourself up safely.
Before you climb up
- Pick a cool day if you can. Heat stress is real up there.
- Wear a respirator or dust mask, safety glasses, gloves, long sleeves, and knee pads. I keep a cheap pair of coveralls just for attic work.
- Use solid footing. Walk on joists or on laid planks. Do not step on drywall.
- Bring good light. A headlamp plus a work light makes this job 50 percent less frustrating.
- Turn off power to any circuits you will be working near if you are not 100 percent sure what you are touching.
Clear your work areas
If you already have some insulation up there, you can still air seal. Just gently pull it back from the areas you need to seal and set it aside. With loose fill, a plastic tote lid or a dustpan works well for scooping it out of the way.
Keep a trash bag for old rodent nests, crumbly duct tape, and mystery debris from 1978.
Tools and materials that make this go smoothly
You do not need a truckload of fancy gear. You need the right sealant for the right gap, and enough light to see what you are doing.
- Polyurethane spray foam for small to medium gaps (use minimal expansion around sensitive areas).
- Fire-rated caulk, fireblocking foam, or firestop products where code or safety calls for it. These are not all the same thing, so use a product that is listed for your specific application and follow local code or inspector guidance.
- Acrylic latex caulk for small cracks where you want control and a neat bead.
- Rigid foam board (polyiso or XPS) to cover larger openings.
- Foil tape for sealing rigid foam patches and some duct-related fixes (not cloth duct tape).
- Utility knife, straightedge, and a marker for cutting foam board.
- Shop vacuum for cleaning dusty surfaces so caulk sticks.
- Disposable foam gun or straw applicator, plus foam cleaner if you use a reusable gun.
If you are only buying one upgrade: a basic foam gun gives you way more control than straw cans, which means less mess and fewer "oops" moments.
The attic-floor air sealing walkthrough
Here is the route I follow in my own 1970s Michigan fixer-upper. Start at the attic access, then work methodically so you do not miss anything. I like to move clockwise along the perimeter, then hit the middle penetrations.
1) Top plates and the attic perimeter
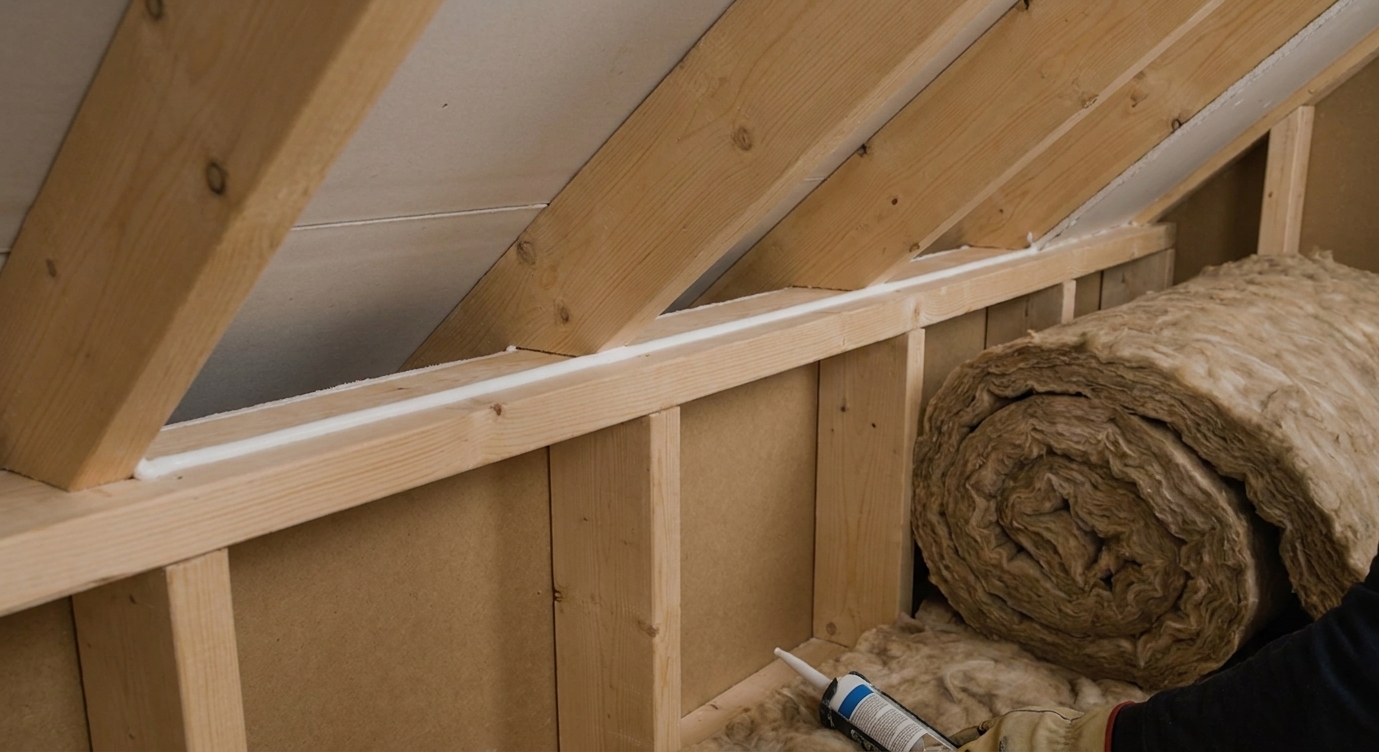
The top plates are the double boards at the top of your exterior and interior walls. In many older homes, the drywall to framing connection is not airtight. That tiny crack runs the entire length of your house, so it adds up fast.
- What to do: Run a bead of caulk or a thin bead of foam along the joint where drywall meets the top plate. Also seal any cracks and penetrations you can access at the perimeter framing.
- Tip: Use less foam than you think. You are sealing a crack, not frosting a cake.
2) Electrical wire holes through the ceiling
Every wire that passes through your ceiling drywall is a potential leak, especially where it pops through an interior top plate into the attic.
- What to do: Use caulk for small gaps. Use a small amount of spray foam for larger gaps around bundles.
- Watch for: Open holes drilled through framing that lead down into wall cavities. Those are direct air highways.
Keep it clean: Wipe dust off the wood before you seal. Foam and caulk do not love grime.
3) Plumbing vents and small pipe penetrations
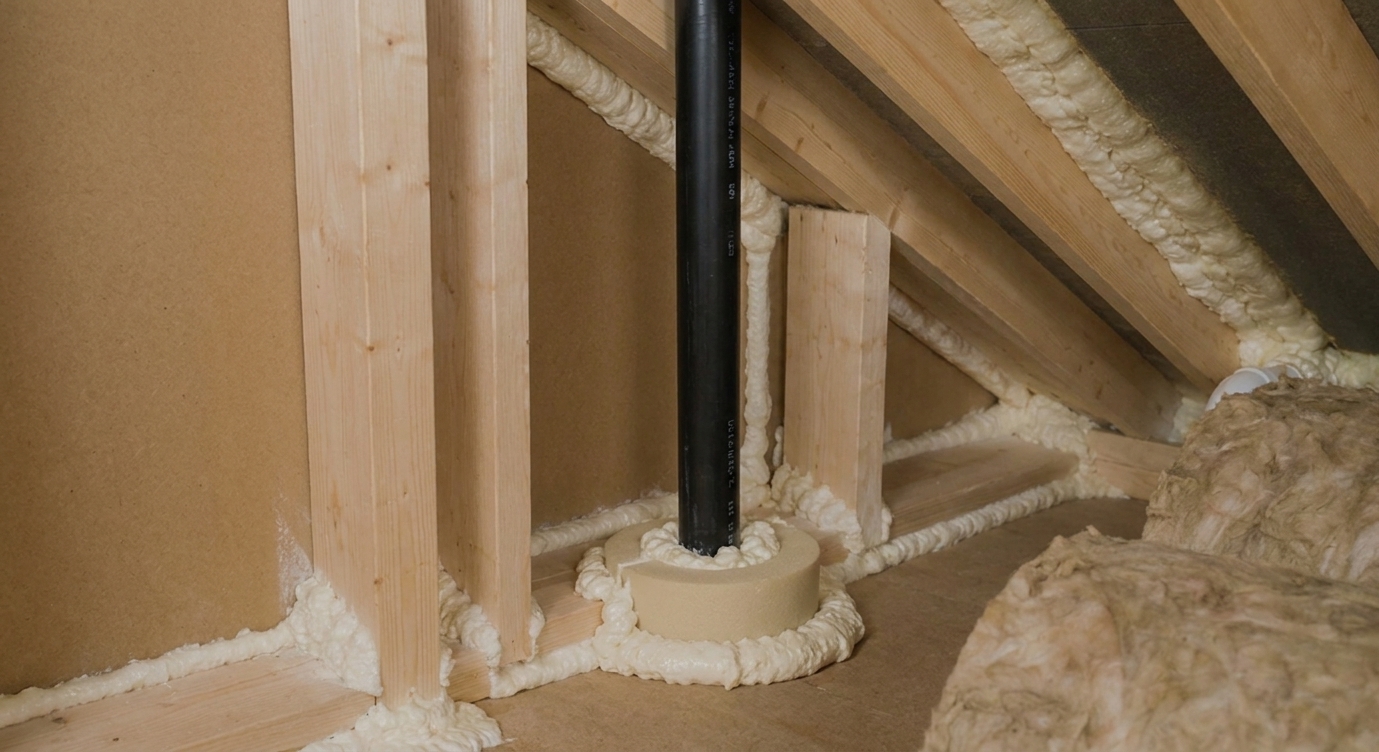
Plumbing vent stacks (usually black ABS or white PVC) are common leakers. The hole around the pipe is often oversized, and warm air rises right around it.
- What to do: For gaps up to about 1/2 inch, foam works great. For smaller cracks, caulk is easy and tidy.
- Better for big gaps: Cut a collar patch from rigid foam board, fit it around the pipe, seal edges with foam, then tape seams if needed.
4) Bath fan housings and duct penetrations
Bath fans are sneaky. You can have a decent fan and duct, but still leak air around the fan housing where it meets the drywall.
- What to do: Seal the fan housing perimeter with caulk or foam where you can access the seam from above.
- Also check: The duct connection at the fan. If it is loose, reconnect and secure with a clamp. Seal joints with mastic or UL-181 rated tape as appropriate, not cloth duct tape.
If your bath fan duct dumps into the attic instead of venting outside, put this project on pause and fix that first. Moist air in the attic is a mold and rot recipe.
5) Open chases, soffits, and dropped ceilings
These are the big ones. A chase is any framed opening that runs from a lower level up into the attic, like around a plumbing stack, chimney surround framing, or a soffit over cabinets.
- What to do: Cover the opening with rigid foam board or plywood, then seal the edges to framing with foam or caulk.
- Important safety note: If the chase is adjacent to a chimney, flue, or other combustion vent, do not assume plywood or foam is allowed. Maintain required clearances and use noncombustible materials and approved sealants for that situation.
- Goal: Create a continuous air barrier. If you can see into a wall cavity, it is not sealed yet.
In older homes, I sometimes find a chase you could practically toss a football through. Sealing those can make a noticeable comfort difference the same day.
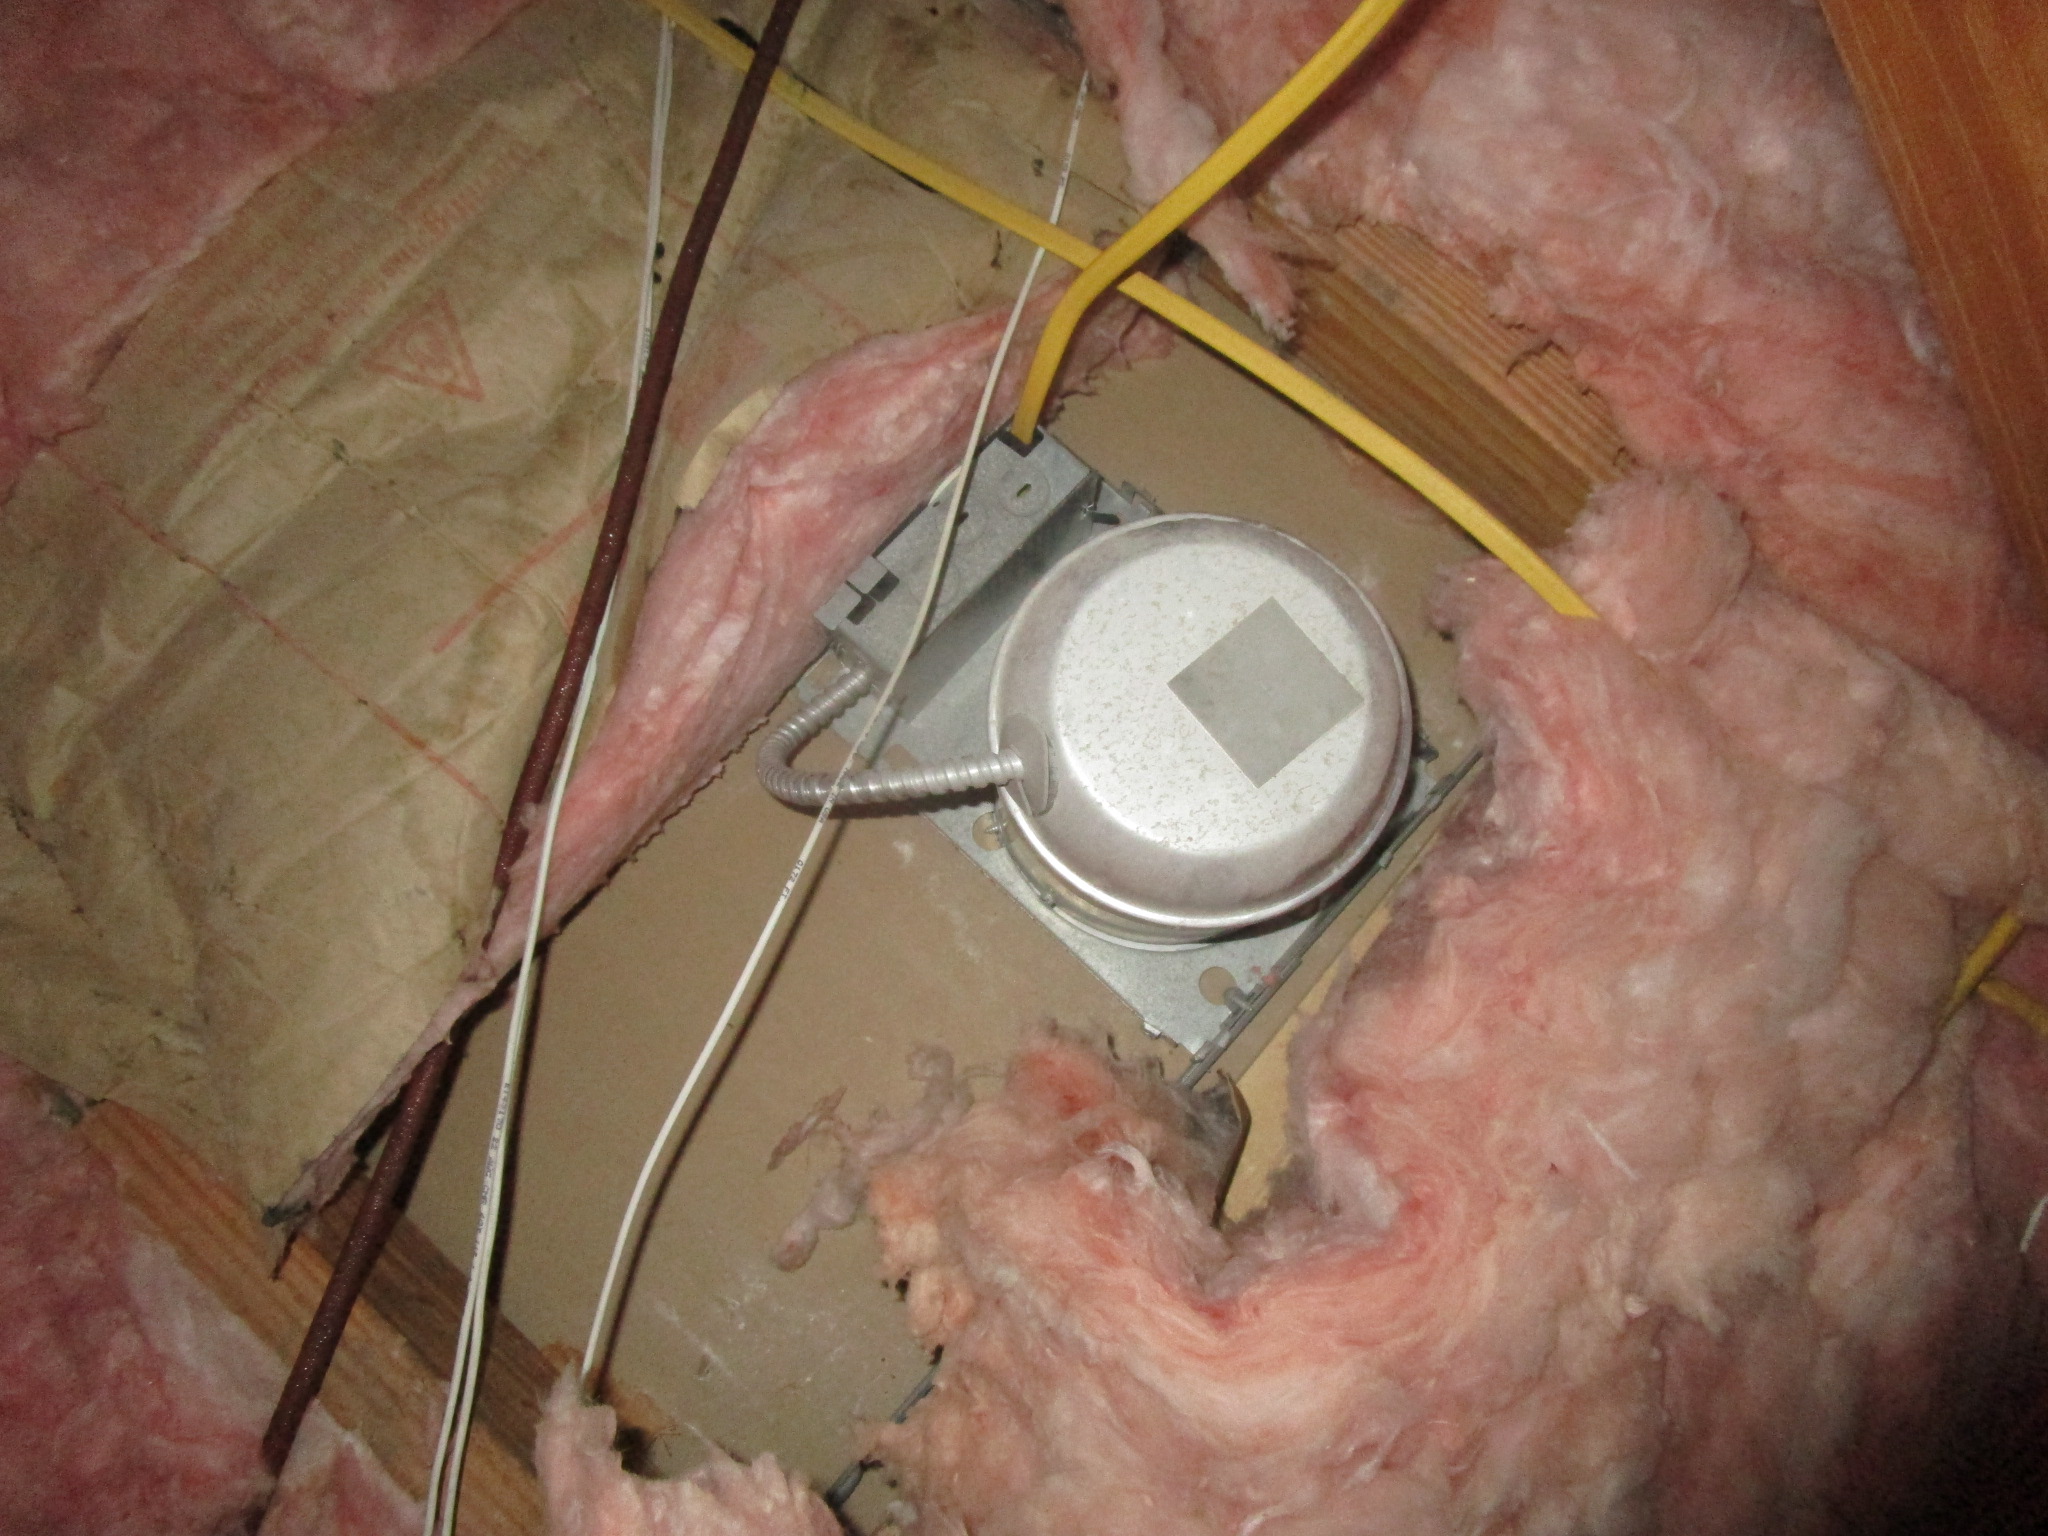
6) Recessed lights, fans, and ceiling penetrations in the middle of the attic
Anywhere the ceiling plane is interrupted is worth inspecting. That includes ceiling fans (electrical boxes), old speaker wires, and abandoned penetrations.
- What to do for small holes: Caulk or a dab of foam.
- What to do for larger, odd holes: Patch with rigid foam or a scrap of drywall or plywood, then seal the edges.
If you find abandoned wires or mystery openings, do not bury hazards. If you are unsure, call an electrician to verify what can be capped or removed safely.
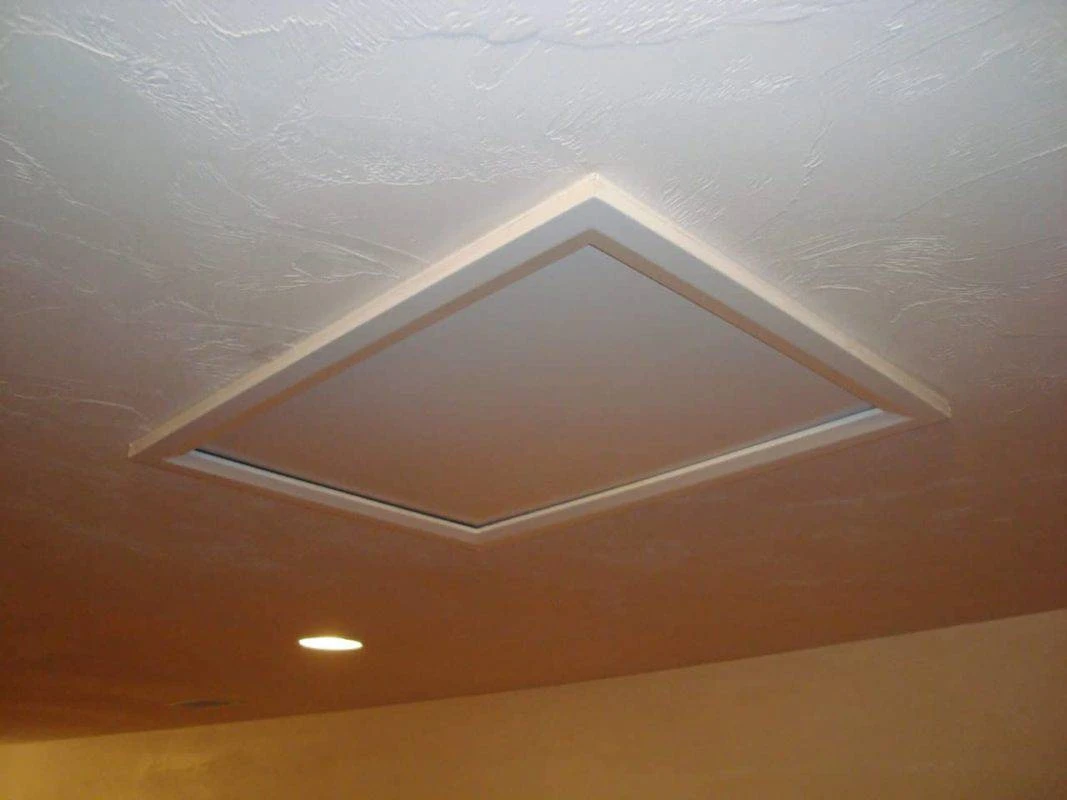
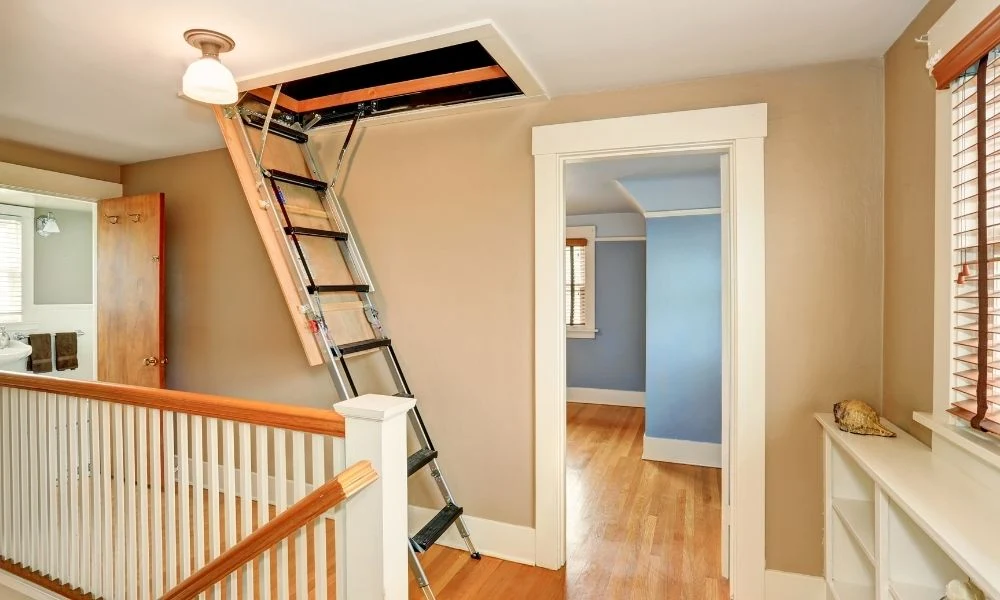
7) Attic hatch or pull-down stairs
This one gets missed because it is not "in" the attic floor, it is the attic floor. If your hatch is leaky, it can undo a lot of careful sealing.
- What to do: Air seal the hatch frame to the ceiling drywall or trim with caulk where accessible.
- Weatherstrip: Add adhesive foam gasket to the hatch stop so the lid compresses evenly when closed.
- Make it clamp down: A simple latch or hook-and-eye can turn a "resting" hatch into a sealed hatch.
What not to foam or caulk without special rules
This is the part where I put on my old carpenter hat and my responsible neighbor voice at the same time. Some attic items need clearances, noncombustible materials, or a specific rated product. If you treat everything like a random crack, you can create a fire risk.
Important: When in doubt around heat sources, use approved fire-resistant materials and follow the manufacturer clearance requirements. If you cannot confirm the requirements, do not seal that area until you can.
Chimneys, metal flues, and vent stacks from fuel-burning appliances
Masonry chimneys and metal vents (from furnaces, boilers, water heaters, or fireplaces) typically require clearance to combustible materials. Spray foam is combustible. So is wood framing. Insulation is often combustible too.
- Do not: Foam directly against a chimney or flue.
- Do: Treat clearances as vent-specific. A masonry chimney, single-wall connector, B-vent, and factory-built chimney can all have different rules. The vent and appliance label and instructions, plus local code, govern. Air sealing in these areas often involves sheet metal flashing and an appropriate high-temperature sealant, while maintaining required clearance. If you are not comfortable identifying the vent type and clearance, bring in a pro.
Recessed can lights
Recessed lights are another spot where homeowners accidentally create a problem by insulating or foaming too close.
- If the fixture is not IC-rated: It needs clearance from insulation and combustibles. Do not build a sealed box around it unless you follow code-compliant methods.
- If the fixture is IC-rated: It is designed for contact with insulation, but many IC fixtures still leak air unless they are specifically labeled airtight (often "AT").
If you cannot see the rating from above, check from below (trim ring area) or look up the fixture model. When I am unsure, I treat it as non-IC and keep insulation back until I can confirm. If air leakage is the main issue, an LED airtight retrofit trim (rated for your fixture) can help without guessing in the attic.
Knob-and-tube wiring
If you have knob-and-tube wiring, stop and get guidance before sealing and insulating. It has specific rules and insulation contact can be unsafe. Many insulation contractors will not cover it, and for good reason.
A simple order of operations
- Air seal big holes first (open chases, soffits, dropped ceilings) using rigid foam board patches.
- Air seal medium gaps (plumbing stacks, wiring bundles) with controlled foam.
- Caulk the fine cracks (top plates, small penetrations) for a tidy finish.
- Verify ventilation (soffit vents, baffles, bath fan ducting to exterior).
- Then add insulation without crushing soffit baffles or burying things that need clearance.
I like to keep a roll of painter's tape and flag any "come back later" hazards like flues and questionable recessed lights. It keeps you from forgetting what you decided at hour two.
Quick inspection checklist
- Top plates sealed along exterior and interior partitions where accessible
- All visible wire holes through top plates sealed
- Plumbing vent stack gaps sealed
- Bath fan housings sealed to drywall where accessible
- Bath fan ducts connected, clamped, and vented outdoors
- Large open chases covered and edge-sealed (with proper clearances near chimneys and flues)
- Attic hatch frame sealed and weatherstripped, hatch latches tight
- No insulation blocking soffit ventilation paths, baffles installed where needed
- Chimneys and flues flagged for proper clearances and fire-resistant methods
- Recessed lights identified as IC, non-IC, and airtight (AT) where applicable
Common questions I get
Do I really need to air seal if I am adding a lot of insulation?
Yes. More insulation helps, but air leaks can still move a surprising amount of heat and moisture. Air sealing is what makes the insulation perform like it is supposed to.
Should I use caulk or spray foam?
Use caulk for small cracks and seams you can run a bead on neatly. Use foam for irregular gaps and penetrations where caulk would be tedious. For big openings, patch with rigid foam board first, then seal edges.
Can I air seal with fiberglass stuffed into gaps?
Fiberglass is not an air barrier. It can slow airflow a bit, but it does not seal. Think of fiberglass as a sweater, not a zipper.
Do I need to worry about combustion safety?
If your home has atmospherically vented combustion appliances (some older furnaces, boilers, or water heaters), aggressive air sealing can change pressure and draft conditions. At a minimum, make sure you have working carbon monoxide alarms. If you are planning a major air sealing push or have any drafty, backdrafty, or questionable equipment, consider a combustion safety check or blower-door-guided work.
What about moisture and attic condensation?
In cold climates like Michigan, warm indoor air leaking into a cold attic is a condensation machine. Air sealing helps a lot, but also keep indoor humidity in check and make sure bathroom and kitchen exhaust fans vent outdoors and actually get used.
What about sealing windows, doors, or outlets?
Those are great projects, but they are a different checklist. This walkthrough is focused on attic-floor leaks that get buried once you add insulation.
My final tip before you insulate
When you think you are done, sit quietly in the attic for a minute and just look around with a bright light. Your eyes will start catching patterns: repeated wire holes, a line of gaps along a wall, a chase you missed behind a truss web. Those last few seals are usually the difference between "I did some" and "I actually tightened up the house."
And if you are also insulating your attic hatch, do that after air sealing so the whole lid and frame become part of the same air barrier. Your future self will thank you the first time a Michigan cold snap hits and your hallway stops feeling like a wind tunnel.