A step-by-step, homeowner-friendly guide to flushing sediment from gas and electric tank water heaters for better efficiency and longer life.
The Homeroom Fix
September 25, 2026
•
By Marcus Delgado
Water Heater Leaking? 6 Causes and Fixes
A leaking water heater can be a quick fix or a sign it is time to replace. Learn 6 common causes, how to spot them, and what to do next safely.

Marcus Delgado
Marcus Delgado is a former residential carpenter and lifelong DIY enthusiast who believes every homeowner has the power to transform their space. After a decade of swinging hammers for general contractors, he shifted gears to share practical, budget-friendly home improvement advice. When he's not renovating his own 1970s fixer-upper, you can find him hunting for salvaged wood or teaching weekend workshop classes.
Few things raise a homeowner’s blood pressure like spotting a puddle near the water heater. The good news is a “water heater leak” is not always a failed tank. Sometimes it is a loose fitting, a tired valve, or even water from somewhere else trickling down and playing innocent.
Let’s walk through the most common causes, how to confirm what you are seeing, and what you can safely fix yourself.
First, make it safe
Before you start poking around, take 60 seconds for damage control. Water heaters combine water, heat, and sometimes gas or high voltage, which is a trio that deserves respect.
Safety first If you smell gas, leave the area and call your gas utility or emergency services from outside. If you see water near electrical components, shut off power at the breaker before touching anything.
Quick shutoff steps
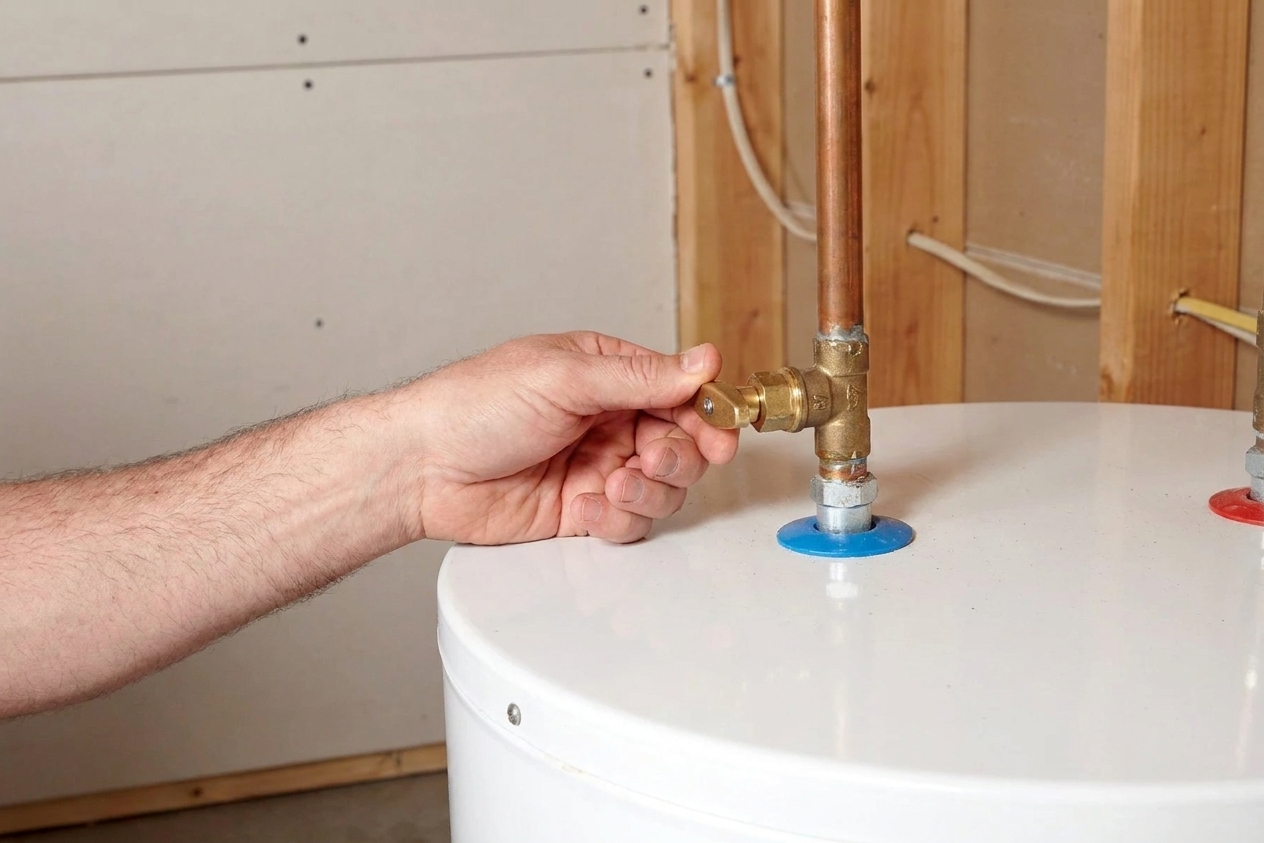
- Turn off the cold water supply to the heater. It is usually a valve on the pipe above the unit.
- Turn off power: For electric, switch off the water heater breaker. For gas, set the control to OFF (or PILOT if instructed on the label) and close the gas shutoff valve if needed.
- Contain the leak: Put down towels, a shallow pan, or a wet vac. If you have a drain pan and it is overflowing, divert to a bucket temporarily.
Confirm it is actually the water heater
Condensation, a nearby floor drain backing up, a humidifier line leak, or a sweating cold water pipe can all create “mystery puddles.” Dry everything you can, then watch where the first fresh drop forms.
Electric heater note: If you see water near the element access panels, remove power at the breaker first. Water can run down the jacket from a top leak and sneak into those compartments.
Cause 1: Loose connections
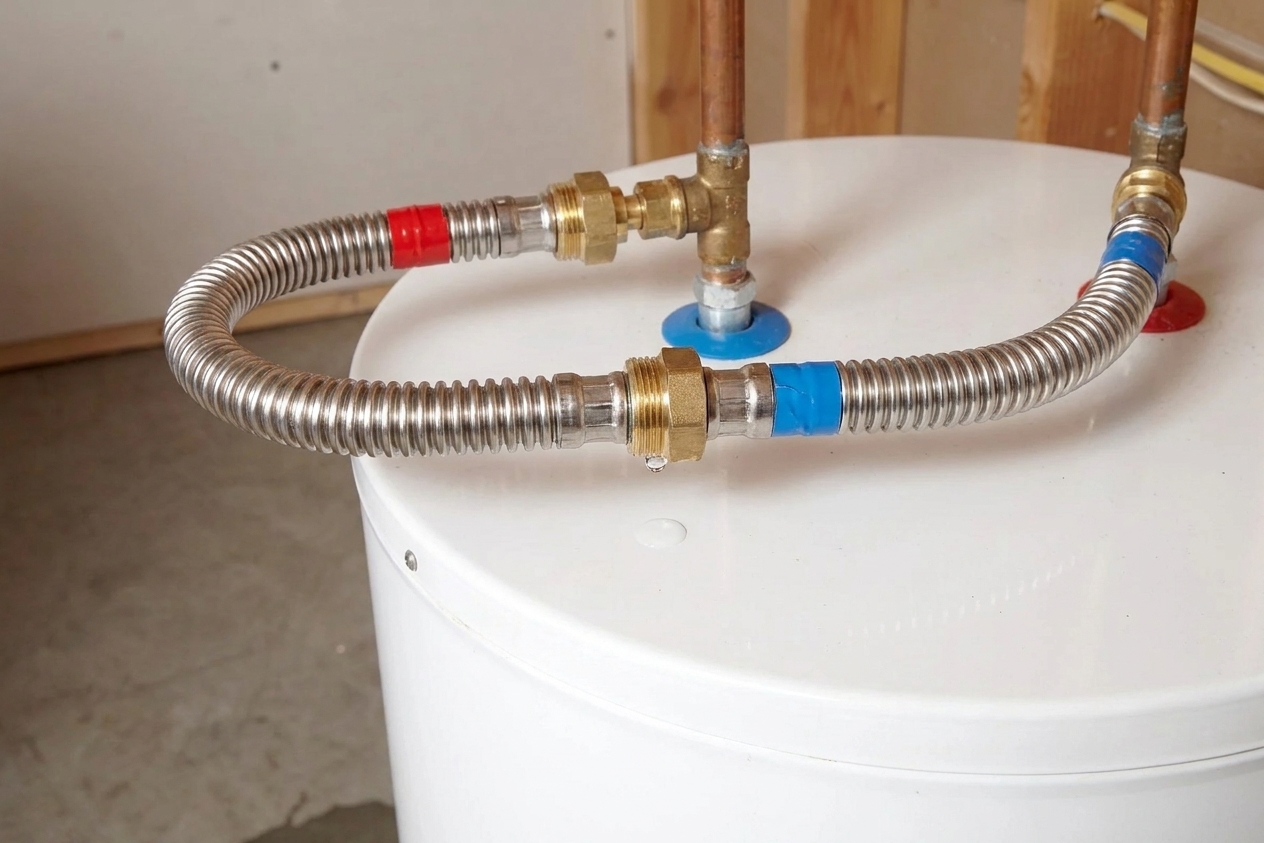
If the puddle is forming near the top of the heater or running down the jacket from above, start with the plumbing connections. Thermal expansion and vibration can loosen fittings over time.
What you’ll see
- Water beading on the cold inlet or hot outlet pipes
- Slow drips that run down the side of the tank
- Mineral staining around threaded joints
Fix
- Shut off the cold water to the heater.
- Dry the fitting and confirm exactly where the leak is coming from.
- If it is a threaded connection, snug it gently with a wrench. Do not overtighten it. “Do not reef on it” is the same advice in fewer bruises, especially on older piping.
- If it is a compression fitting or flex connector, tighten the nut slightly and recheck.
If a threaded joint continues to seep, it may need to be disassembled and re-sealed with pipe dope or PTFE tape. If you are not comfortable reworking the connection, this is a very reasonable moment to call a plumber.
Cause 2: T&P valve discharge
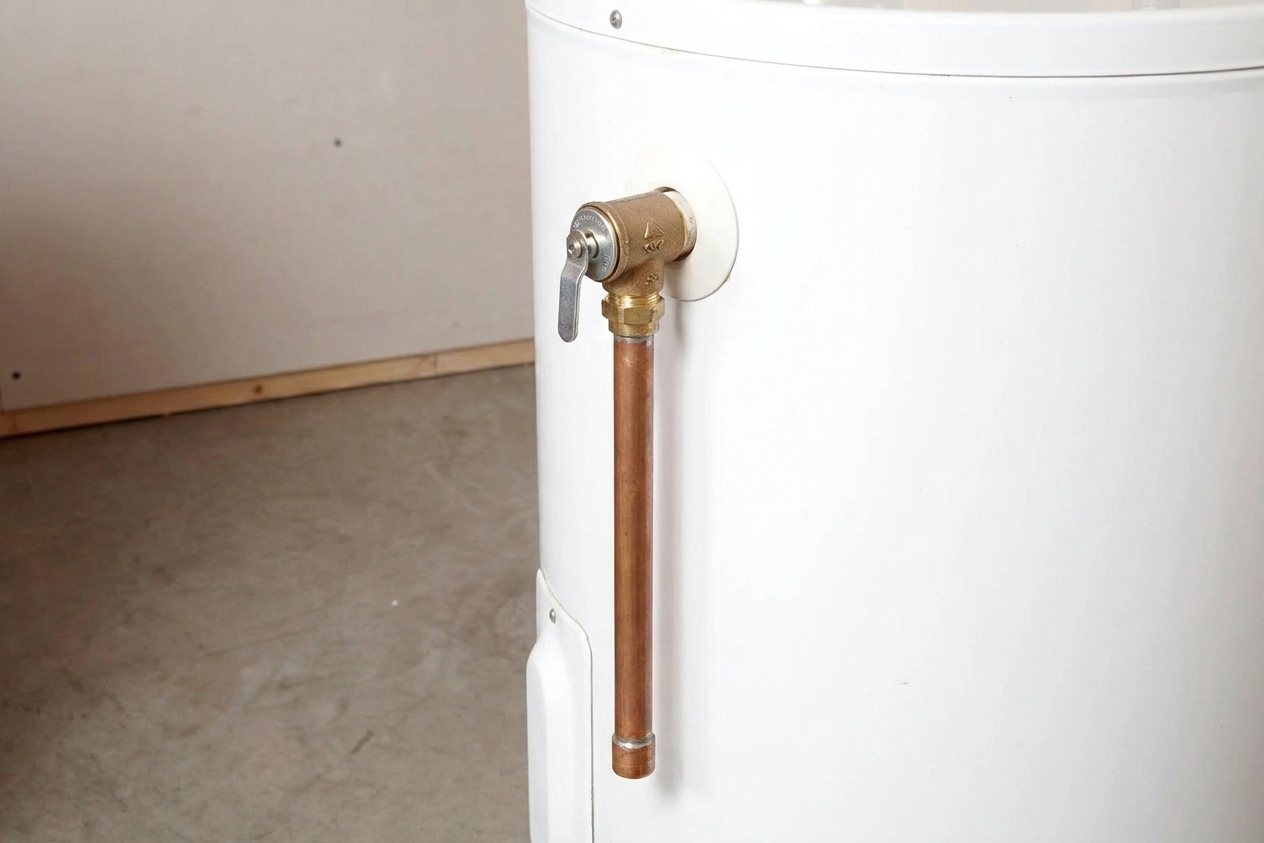
The T&P valve is a safety device designed to open if pressure or temperature gets too high. It is typically located on the side of the tank near the top, with a discharge pipe that points down toward the floor.
What you’ll see
- Water dripping from the end of the T&P discharge pipe
- A wet spot that appears intermittently, often after a heating cycle
- Sometimes a small puddle that comes and goes
Fix
First figure out if it is doing its job or failing.
- Confirm the discharge pipe is safe: It should terminate properly (downward, not blocked), and it should not be capped or plugged. If someone added a cap or anything that restricts flow, stop and call a pro.
- Check water pressure in the home if you can. A common guideline is over 80 psi is too high and can contribute to nuisance dripping. High pressure is typically addressed with a pressure reducing valve (PRV), and in many closed systems, a properly sized expansion tank.
- Lever test, with a warning: You can place a bucket under the discharge pipe and lift and release the valve lever briefly to flush debris. On older valves, this can cause it to weep afterward and not reseat. Only do this if you are prepared to replace the valve if it will not stop dripping.
- Replace the T&P valve if it won’t stop dripping and pressure issues have been addressed. Use the correct temperature and pressure rating for your heater.
Do not cap or plug a T&P discharge pipe. That valve is there to prevent a dangerous overpressure situation.
Cause 3: Drain valve leak
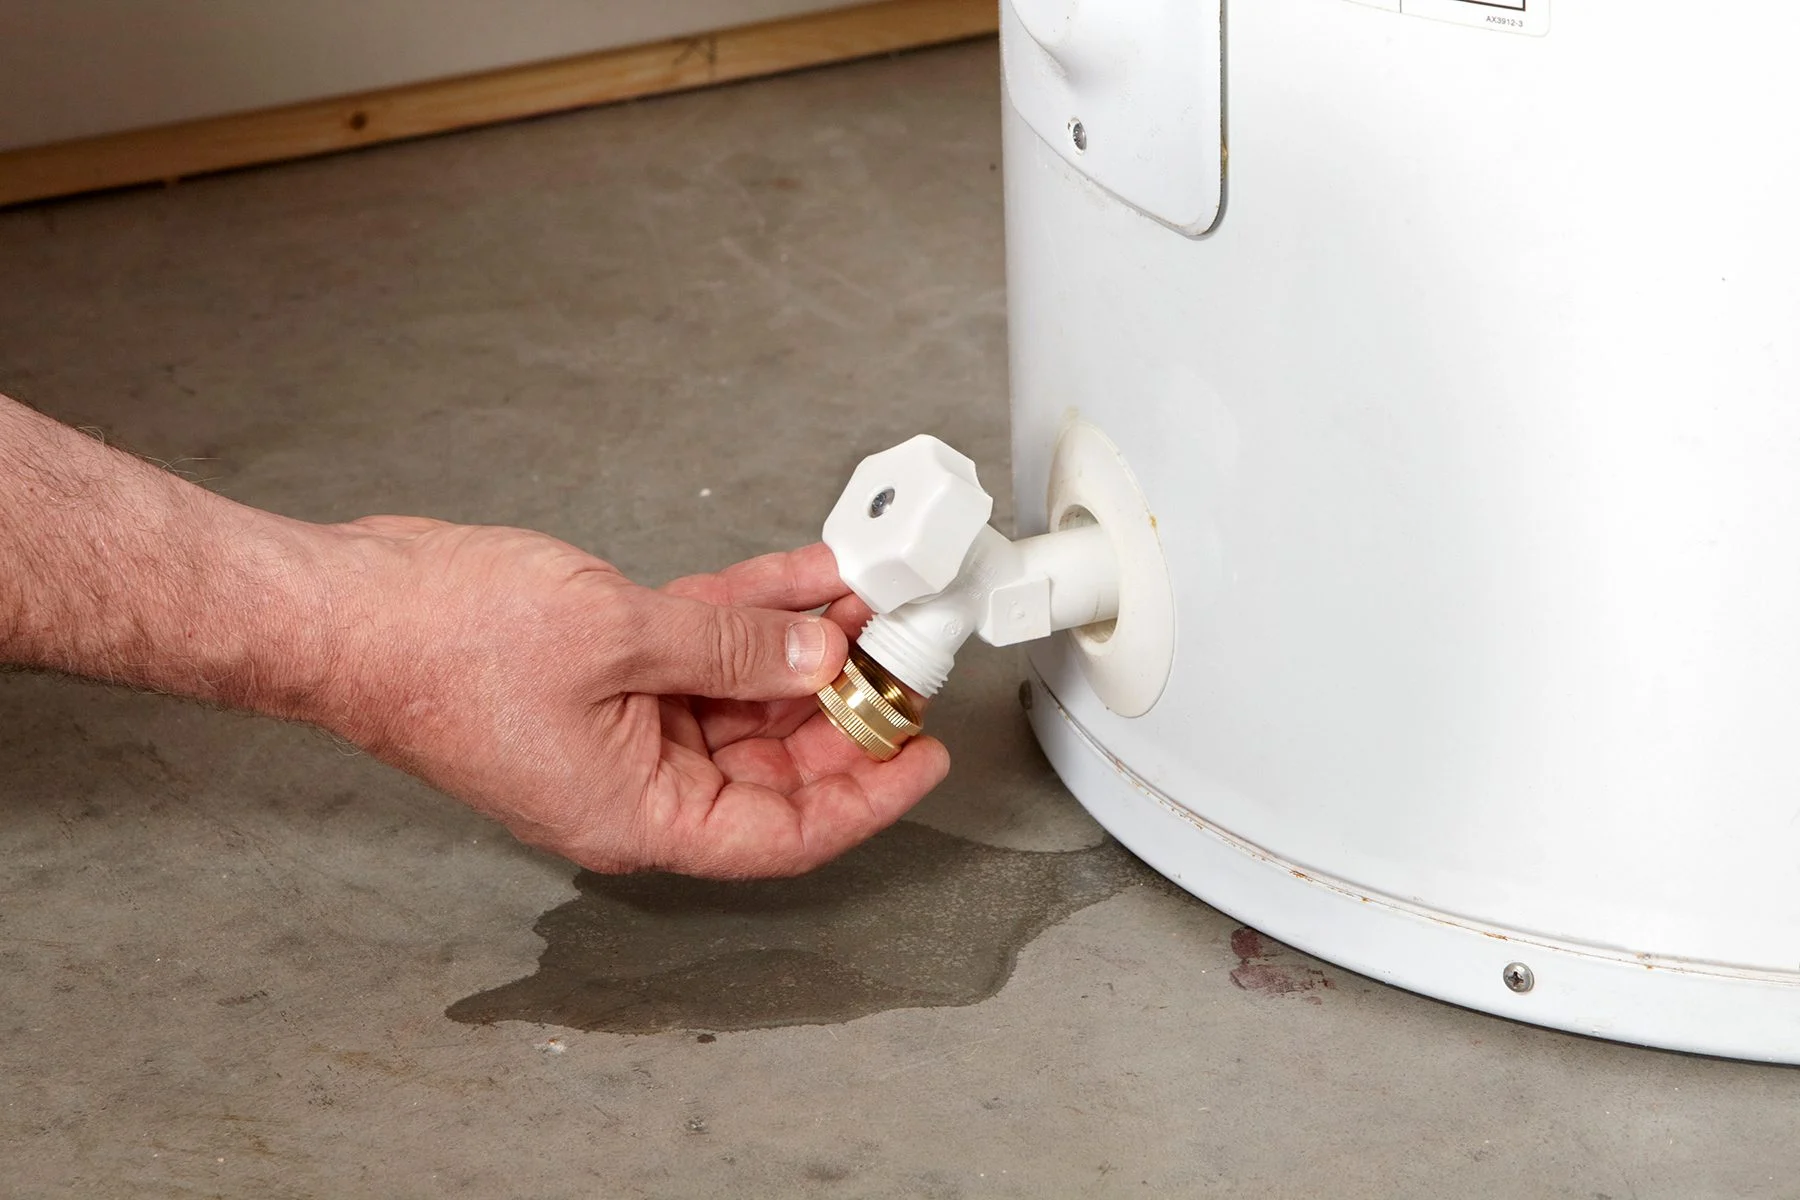
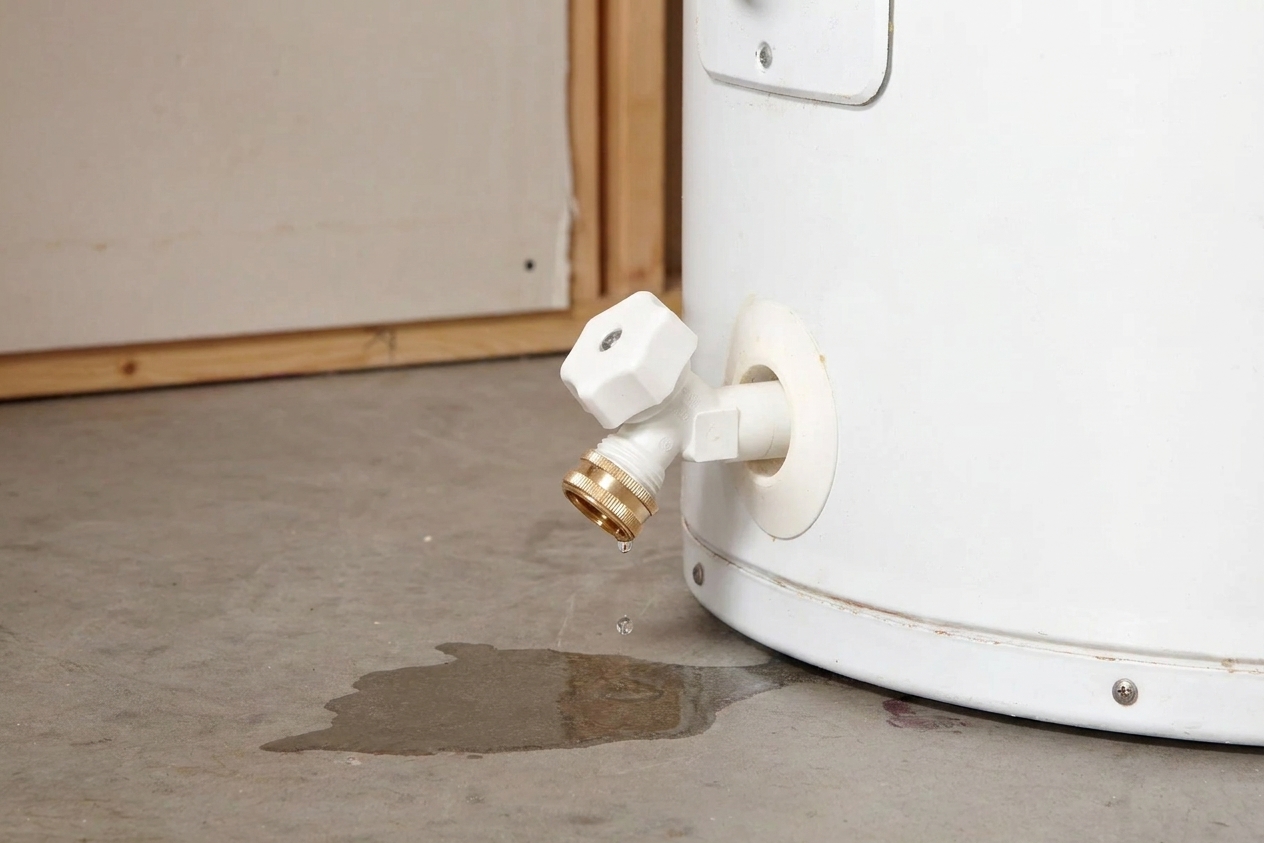
The drain valve (hose bib) at the bottom of the tank is used for flushing sediment. Over time, it can seep, especially plastic drain valves or valves that have been opened and closed a few times.
What you’ll see
- Drips forming right at the drain spout
- Water tracks on the front of the heater below the valve
- A puddle that hugs the front lower edge
Fix
- Try snugging the valve closed gently. Sometimes it is just not fully seated.
- If it still drips and the outlet is standard garden hose thread, screw on a hose cap with a rubber washer as a temporary stop. Make it snug, not cranked down.
- For a proper repair, the drain valve can be replaced, but it requires draining the tank below the valve level. Many homeowners choose to have a plumber swap it, especially on older units.
Good to know: A hose cap is a mitigation, not a cure. It buys you time, not a lifetime warranty.
Cause 4: Condensation
Not every puddle means something is broken. In cool basements, especially with cold inlet water and high humidity, you can get condensation on the tank or pipes. It can drip down and collect at the base like a leak.
What you’ll see
- Moisture on the outside of the tank, not at a specific fitting
- Dripping that seems worse in humid weather or after heavy hot water use
- No obvious single “source” point
Fix
- Wipe everything dry and monitor for new moisture.
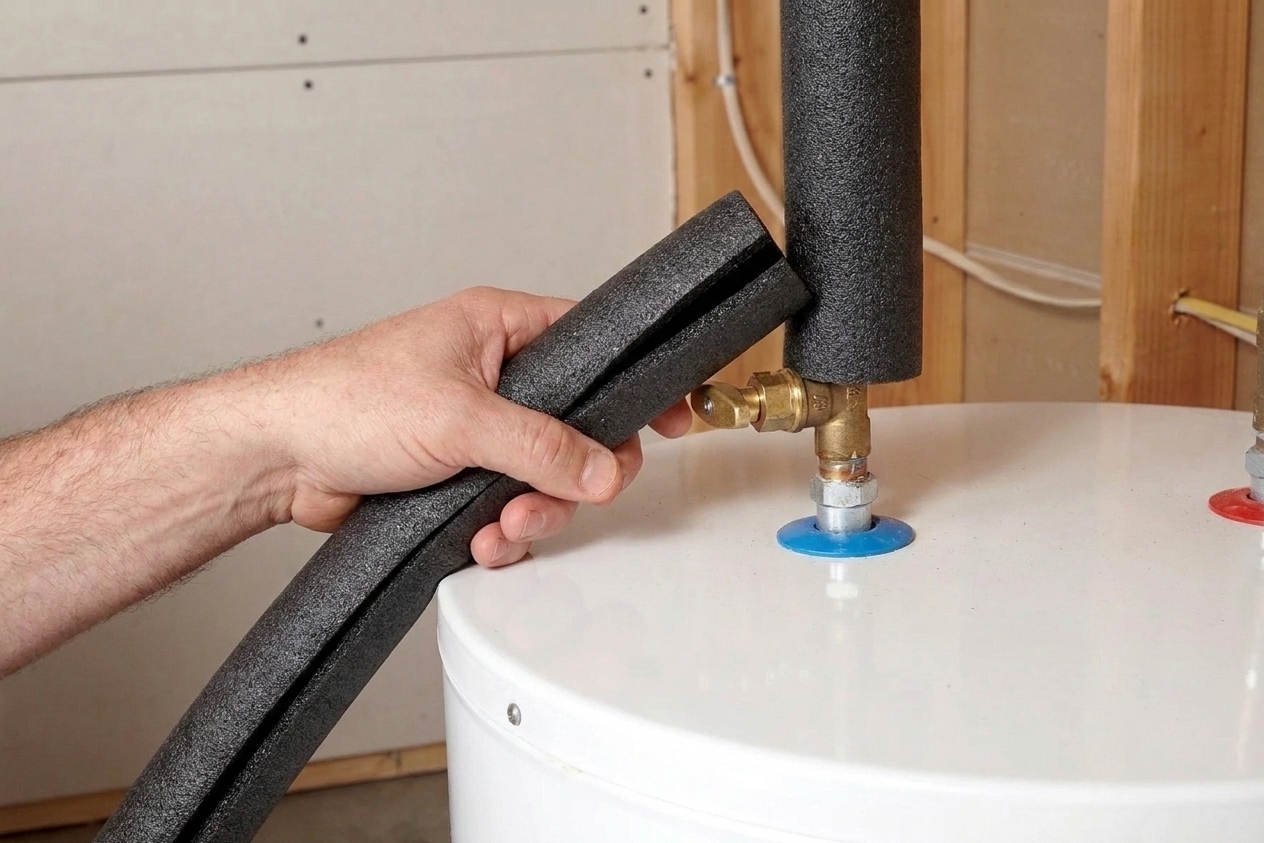
- Insulate cold water pipes with foam pipe insulation.
- Run a dehumidifier in damp basements.
- Make sure the water heater is set to a reasonable temperature, typically around 120°F for many homes.
If you are unsure whether it is condensation or a slow leak, tape a dry paper towel to suspicious areas. The first wet spot tells the story.
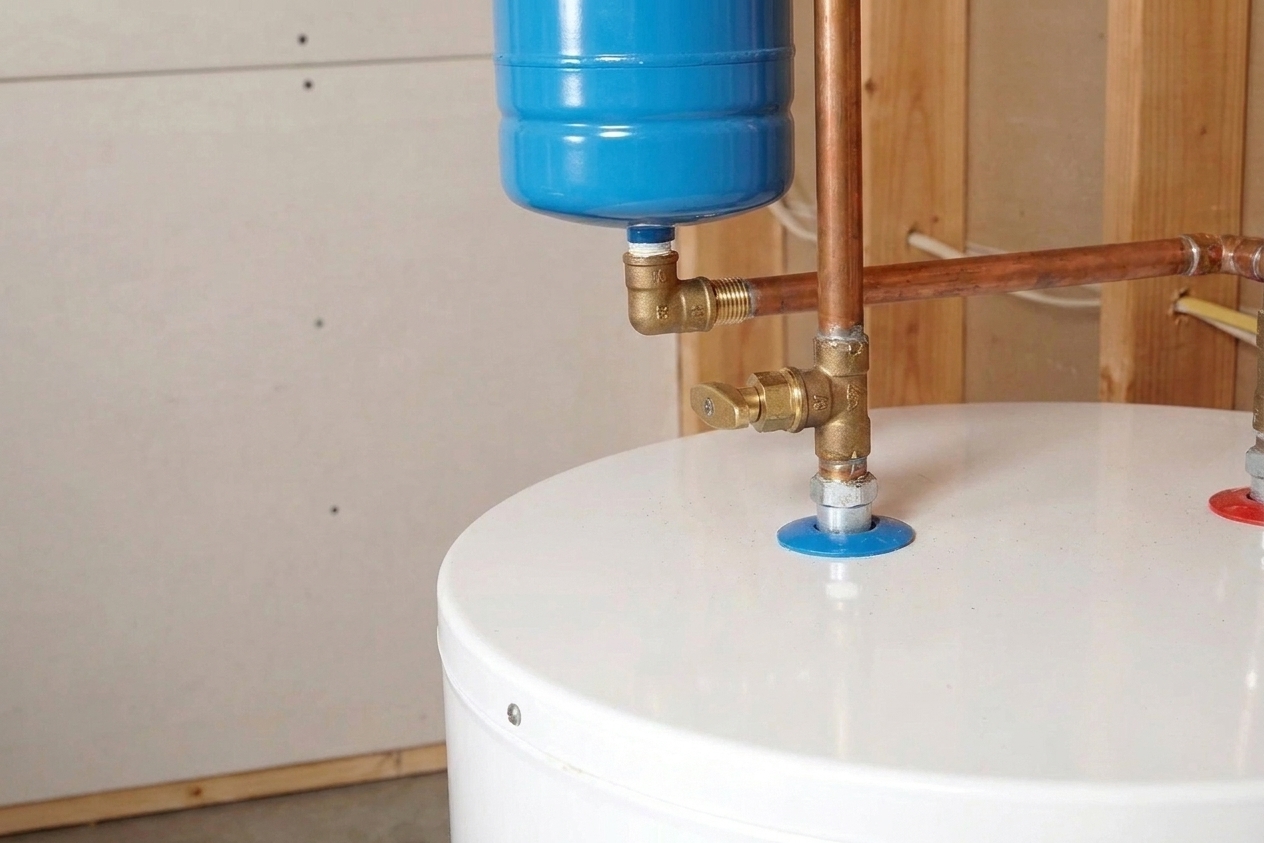
Cause 5: Expansion tank or nearby leak
If you have an expansion tank mounted above the water heater, it can leak at the threaded connection or fail internally. Also check nearby shutoff valves, unions, and any mixing valve or recirculation line.
What you’ll see
- Moisture near the expansion tank threads or on top of the heater
- Rust streaks or mineral buildup on fittings above the tank
- Water appearing to come “from the heater” but actually starting on an adjacent pipe
Fix
- Dry everything above the heater and watch closely with a flashlight.
- Tighten a seeping threaded joint slightly. If it persists, you may need to remove and re-seal the connection.
- Expansion tank check: Tapping the tank (top vs bottom) can give a clue, but it is not definitive. A better check is to shut off the cold water supply, relieve pressure by opening a hot faucet briefly, then check the tank’s air charge at the Schrader valve with a tire gauge. The air charge is typically set to match your home’s water pressure. If it is waterlogged, won’t hold air, or is corroded, it likely needs replacement.
Cause 6: Tank leak
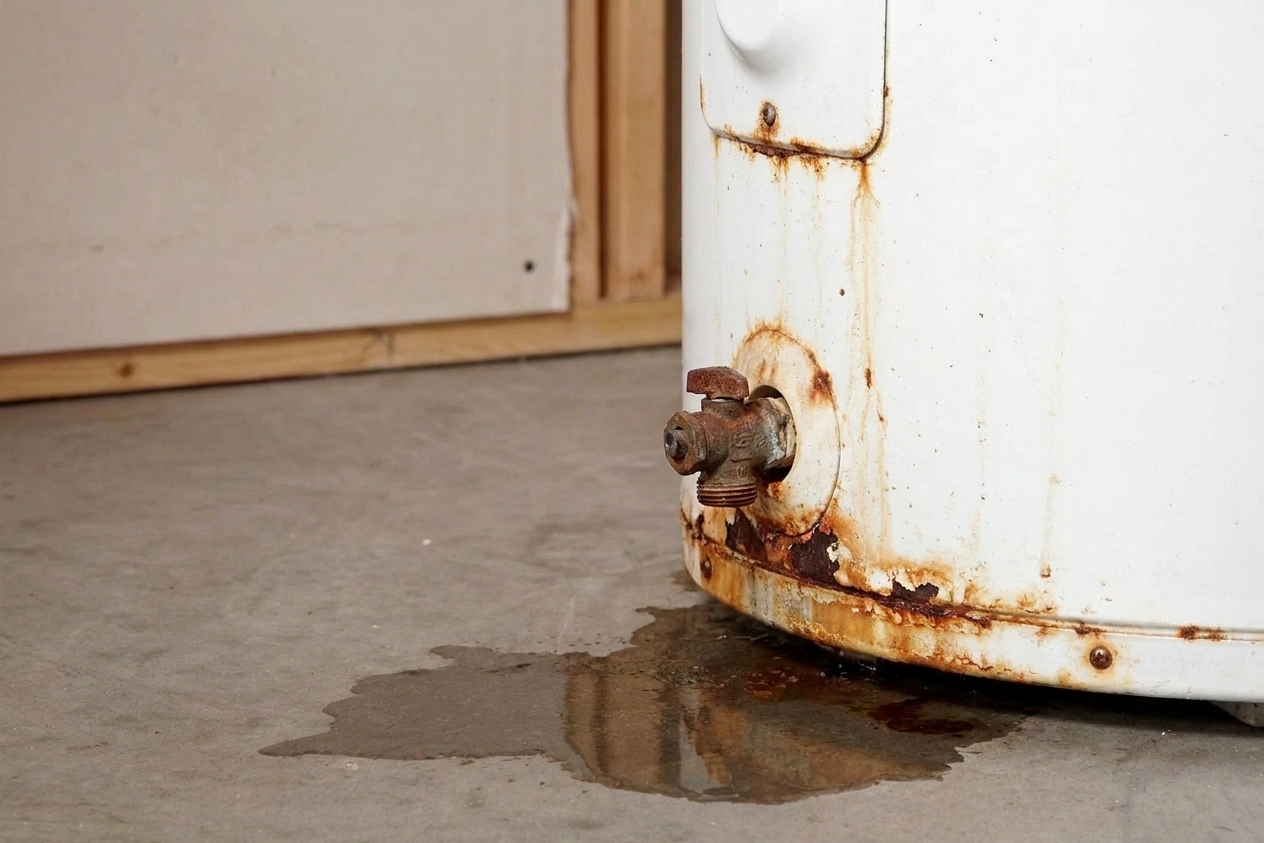
If water is coming from under the tank, or from a seam, or you see rusted-through metal, you may be looking at an internal tank failure. Once the steel tank is compromised, it is replacement time.
What you’ll see
- Water pooling from under the unit, not from a valve or fitting
- Rusty water and heavy corrosion on the base
- Moisture that returns even after everything is dried and fittings look clean
Fix
There is no reliable patch for a leaking tank. The fix is replacement.
- Keep the cold water supply off if the leak is active.
- Shut off power or gas.
- Plan replacement promptly to avoid a bigger flood. If your heater is in a finished area, consider shutting it down entirely until it is replaced.
Most tank-style water heaters last roughly 6 to 15+ years depending on water quality, maintenance, and a little luck. Anode rod maintenance can extend life, but if yours is leaking from the body, the decision is usually made for you.
Special case: Condensing units
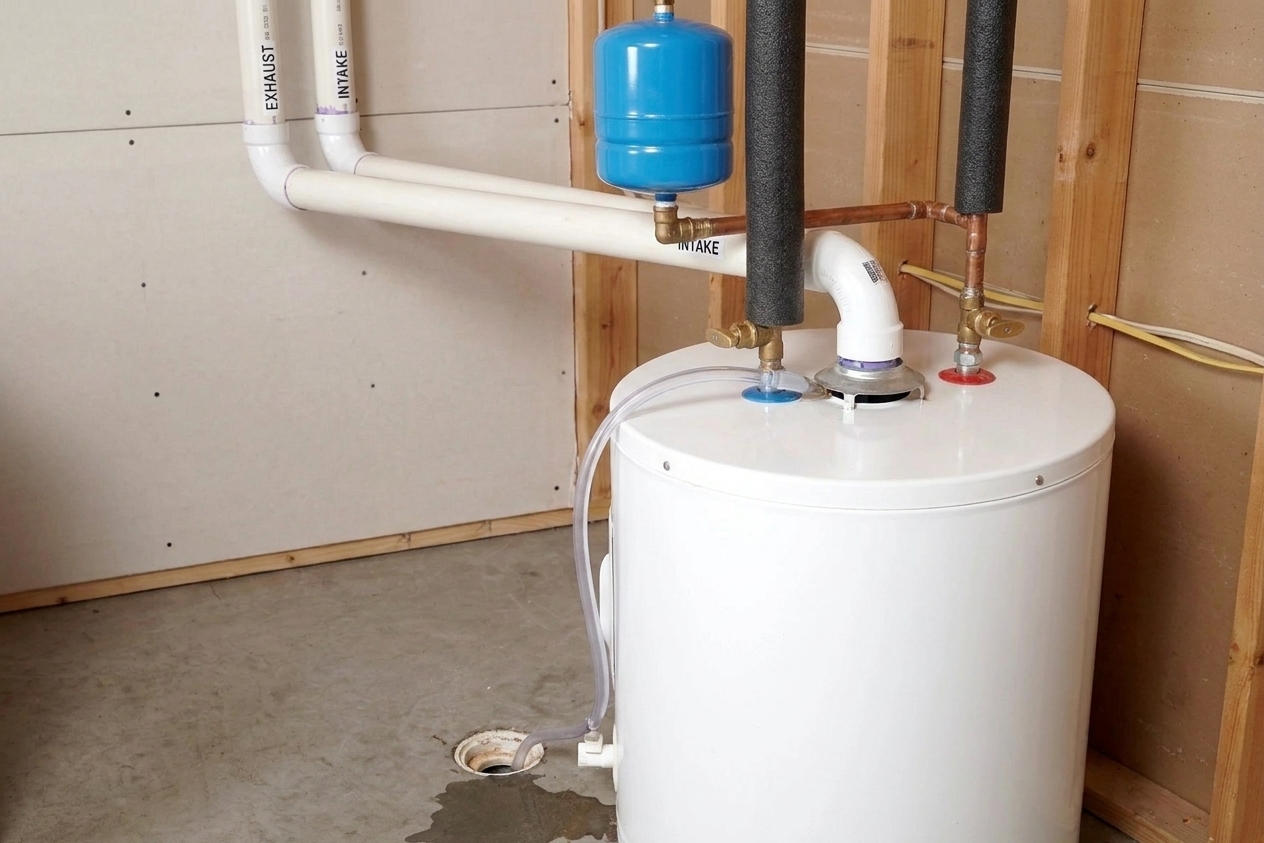
If you have a high-efficiency gas water heater (often with PVC venting), it may produce condensate. A loose condensate line, trap, or pump can leak and mimic a tank problem.
What you’ll see
- Drips near a condensate hose, neutralizer, trap, or small pump
- Water that seems to appear during or right after burner operation
- No active leak at the tank fittings, valve, or drain
Fix
- Follow the condensate tubing and check for loose connections and cracks.
- Make sure the line is not kinked or blocked.
- If you are unsure, call a pro. Condensate routing is simple, but it has to be correct.
When to call a pro
I love a good DIY win, but I love “not flooding your basement” even more. Bring in a licensed plumber or HVAC tech if:
- You suspect the tank is leaking internally
- You are dealing with gas lines and are not 100% confident
- The leak is tied to high water pressure (often over 80 psi) or you need an expansion tank or PRV installed
- You see electrical wiring that got wet on an electric heater
- You have recurring T&P valve discharge and cannot identify the cause
Fast checklist
If you want the shortest path to the answer, use this quick sequence:
- Look up top: fittings, flex connectors, expansion tank, shutoff valve.
- Check the T&P discharge pipe: any dripping, and is it unobstructed?
- Check the drain valve at the bottom front.
- Check condensate parts if you have a high-efficiency unit.
- Dry everything and watch for the first fresh drop.
- Confirm it is not condensation or another nearby leak.
- If water is coming from under the tank: plan a replacement.
FAQ
Should I turn off my water heater if it is leaking?
If there is active leaking, yes. Turn off the cold water supply first. Then shut off power at the breaker for electric units, or set the gas control to OFF for gas units. This reduces damage and keeps the heater from heating while it is compromised.
Is a small leak okay to ignore for a few days?
A tiny seep from a fitting might limp along, but I would not “set it and forget it.” Small leaks turn into big ones at the worst possible time. At minimum, shut off the water when you are away and keep a pan or wet vac handy until it is fixed.
Why is my water heater leaking only sometimes?
Intermittent leaks are often tied to heating cycles and pressure changes. Common culprits are T&P valve discharge, a barely-loose fitting, condensate issues on high-efficiency units, or condensation that comes and goes with humidity and usage.
How can I tell how old my water heater is?
Check the data plate on the tank for the serial number and manufacturing date. If it is not obvious, the manufacturer’s website usually has a serial number decoder. If you are already in the 10+ year range and it is leaking from the tank, replacement is typically the smart play.