
Install a Garbage Disposal on a Sink That Never Had One
Step-by-step, homeowner-friendly guide to adding a garbage disposal to a sink with only a basket strainer, including power options, mounting, dishwasher knockout, and drain hookup.
The first house I worked on as a young carpenter had a kitchen sink that looked normal from above, but underneath it was basically a plumbing museum. Basket strainer, old chrome trap, and exactly zero room to add anything. The homeowner wanted a garbage disposal, and I remember thinking, “How hard can it be?”
It is not hard, but it is specific. The good news is that if your sink has never had a disposal, you often get to start without an old disposal mount to fight. The more honest news is you can still find crusty shutoffs, tired slip joints, or wiring that is not what you hoped for. This guide walks you through the install up to the point where the unit is mounted, powered, and plumbed.
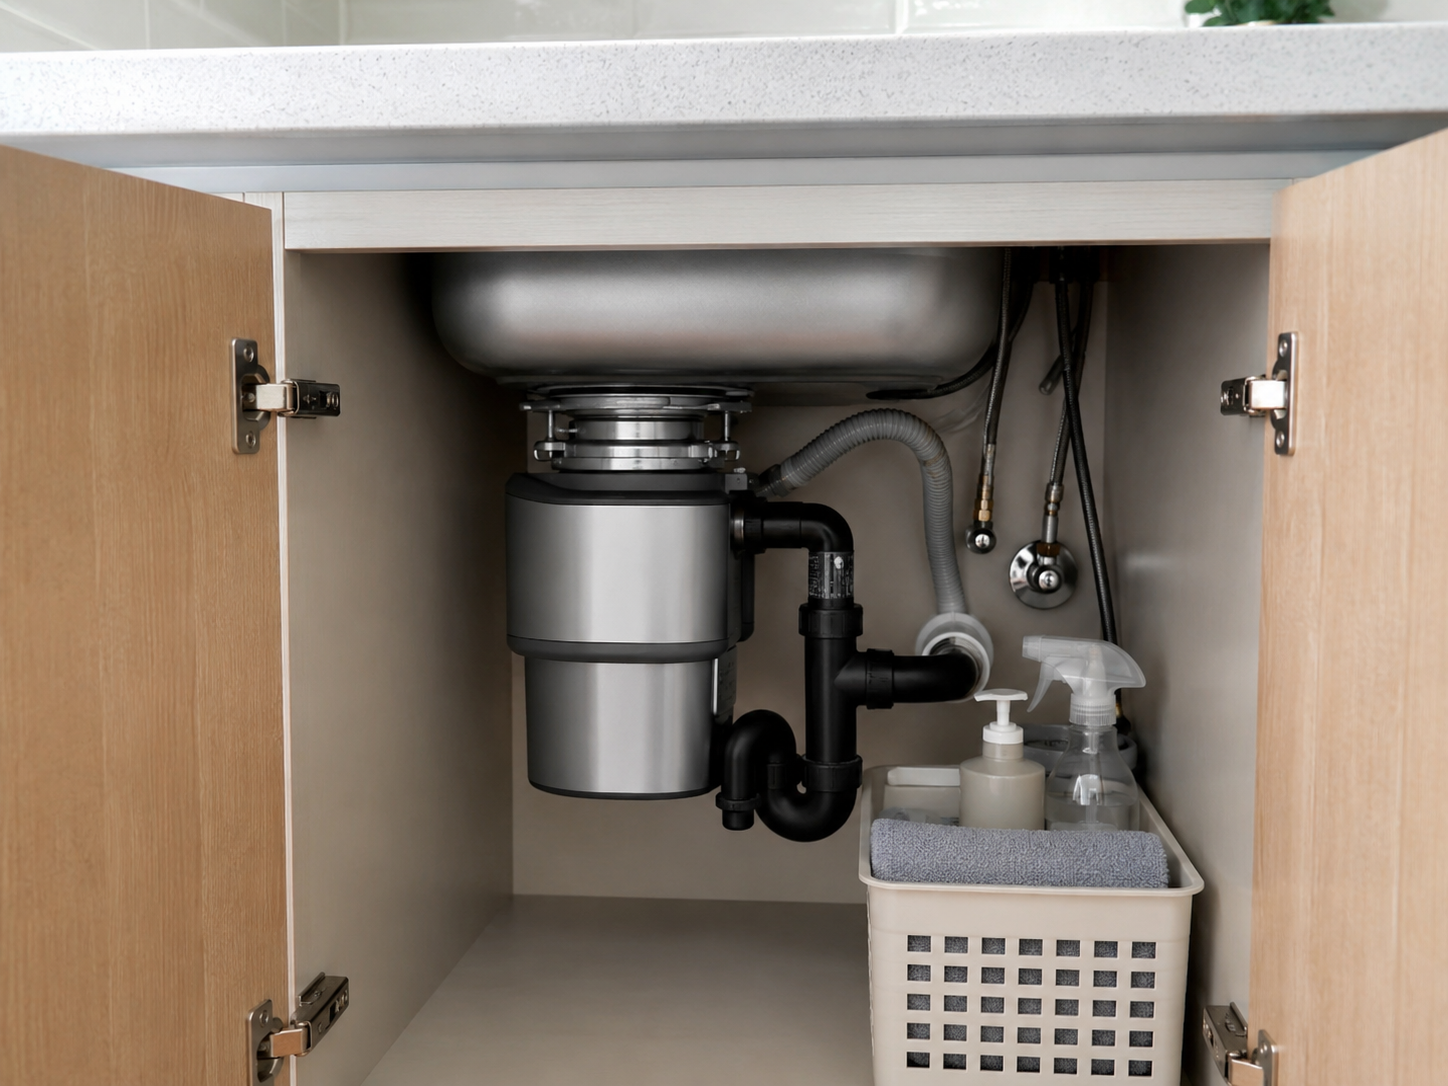
Before you buy anything: make sure your setup can take a disposal
Check space under the sink
Disposals are chunky. Open the cabinet and look for:
- Vertical clearance from the sink bottom to the cabinet floor.
- Side clearance for the body of the disposal, especially if you have a shallow sink basin, tilt-out tray, or pull-out trash system.
- Interference from shutoff valves, supply lines, or the drain coming out of the wall.
Confirm sink type and flange size
Most kitchen sinks use a standard 3-1/2 inch drain opening. That is what disposal mounting assemblies are made for. If you have an odd drain size or an extra-thick sink (some cast iron, some farmhouse setups), check the disposal brand notes before purchasing.
Plan power: corded plug, wall switch, or air switch
This is the decision that determines whether you are doing basic electrical work or calling in a pro.
- Corded to an outlet: Easiest. Disposal plugs into a receptacle under the sink. If you want a wall switch to control it, you will need a switched receptacle setup (or a switched circuit feeding that outlet).
- Hardwired: No plug. A cable runs into the disposal wiring compartment. Typically controlled by a wall switch.
- Air switch: A common retrofit option when running new wiring is a pain. A small button on the countertop controls a switch module under the sink.
Safety reality check: If you are not 100 percent comfortable working inside an electrical box, hire an electrician for the wiring part. A disposal is forgiving. Household wiring is not.
Code note: Kitchens are a wet location and rules vary. Many installs require GFCI protection for under-sink receptacles, and whether a dishwasher and disposal can share a circuit depends on load and local requirements. If you are unsure, check your local code or pull a permit.
Tools and parts you will want on hand
If you have done basic sink repairs, you probably own most of this already.
Tools
- Adjustable wrench or channel-lock pliers
- Large slip-joint pliers (helpful for the mounting ring)
- Flathead screwdriver
- Phillips screwdriver
- Putty knife or plastic scraper
- Bucket and a few rags
- Hacksaw or PVC cutter (only if you need to adjust drain pipe length)
- Wire stripper and voltage tester (only if hardwiring or adding a switched outlet)
- Allen key (hex wrench) for jams (many disposals include one)
Parts and materials
- Garbage disposal unit (with mounting hardware)
- Disposal discharge tube or drain elbow (usually included)
- Plumber’s putty or silicone (use what your sink manufacturer recommends)
- New P-trap parts if your existing ones are corroded or mismatched
- Dishwasher drain hose clamp (if connecting dishwasher)
- Disposal power cord kit (if converting to plug-in and your unit does not include a cord)
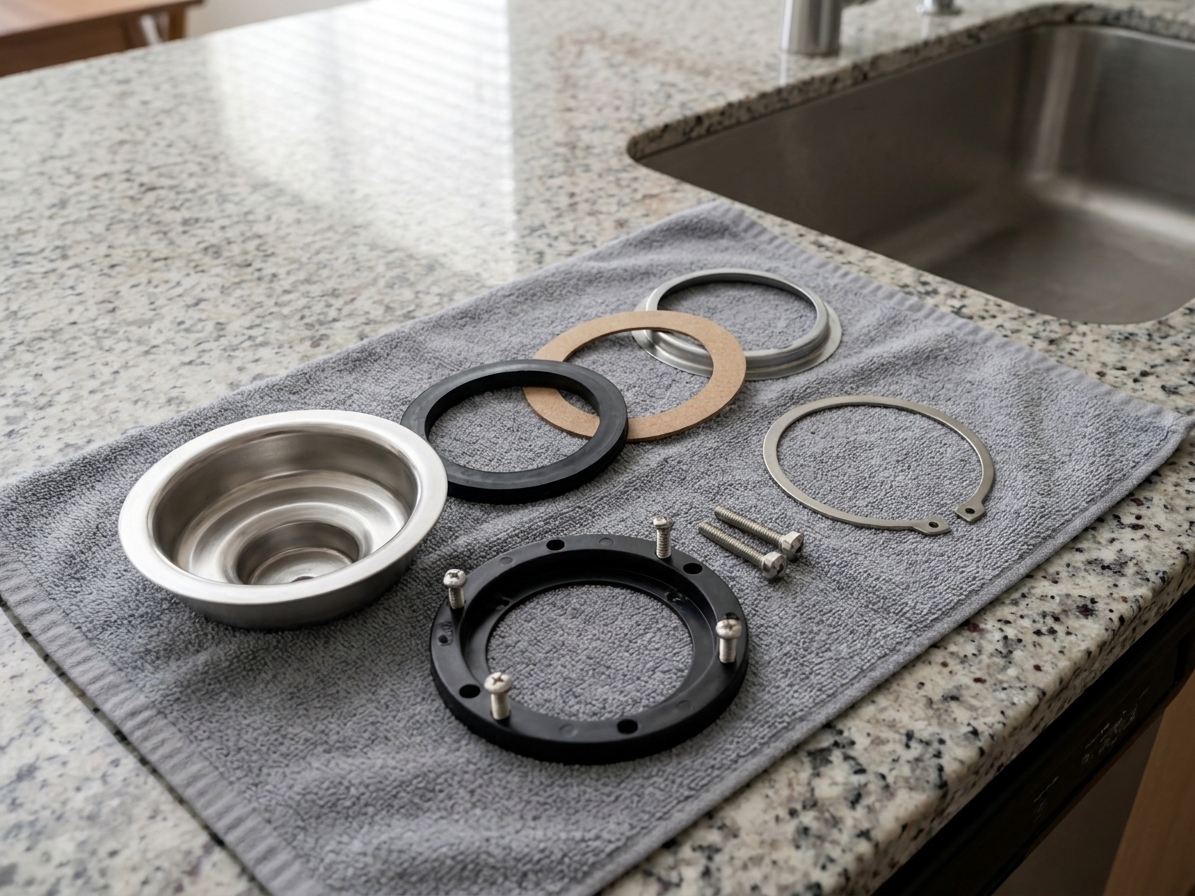
Step 1: Turn off power and clear the cabinet
Even if there is no disposal yet, you might be working near an outlet, dishwasher plug, or wires for a future switch.
- Empty the cabinet and lay down a towel.
- If there is an outlet under the sink, turn off the breaker that feeds it.
- Set a bucket under the trap. You will spill a little water. Everyone does.
Step 2: Remove the basket strainer
A disposal replaces the basket strainer. This is where most “why won’t it come apart” frustration lives, especially if the strainer is old.
- Disconnect the drain below the sink: loosen the slip nuts on the P-trap and trap arm, then swing the trap out into your bucket.
- Hold the strainer steady: from above, grab the strainer body so it does not spin while you work underneath.
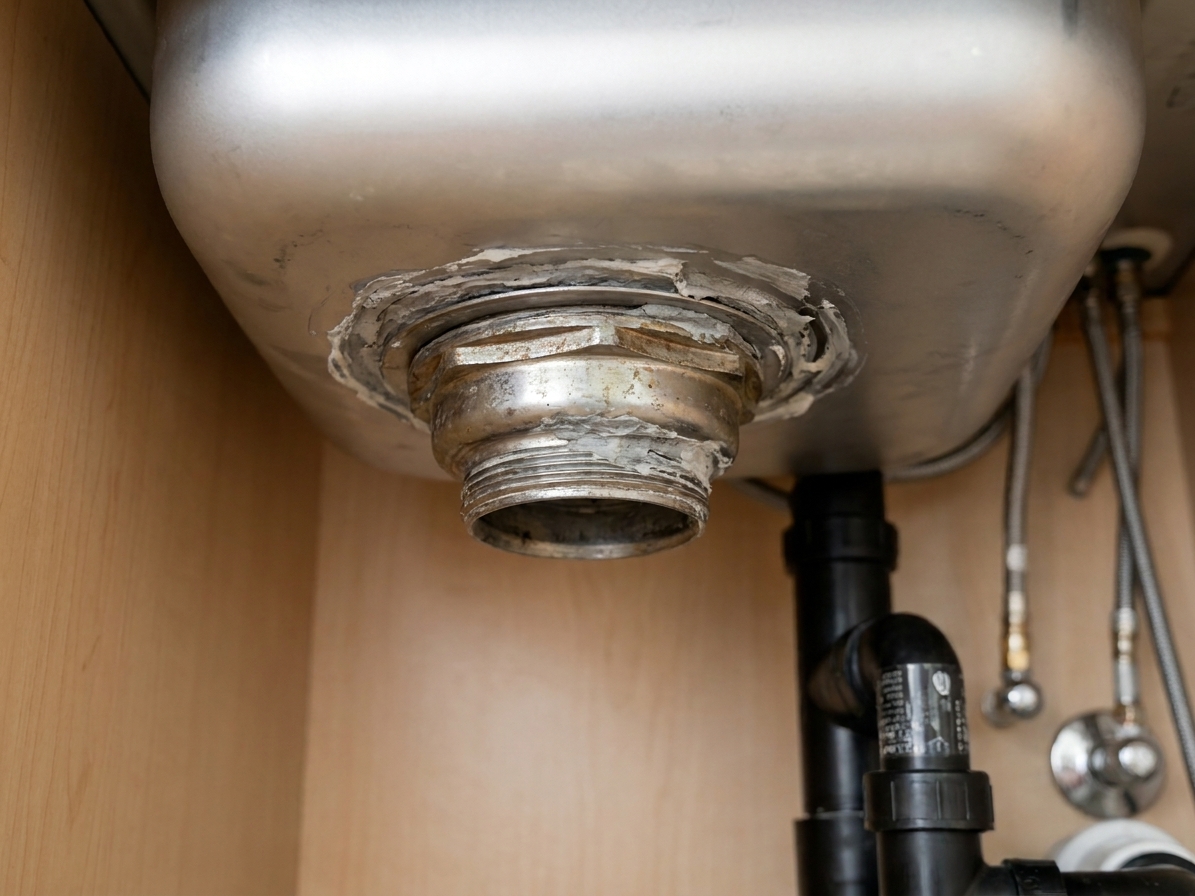
- Remove the strainer locknut: look up under the sink at the bottom of the strainer. You will see a large locknut holding it tight. Loosen it with channel-locks or a basket strainer wrench if you have one.
- Free the strainer: if it will not pop out from above, tap upward gently from below with a screwdriver handle or a small block of wood. Then lift it out from the top.
- Clean the opening: scrape off old putty so you start with a clean surface.
If the locknut is frozen with corrosion, a little penetrating oil and patience helps. If it is truly hopeless, you can cut the strainer body, but that is a last resort.
Step 3: Install the disposal mounting assembly
This is the “stack of rings” part. Take your time and do it in order.
From the top of the sink
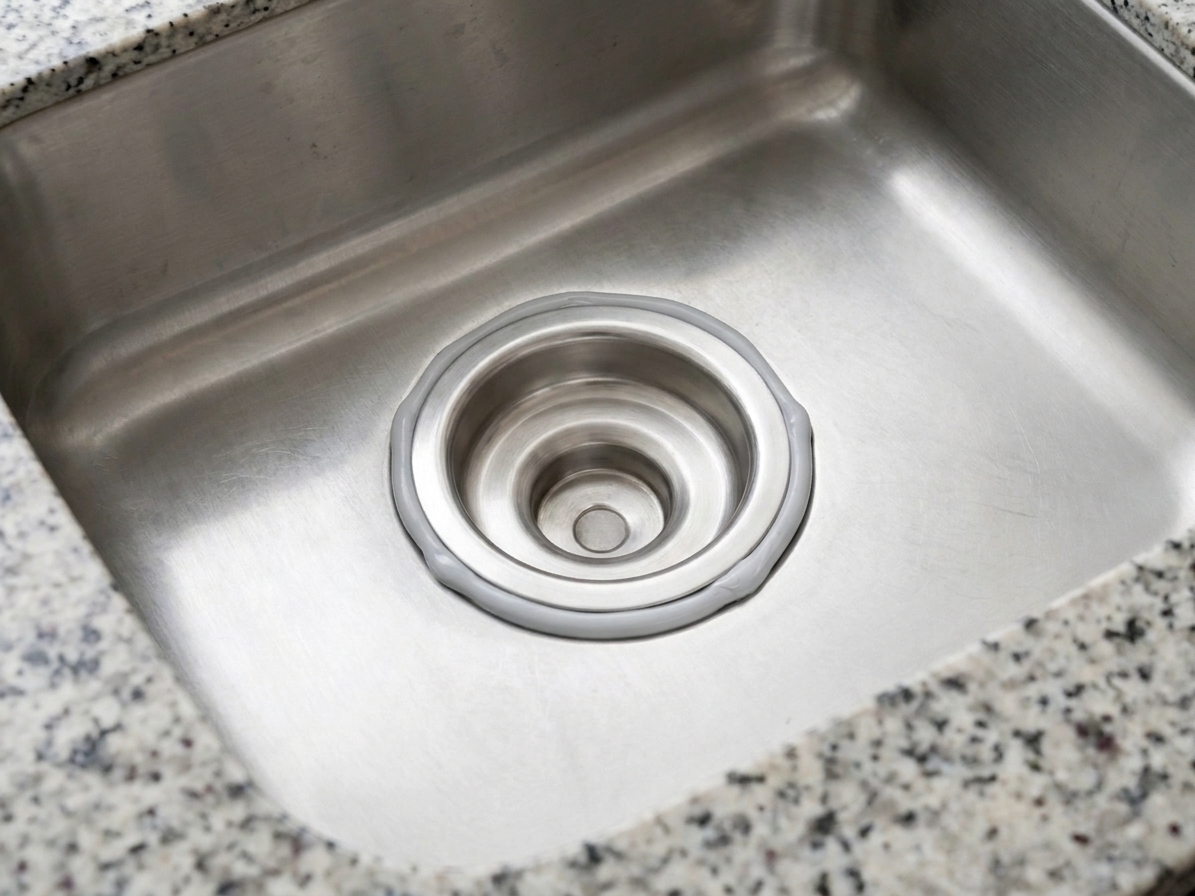
- Roll a rope of plumber’s putty (or apply a thin bead of silicone if required) and place it under the sink flange.
- Press the flange down into the sink drain opening so it seats evenly.
From under the sink
- Slide on the rubber gasket and then the fiber or cardboard gasket (order varies by brand, so follow your disposal instructions).
- Add the backup ring if your kit includes one.
- Install the snap ring into the groove to hold everything in place.
- Tighten the mounting assembly evenly per your model (some use a threaded ring, some use a compression ring and screws) until the flange is snug and putty squeezes out slightly at the top.
Wipe away the squeezed-out putty from around the flange in the sink basin. You want a clean seal line, not a gray putty mustache.
Marcus tip: When you tighten the mounting assembly, alternate around the ring. If you crank one side down all at once, the flange can tilt and you end up chasing a slow seep later.
Step 4: Plan the electrical before hanging the disposal
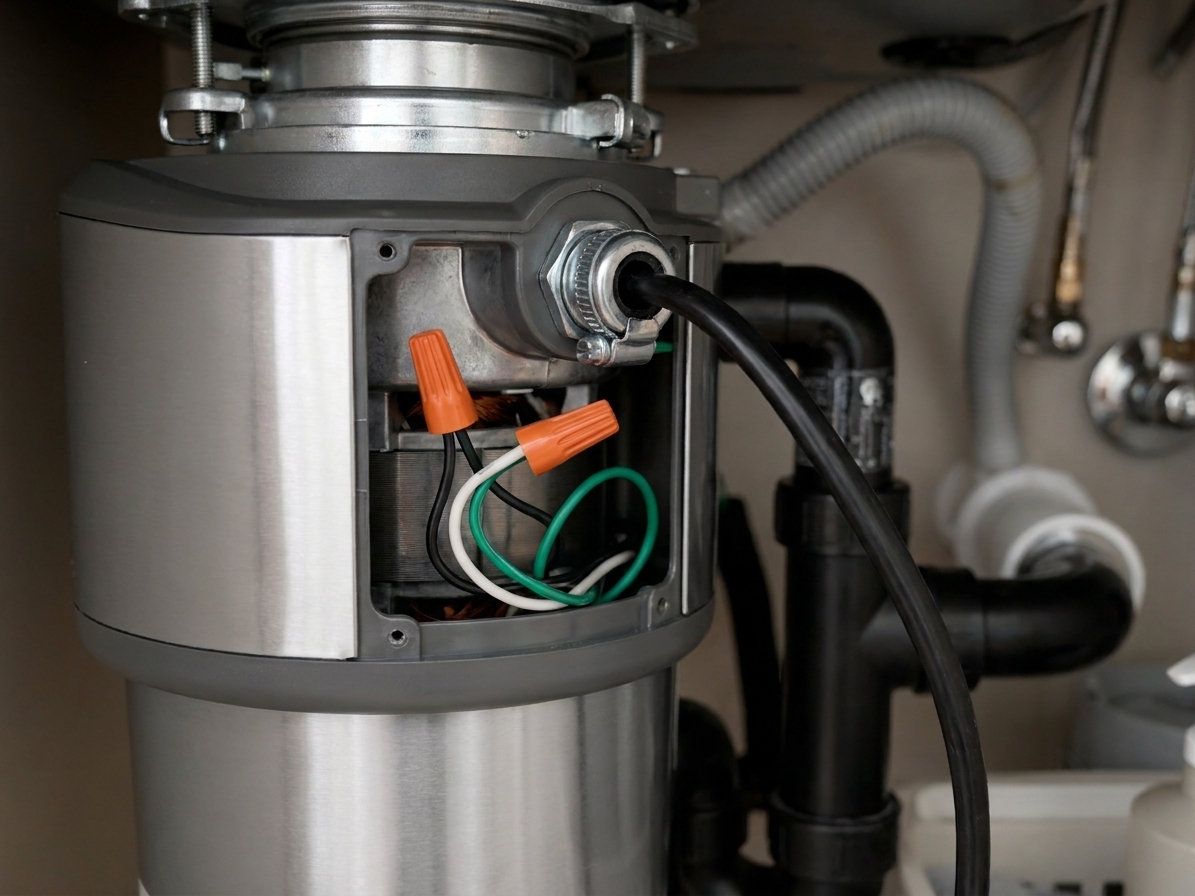
Once the disposal is mounted, working in the wiring compartment is possible, but it is a lot nicer on a workbench or on a towel in the cabinet.
Option A: Plug-in cord to an outlet
Some disposals come with a cord. Some do not. If yours does not, you will need a power cord kit made for disposals.
- Make sure the breaker is off.
- Remove the small wiring cover plate on the disposal.
- Feed the cord through the strain relief clamp into the wiring compartment.
- Connect wires: typically black to hot, white to neutral, green to ground. Match to your disposal’s labeled terminals.
- Tighten the strain relief so tugging the cord cannot pull on the connections.
Option B: Wall switch (hardwired or switched receptacle)
There are two common “switched” outcomes:
- Switched receptacle: the disposal plugs in, but the outlet is controlled by a wall switch.
- Hardwired to switch: cable goes directly into the disposal wiring compartment, controlled by a switch.
Option C: Air switch
An air switch can be a clean option when you want switch control but do not want to open walls for a new electrical box. It still has electrical requirements, so follow the manufacturer instructions closely.
Code and safety note: Electrical requirements vary by location, and kitchens are a wet environment. If you are adding a new circuit, a new box, or converting an outlet to switched power, an electrician is money well spent.
Step 5: Prep for dishwasher connection
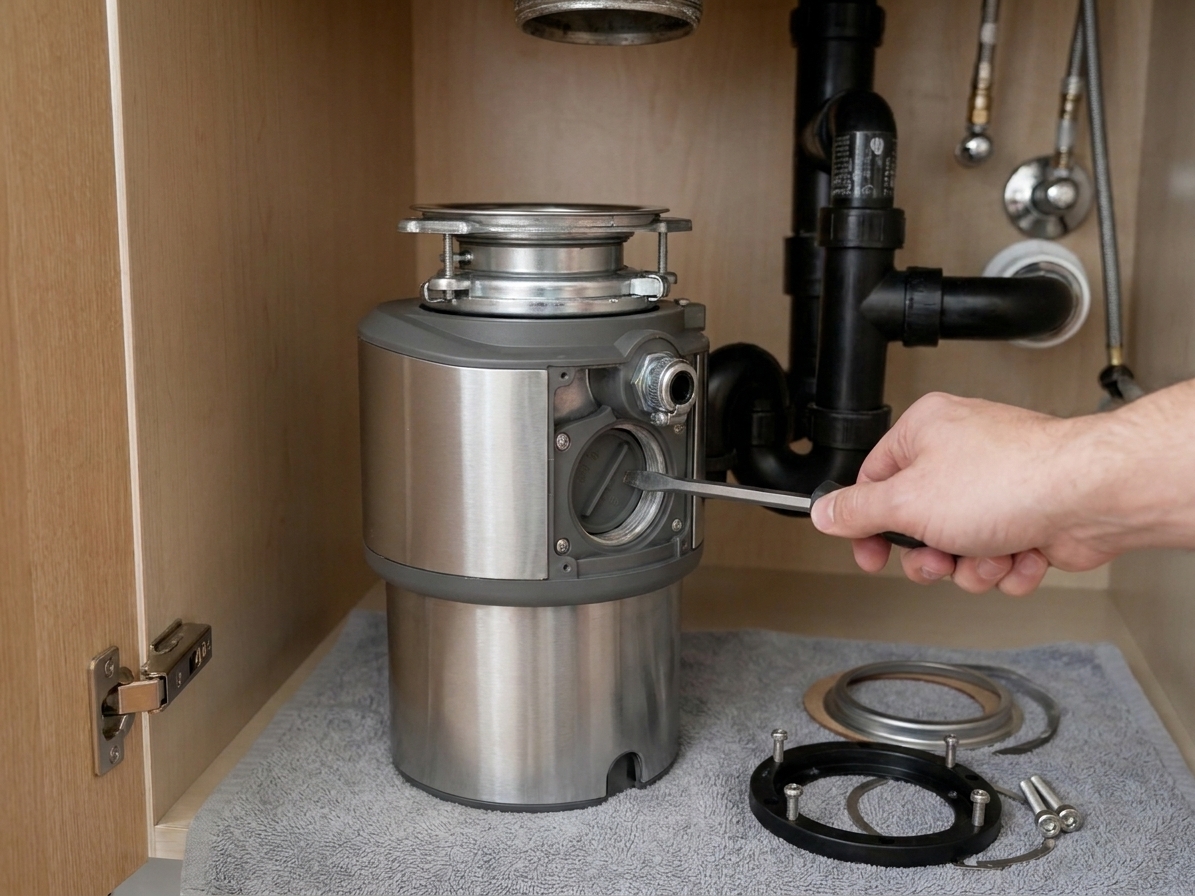
If you have a dishwasher and you want it to drain into the disposal, there is one step you must do before you hook up the dishwasher hose: knock out the inlet plug.
- Locate the dishwasher inlet on the disposal. It is a small port on the side of the unit.
- Place a screwdriver against the center of the knockout plug inside the inlet.
- Tap firmly with a hammer until the plug pops into the disposal’s grinding chamber.
- Reach into the disposal opening and remove the loose plug piece. Do not leave it in there.
If you do not have a dishwasher, leave the knockout intact.
Step 6: Hang the disposal
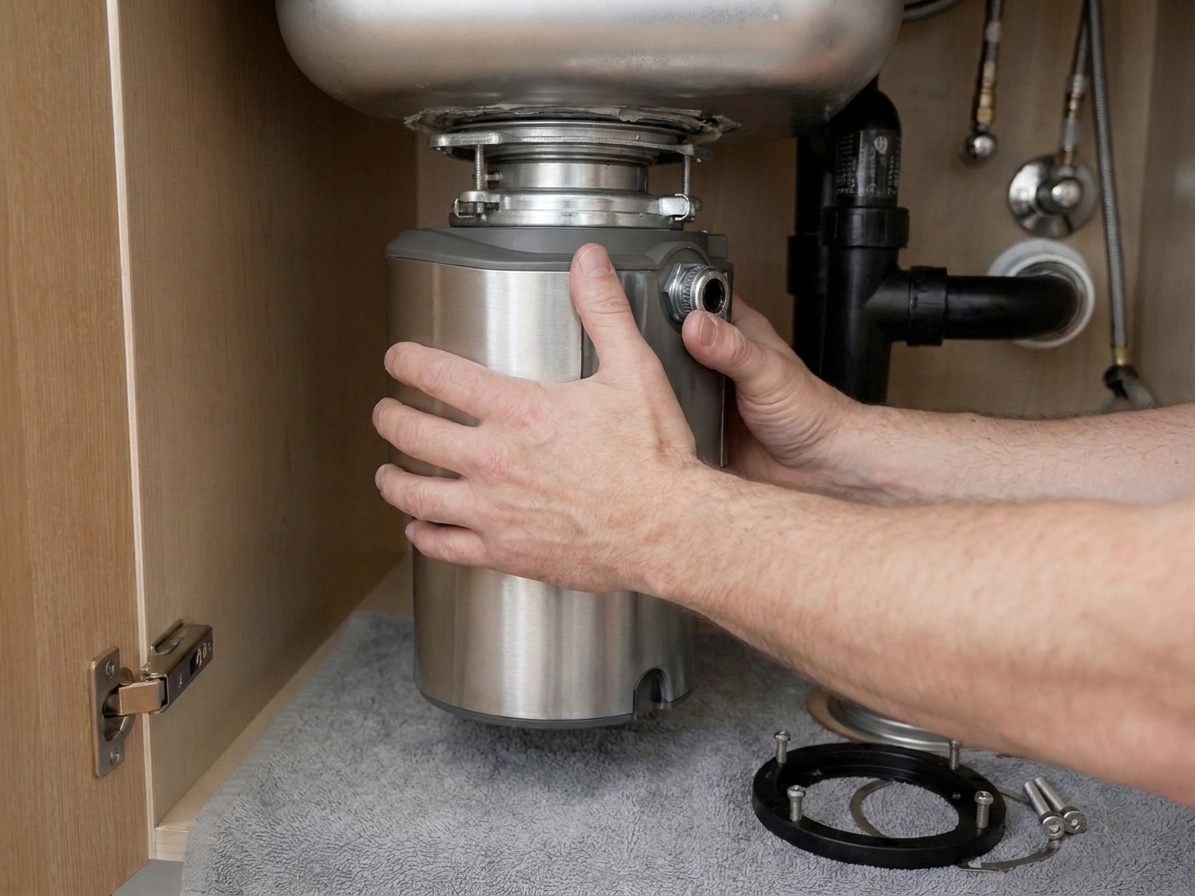
This is the heavy part. Many units are in the 12 to 20 pound range, and premium models can be more. If you have a bad shoulder or a tiny cabinet opening, grabbing a helper is not cheating.
- Make sure the mounting ring is ready and the disposal’s mounting tabs are aligned.
- Lift the disposal up and engage it onto the mounting ring.
- Rotate the unit until it locks into place. Many brands use a cam or twist-lock system.
- Use a screwdriver in the mounting lugs to tighten and fully seat the unit.
Before you tighten everything to the final “that is not going anywhere” level, think ahead: you want the discharge outlet aimed toward your drain line in the wall.
Depending on the brand, you may also have a sink baffle or splash guard that snaps in from the top after the flange is installed. If your kit includes one, install it per the instructions so it sits flat.
Step 7: Install the discharge tube
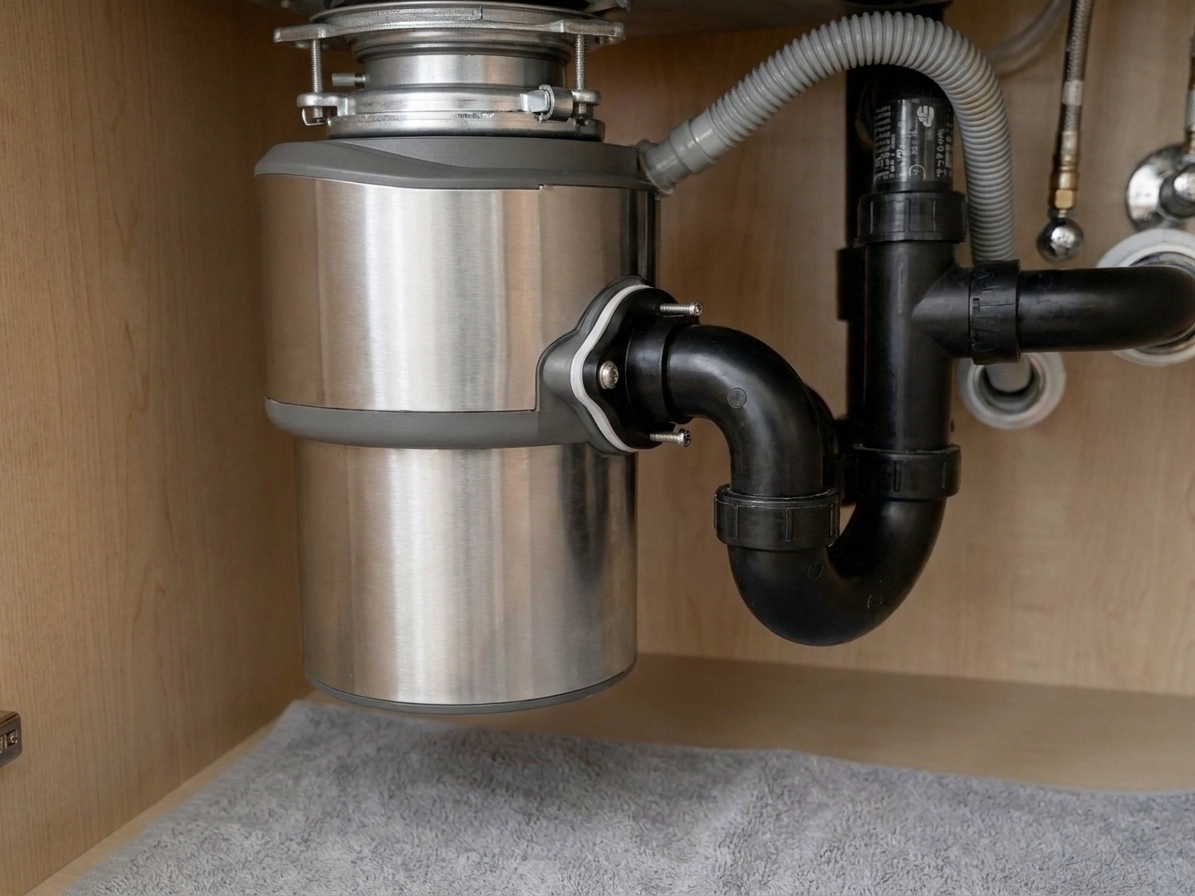
This is the outlet that carries water and food waste from the disposal to your trap.
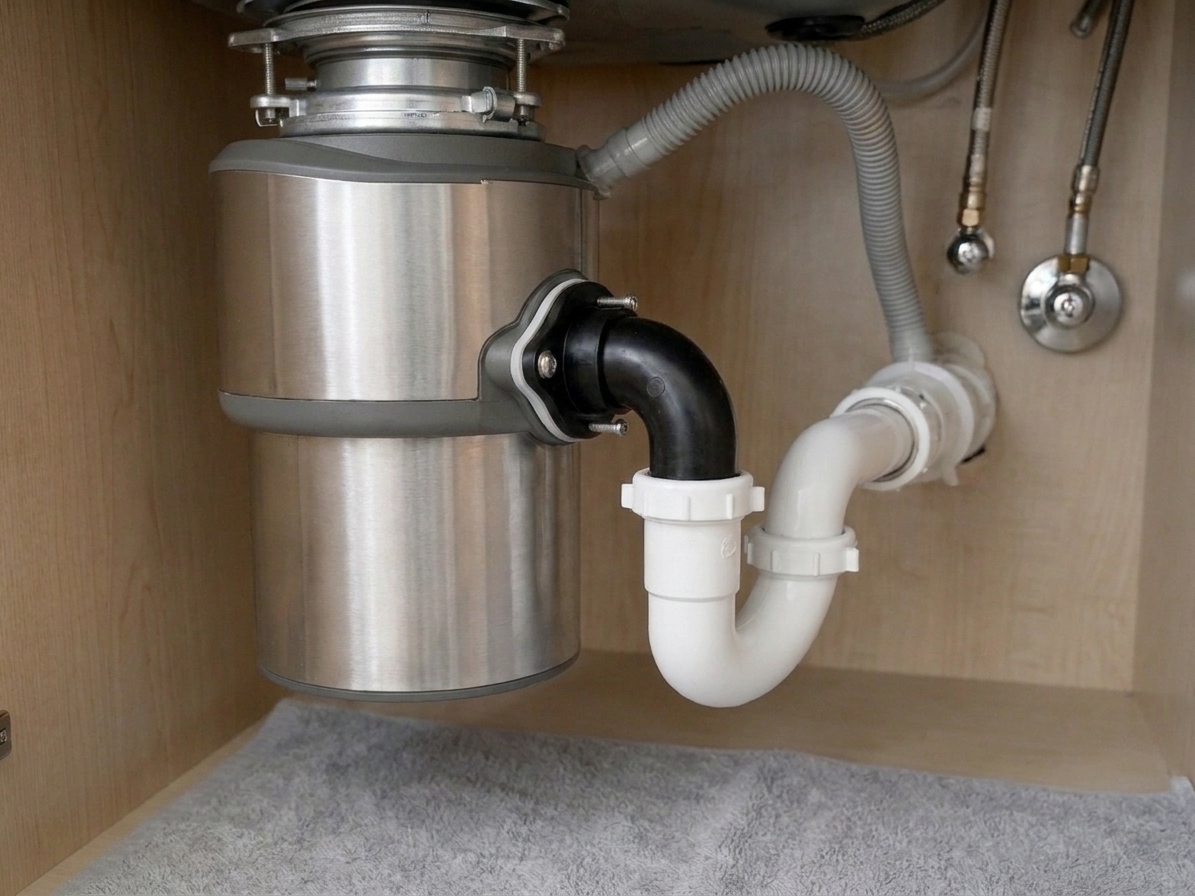
- Attach the drain elbow or discharge tube to the disposal outlet using the gasket and bolts provided.
- Point the elbow toward the wall drain.
- Tighten the bolts evenly so the gasket compresses uniformly.
Some setups use a metal discharge tube, some use plastic. Either can work, but make sure the gasket is seated properly and the bolts are snug, not stripped.
Step 8: Connect the drain and P-trap
Your old trap may or may not line up once a disposal is added. That is normal. A disposal outlet sits lower than a basket strainer, so sometimes you need to rebuild the trap arm length or swap a couple fittings.
One common single-bowl layout
- Disposal discharge elbow
- Trap inlet (the end of the U-bend that receives the elbow)
- Trap outlet to trap arm (straight section toward the wall)
- Wall stub-out (the pipe coming out of the wall)
If you have a double-bowl sink, the layout often changes. You may have a continuous waste tube and a tee or baffle setup tying both bowls together, with the trap positioned under one side. Dry-fit is your friend here.
Dry-fit first
Before tightening anything, hold the pieces in place and confirm:
- The trap lines up without forcing the pipes sideways.
- The trap arm has a gentle, natural fit into the wall connection.
- The slip nuts can thread on without cross-threading.
Once it all lines up, tighten slip nuts hand-tight, then give each one a small additional snug with pliers. Slip joints seal with washers, not brute strength.
Step 9: Connect the dishwasher hose
If you knocked out the dishwasher inlet plug earlier, you are ready to attach the hose.
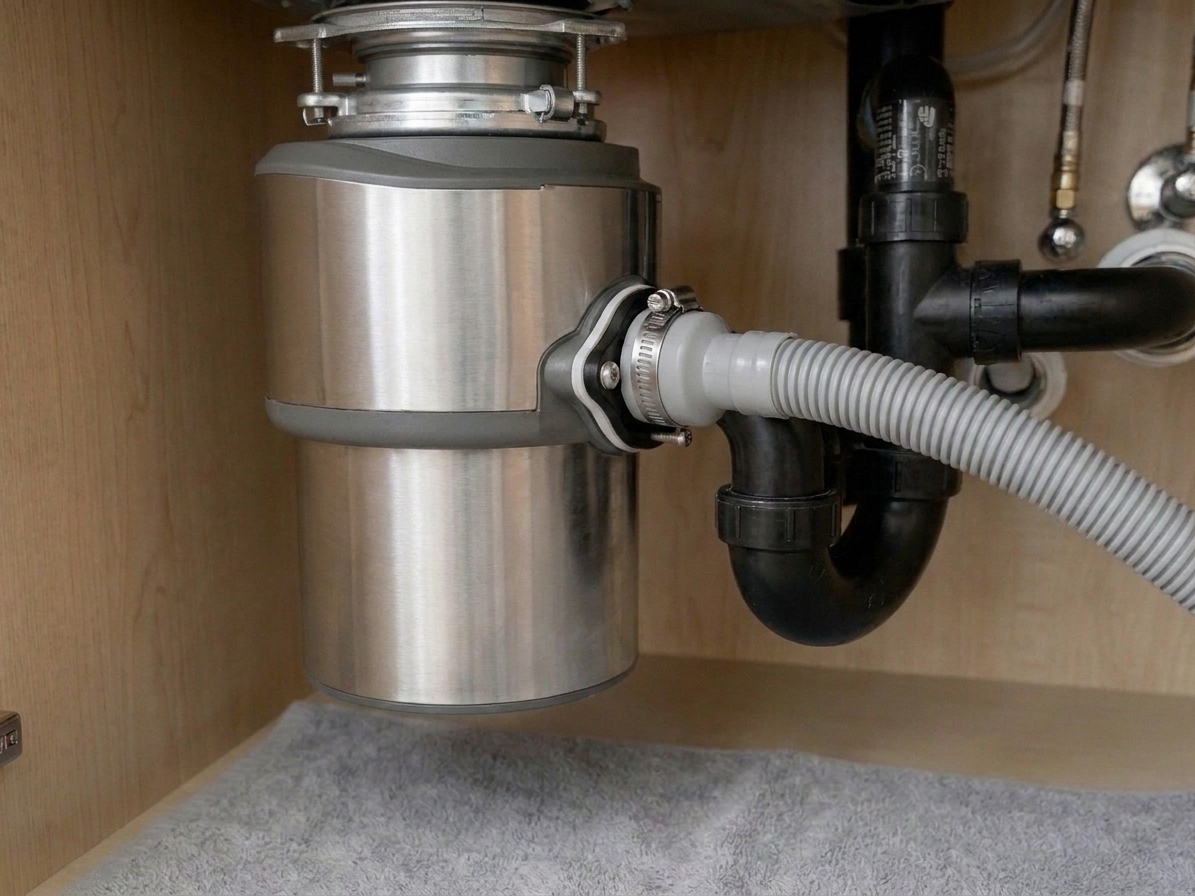
- Slide a hose clamp onto the dishwasher drain hose.
- Push the hose fully onto the disposal’s dishwasher inlet nipple.
- Position the clamp over the hose and nipple, then tighten securely.
If your dishwasher hose is long, make sure it is routed neatly and not kinked. If you do not have an air gap, secure a high loop up under the countertop as high as possible. Some areas require an air gap, so follow your local rules and dishwasher manual.
Final checks and first run
You are not doing a full troubleshooting session yet, but you can do smart checks before you flip the switch.
- Mounting ring tight: disposal is fully locked and does not rock.
- Discharge elbow bolts snug: gasket is not pinched.
- Trap alignment: pipes are not under tension.
- Dishwasher knockout removed: only if you connected a dishwasher hose.
- Wiring compartment cover installed: no exposed connections.
- Know your reset: most disposals have a reset button on the bottom. Many also have a hex socket underneath for an Allen key to free a jam. Find them now so you are not hunting later with water in the cabinet.
For your first test, keep the cabinet empty and a flashlight nearby. Run water and check for drips at every slip nut and gasket. Fill the sink a bit, release the water, and watch the plumbing as it drains. If anything needs a re-seat or a gentle snug, you will catch it right away.
Marcus tip: The disposal does not need to be over-tightened everywhere. What it needs is straight parts, clean washers, and even compression. That is the boring secret to a dry cabinet.
FAQ
Do I need a special sink?
Most standard kitchen sinks can accept a disposal as long as the drain opening is the standard 3-1/2 inch and there is enough cabinet clearance. Very thin sinks can flex, and some specialty setups may need extra reinforcement, but the average stainless or cast iron sink is fine.
Can I install a disposal with old metal drain pipe?
Yes, but plan on adapting from the disposal outlet to what you have. Many DIYers replace the trap section with PVC or tubular plastic while leaving the wall stub-out alone, using the correct adapter at the wall connection. If your metal is heavily corroded, consider replacing more of the drain while you have it apart.
What happens if I forget the dishwasher knockout?
Your dishwasher will not drain properly. If you have already installed everything, you may still be able to knock it out, but it is much easier to do before the hose is clamped on and before the cabinet is crowded with plumbing.
Do all disposals come with a power cord?
No. Many are sold as hardwire-ready units without a cord. If you want plug-in, buy a compatible power cord kit or choose a model that includes a factory cord.
What changes with a double-bowl sink?
Usually you add a continuous waste line and a tee so both bowls can drain, with the disposal on one side and the other bowl tying in. The trap is still downstream of both bowls. The exact parts depend on which side the disposal is on and where the wall drain is, so dry-fit everything before you cut anything.
Is a disposal OK on a septic system?
Often yes, but it depends on your system and local guidance. Some manufacturers have septic-friendly recommendations, and many plumbers will tell you the real key is moderation. If your tank is marginal or you already baby it, skipping the disposal is not a terrible idea.