
How to Replace a Toilet Tank-to-Bowl Gasket
Fix leaks between your toilet tank and bowl by replacing the tank-to-bowl gasket and bolt seals. Step-by-step, with tips to tighten safely without cracking porcelain.
If you see water beading up or dripping from the bolts that connect the toilet tank to the bowl, you are usually dealing with a tired tank-to-bowl gasket or failing bolt seals. The good news: this is a very doable DIY fix if you take your time and resist the urge to crank down on porcelain like it owes you money.
This guide focuses on the leak at the tank joint, not water on the floor around the base, tank condensation, or a supply-hose weep.
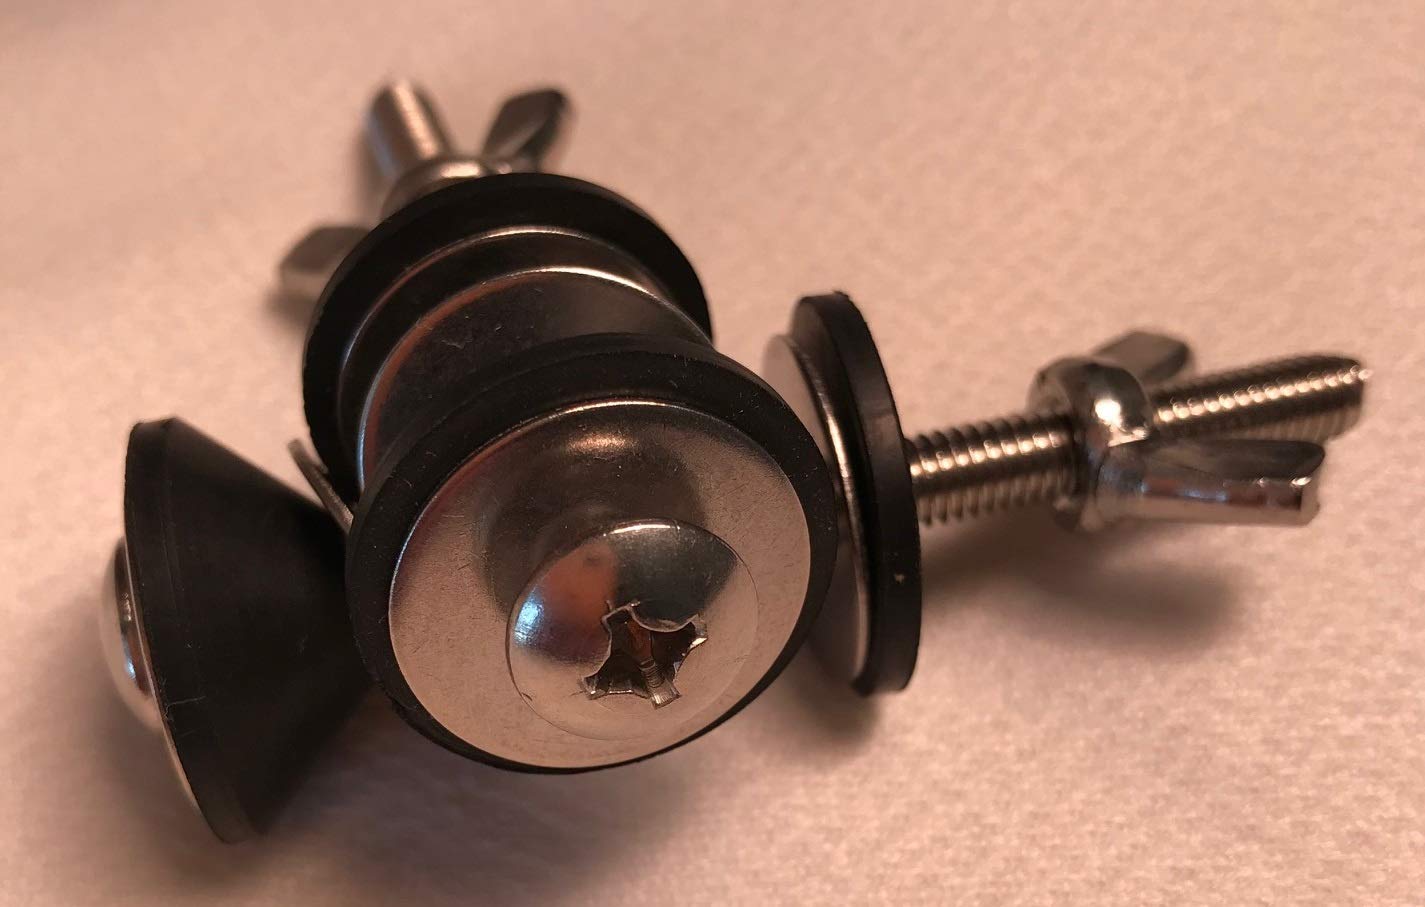
How to tell it is the tank gasket
Before you buy parts, confirm the leak is actually coming from the tank joint and not from water traveling down from somewhere else.
- Drips form under the tank and run down the back of the bowl, often right below the bolt locations.
- Water appears after a flush (when the tank empties and refills) more than when the toilet sits idle.
- You can feel moisture under the tank where it meets the bowl, especially near the bolt heads or nuts.
- The supply connection is dry. A slow drip at the fill valve shank or supply nut can mimic a tank-joint leak if it tracks along the underside of the tank.
Quick check: Dry everything with a towel. Flush once. Watch the underside of the tank, the bolt areas, and the supply connection with a flashlight. If you see water start at the bolt shanks or the tank-to-bowl seam, you are in the right place.
Tools and parts you will need
Tools
- Adjustable wrench or deep socket (common sizes include 7/16 inch, 1/2 inch, 9/16 inch, or 13 mm depending on hardware)
- Large flathead screwdriver (only if your bolt heads are slotted and accessible inside the tank)
- Sponge and a small cup or turkey baster for removing remaining tank water
- Old towels and a small bucket
- Flashlight
Parts
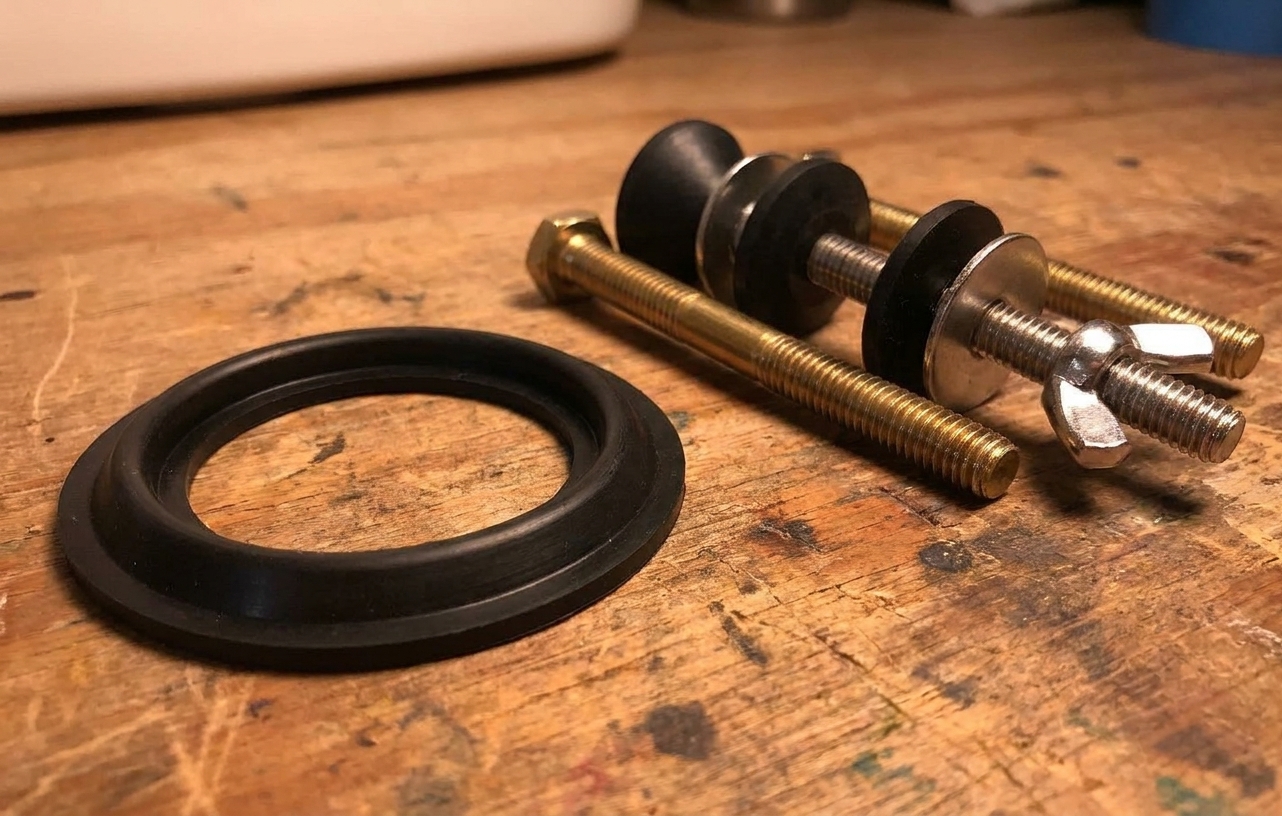
- Tank-to-bowl gasket (match to your toilet brand and model if possible)
- Tank-to-bowl bolt set (recommended to replace, even if the bolts look okay)
In most kits, the bolt seals are a stack of rubber washers and sometimes metal washers. The key rule is this: rubber seals go against porcelain. After that, follow your kit diagram because washer order varies by brand and bolt style.
Note: Some toilets (including many one-piece toilets and some proprietary tank designs) do not use a standard tank-to-bowl gasket and bolt kit. If your setup does not match what you see here, shop by model number and use the manufacturer parts.
Step 1: Shut off water and empty tank
- Turn off the shutoff valve behind the toilet, clockwise until it stops.
- Flush and hold the handle down to drain as much as possible.
- Sponge out the remaining water from the bottom of the tank into a bucket.
If your shutoff valve does not fully stop the water, you can still do the job, but it gets messy fast. In that case, you may want to pause and address the valve before continuing.
Step 2: Disconnect the supply line
Place a towel under the connection, then loosen the nut where the supply line connects to the fill valve shank under the tank.
- Most plastic nuts can be loosened by hand.
- If it is stubborn, use an adjustable wrench gently.
Let any trapped water drain into your towel or bucket.
If the supply line is old, kinked, or the rubber cone washer looks chewed up, this is a good time to replace it. It is cheap, and you already have it off.
Step 3: Remove the tank bolts
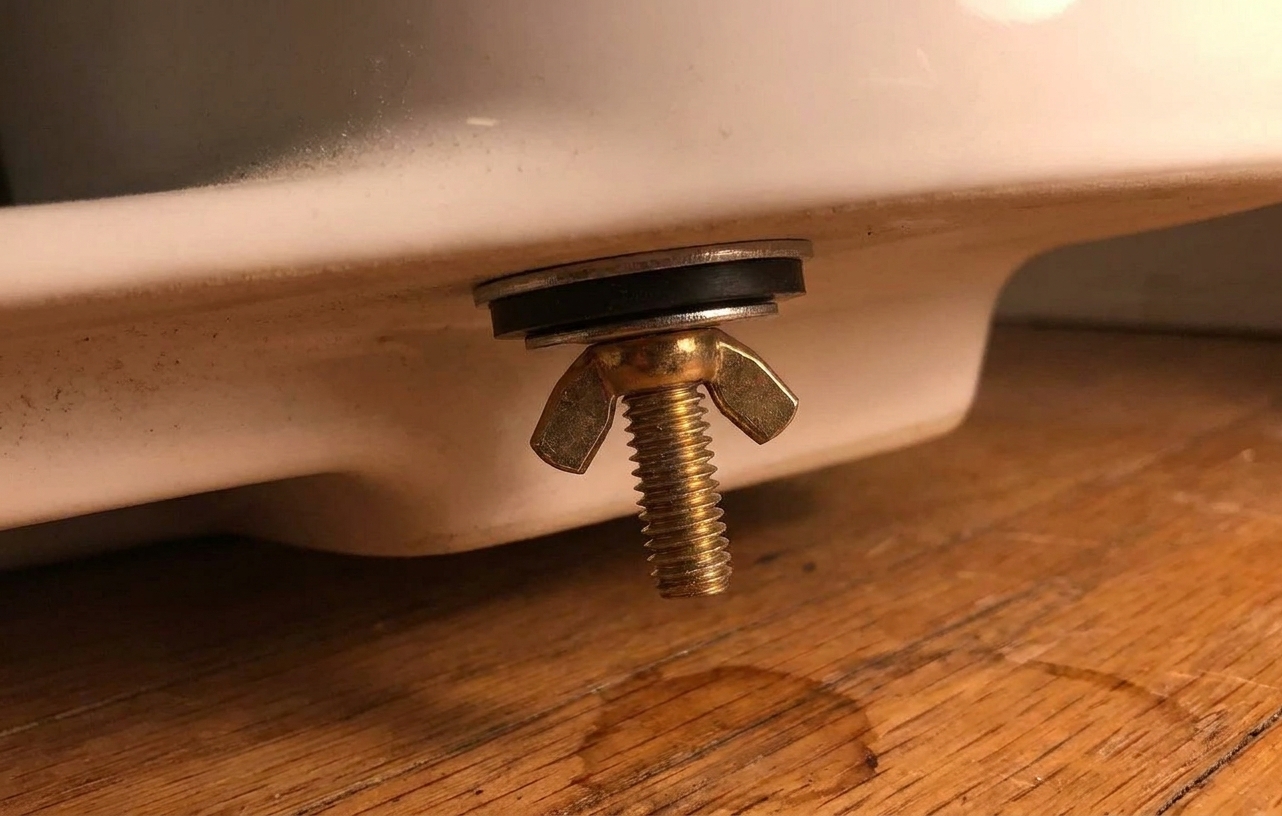
Look under the back of the bowl where the tank meets it. You will see the bolt nuts.
- Support the tank as you loosen. Keep one hand on the tank so it does not shift suddenly when one side frees up.
- Stabilize the bolt head inside the tank if needed (some bolts have a screwdriver slot). If the bolt spins, hold it from above while you loosen the nut below.
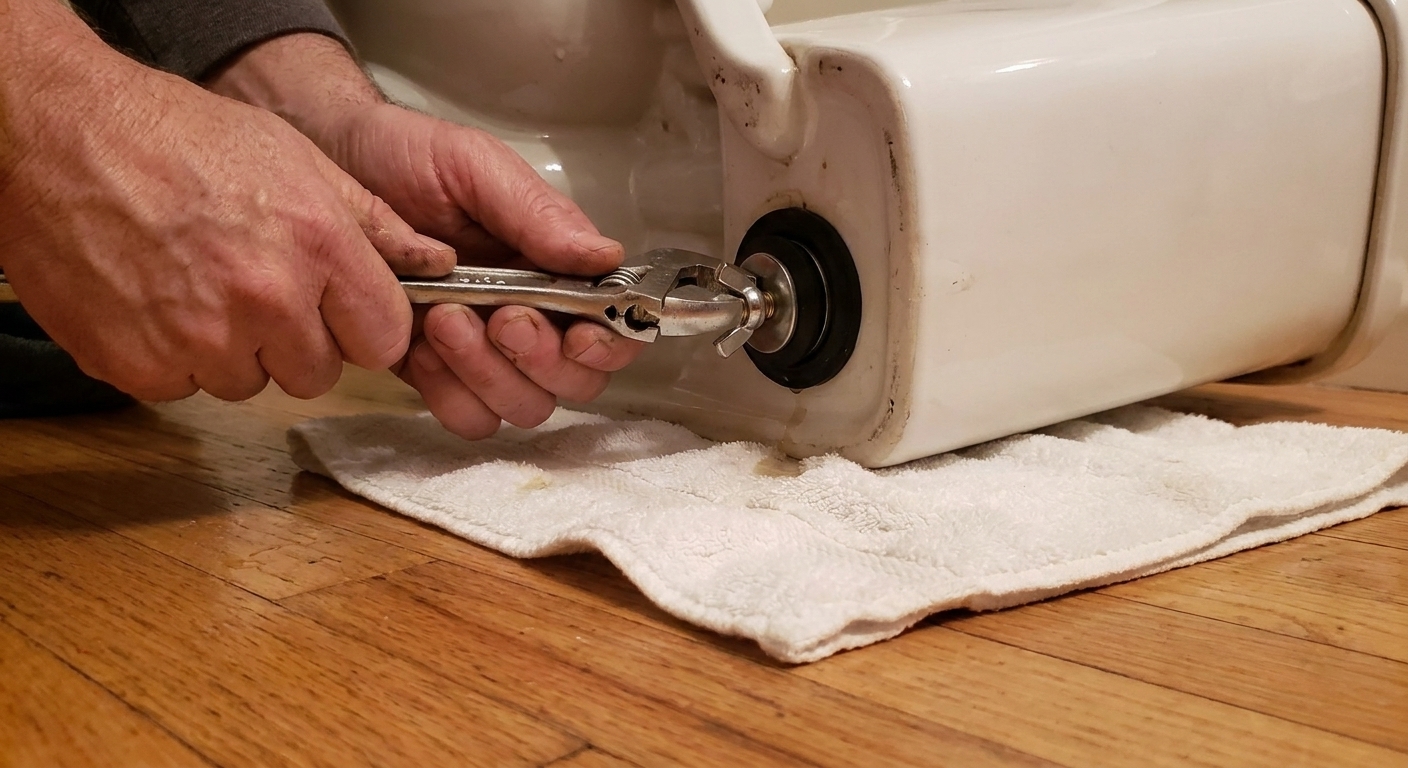
- Loosen each nut a little at a time, alternating sides. This keeps stress even on the porcelain.
Porcelain safety: Do not pry between the tank and bowl with a screwdriver. If it is stuck, rock the tank gently side to side. Slow wins here.
Step 4: Lift off the tank
Once the nuts and washers are off, lift the tank straight up and set it on an old towel on the floor or in the tub.
Step 5: Remove old gasket and clean
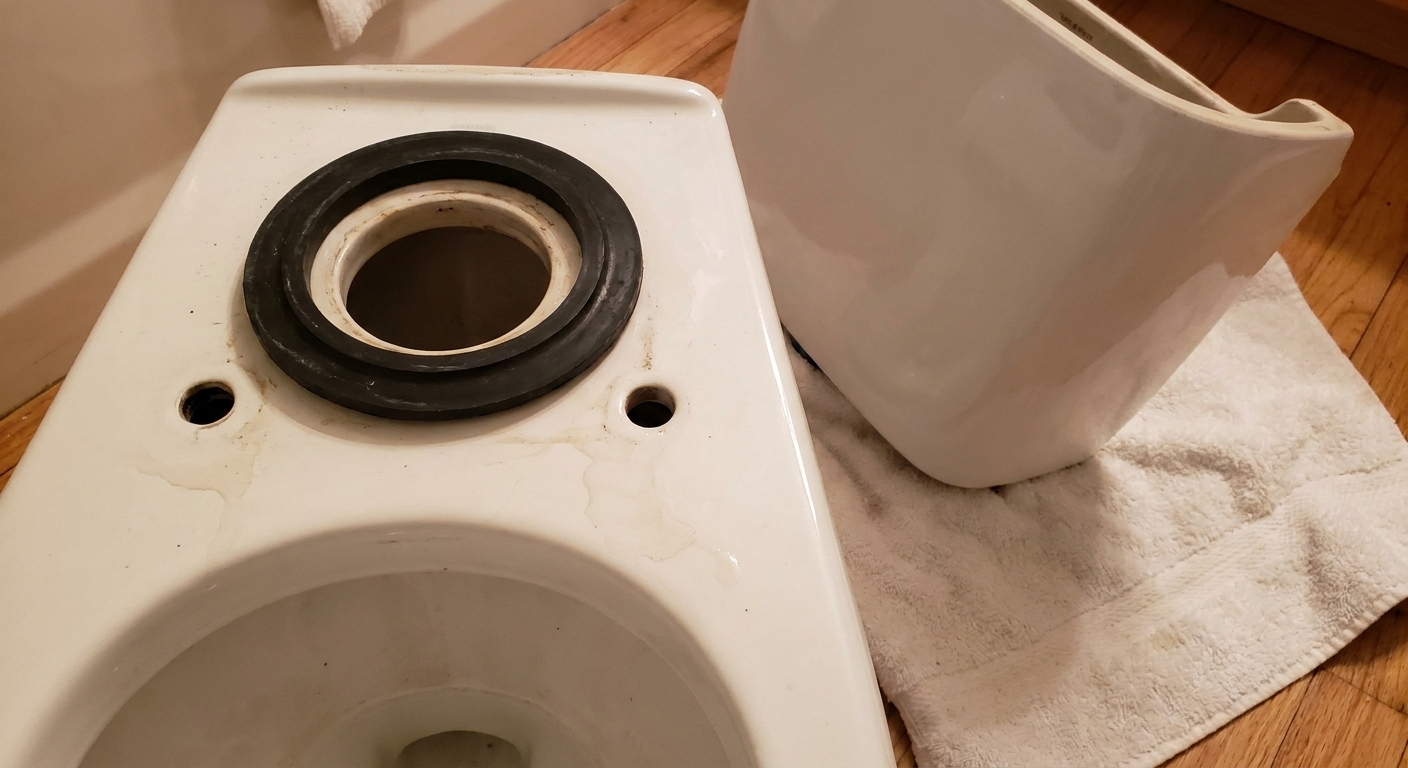
The tank-to-bowl gasket usually sits around the flush valve opening on the bottom of the tank (the big outlet).
- Pull off the old gasket.
- Clean the porcelain mating surfaces on the bottom of the tank and the bowl shelf. Use a rag and mild cleaner if needed.
- Remove mineral crust gently. A plastic putty knife is safer than metal.
You want clean, smooth contact so the new gasket can compress evenly.
Step 6: Install the new gasket
Fit the new gasket onto the flush valve outlet at the bottom of the tank.
- Some gaskets are tapered and only sit correctly one way. If yours is clearly beveled, it usually nests toward the bowl opening, but not every brand does it the same way.
- Make sure it sits flat and centered, not twisted.
If your kit includes instructions for your specific toilet brand, follow those. Toilets are like pickup trucks. They all do the same job, but the parts can be a little brand-specific.
Step 7: Replace bolts and seals
A very common source of leaks is the bolt seals, so do not reuse crusty rubber if you can help it.
Washer order basics
- Inside the tank: bolt head, then a rubber washer against the porcelain to seal the tank.
- Then the bolt passes through the tank hole.
- Outside the tank and at the bowl shelf: hardware varies by kit. Some use a metal washer and nut under the tank. Some use additional rubber or cushion washers where the bolts pass through the bowl. Some use cone washers.
Rule to remember: Rubber touches porcelain. Metal washers should not bite directly into porcelain. If your kit diagram disagrees with the generic advice, trust the kit diagram for your toilet.
Step 8: Set tank and tighten evenly
- Lower the tank straight down so the gasket lines up with the bowl opening.
- Make sure the bolts drop cleanly through the bowl holes as you set the tank down.
- Thread nuts on by hand until snug.
- Tighten a little on one side, then a little on the other. Keep alternating.
Your goal is a tank that is stable and level, with the gasket compressed enough to seal.
How tight is tight enough?
- The tank should not rock when you press on it.
- You should see the gasket compress, but you should not be bending anything or hearing porcelain stress noises.
- Most toilets use two bolts, but some designs vary. Some toilets are designed so the tank makes light contact with the bowl. Others will hover slightly on the gasket. Both can be normal if the tank is stable and sealed.
Do not overtighten. Cracking a tank or bowl is an instant game-over and a very expensive lesson. If you are tempted to give it “one more good turn,” stop, wipe everything dry, and test first.
Step 9: Reconnect water and leak test
- Reconnect the supply line to the fill valve shank under the tank and snug it up.
- Turn the shutoff valve on slowly.
- Let the tank fill completely.
- Dry the bolt areas and the tank-to-bowl seam with a towel.
- Flush 3 to 5 times and watch closely with a flashlight.
If you see a slow seep at one bolt, tighten that side just a hair, then retest. Tiny adjustments beat big turns.
Troubleshooting
Leak from one bolt only
- A rubber washer may be missing, upside down, or pinched.
- The bolt hole may have debris keeping the washer from sealing.
- Hardware may be uneven. Back both sides off slightly and re-tighten evenly.
Leak from the center seam
- Gasket may be the wrong size or not seated flat.
- Tank may be cocked slightly. Loosen bolts, reposition tank, then tighten evenly.
Bolts will not tighten
- Hold the bolt head inside the tank with a screwdriver while tightening the nut below.
- If the bolt head is rounded or the kit is low quality, swap to a better bolt set. Brass hardware tends to behave nicer over time.
Cracked or damaged sealing surface
If the sealing surface is damaged, a new gasket may not save it. At that point, you are often looking at replacing the tank or the whole toilet.
When to call a pro
- You see any cracks in the tank or bowl.
- The shutoff valve will not turn or will not stop water.
- The toilet is an older or uncommon model and parts are hard to match.
- Your toilet uses a proprietary setup that does not match standard gasket and bolt kits.
Otherwise, this is a solid Saturday-morning win. Take it slow, tighten evenly, and you will be back to a dry bathroom floor without paying someone else to do the kneeling.
Quick FAQ
Do I have to replace the bolts too?
You do not have to, but I recommend it. New rubber washers and nuts are cheap insurance, and old bolts are often corroded enough to make tightening uneven.
Should I use plumber’s putty or silicone on the gasket?
Usually no. A proper tank-to-bowl gasket is designed to seal dry by compression. Adding goop can make the gasket slip or prevent it from seating evenly. The exception is if the manufacturer instructions for your specific toilet call for it.
Why do some kits have different washer stacks?
Because bolt styles and toilet designs vary. The goal is always the same: seal water inside the tank and cushion the porcelain so tightening does not crack anything. Follow the diagram that comes with your kit when in doubt.
Can I crack it right away by overtightening?
Yes. Porcelain can crack from too much point pressure, especially if one side is tightened much more than the other. Alternate sides and sneak up on snug.