
How to Fix a Running Toilet
Stop a toilet that keeps refilling after a flush. Diagnose in order: flapper leak, float too high, fill valve not shutting off, or a refill tube pushed into the overflow. Simple checks and part swaps.
I grew up in a house where a “running toilet” was treated like a personal challenge, not a reason to call a plumber. My grandpa would pop the tank lid, hand me a towel, and say, “Listen to it. It’s telling you what’s wrong.” He was right. A toilet that keeps refilling after a flush is almost always one of four simple issues, and you can diagnose them in minutes.
This guide walks the checks in the order I use at home and when I’m helping students in a weekend workshop: flapper first, then float height, then fill valve shutoff, then the refill tube. (If your toilet is clogged or keeps clogging, that’s a different problem than clean water running and belongs on our clog pages.)
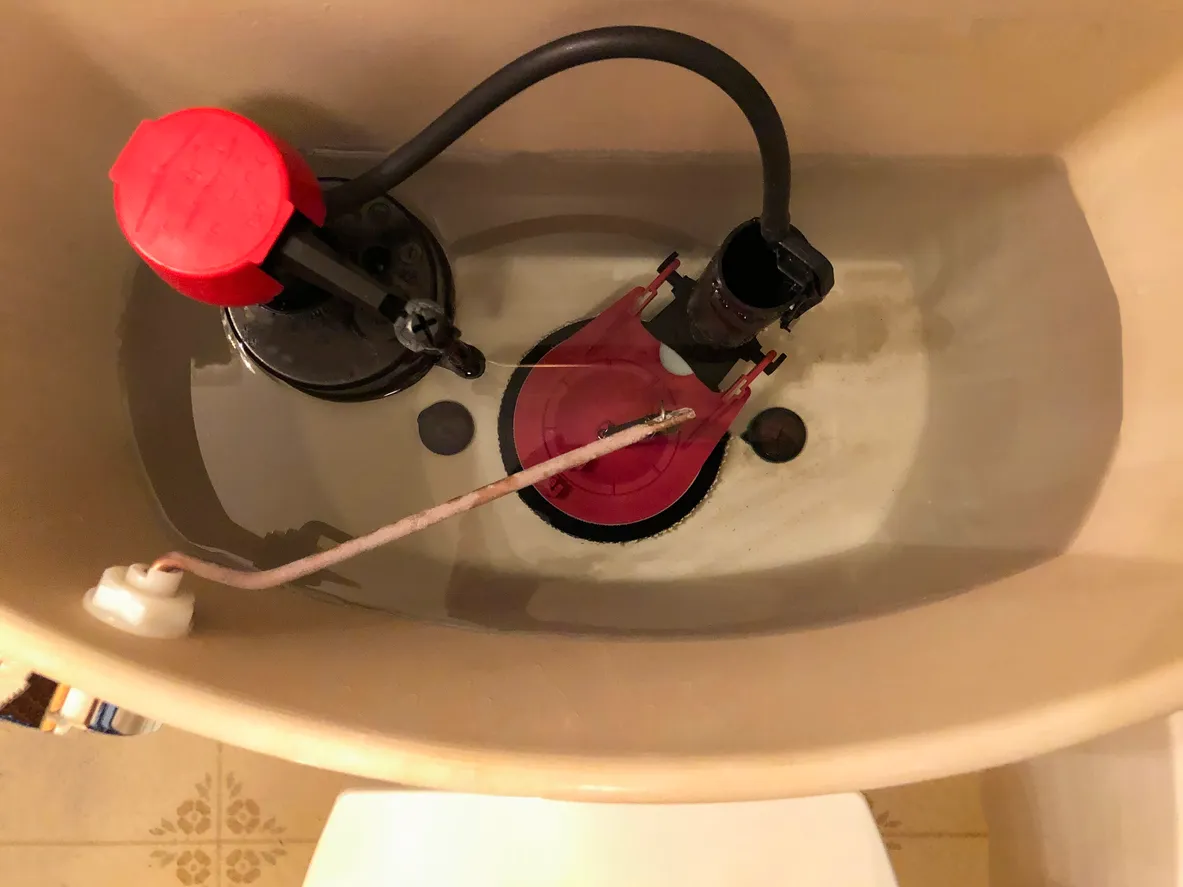
Before you start: quick safety and setup
- Take the tank lid off carefully. Porcelain breaks easily. Set it on a towel on the floor or a sturdy counter.
- Know the goal. After a flush, the tank refills to a set waterline and stops. If you hear the hiss of water long after, something is letting water escape or the valve is not shutting off.
- Don’t overtighten plastic. Most toilet parts are plastic with rubber seals. Snug is good. Hulk is bad.
Tools and parts you might need
- Adjustable wrench or channel-lock pliers
- Sponge or small cup (to bail out the last bit of tank water)
- Small towel
- Replacement flapper (universal or brand-specific)
- Replacement fill valve (universal style works for most toilets)
- Replacement refill tube and clip (often comes with a fill valve)
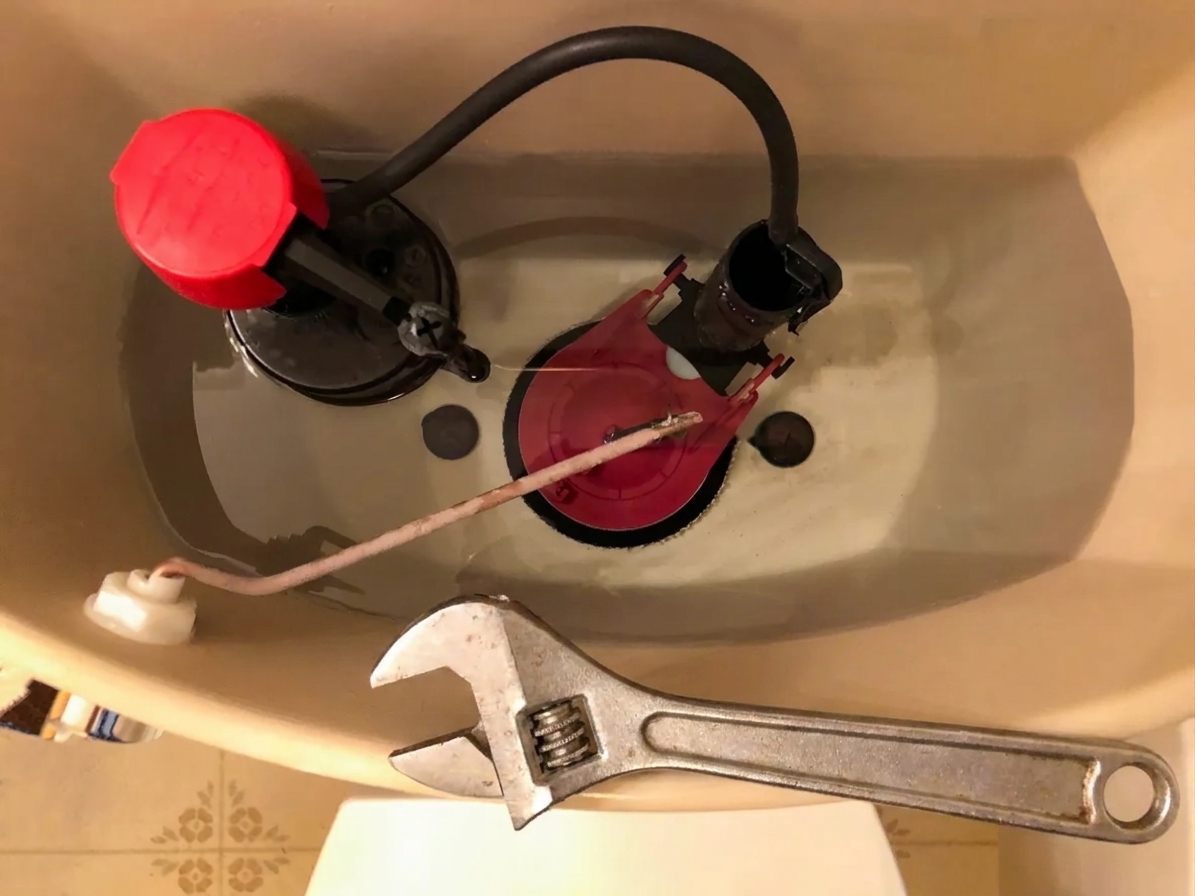
Step 1: Check the flapper (most common)
If a toilet “runs” by periodically turning on for a few seconds, the tank is slowly losing water and the fill valve is simply doing its job refilling it. The most common leak path is the flapper, the rubber valve at the bottom of the tank.
How to diagnose a flapper leak
- Look for movement in the bowl. With the toilet unused, you might see a faint ripple or trickle in the bowl.
- Do the “press test.” After the toilet finishes refilling, press down gently on the flapper with one finger. If the running stops immediately, the flapper is not sealing well on its own.
- Check the chain. If the chain is too short or snagged, it can hold the flapper slightly open. You want just a little slack, not a hammock, not a guitar string.
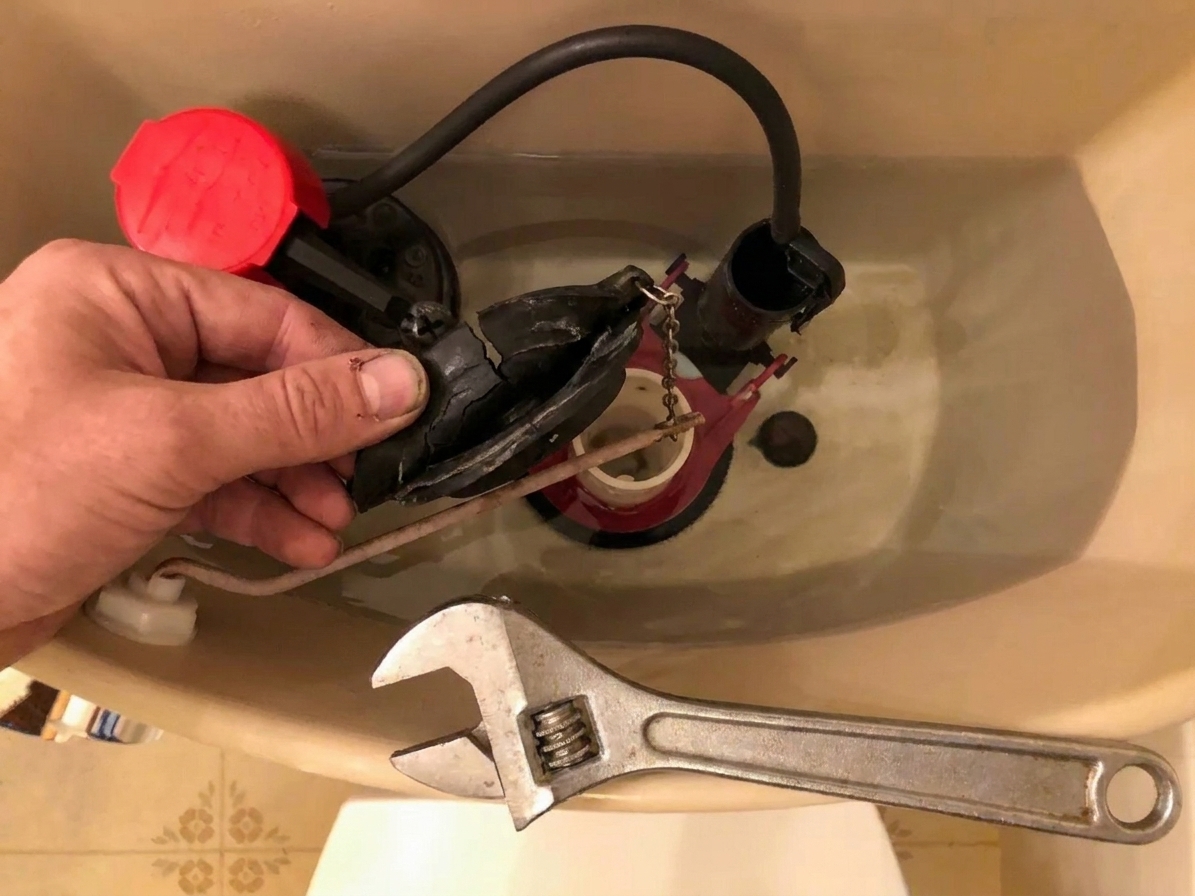
- Inspect the rubber. If the flapper is warped, slimy, cracked, or stiff, it is done.
Flapper fix: adjust or replace
- Adjust the chain first: Move the chain clip to a link that leaves about 1/2 inch of slack when the flapper is closed.
- Clean the seat: Mineral buildup on the flush valve seat can prevent sealing. Wipe the seat with a rag. If there is crusty scale, a nylon scrub pad helps.
- Replace the flapper: Shut off the water at the stop valve (usually on the wall behind the toilet), flush to drain the tank, then unhook the old flapper from the overflow tube pegs and the chain from the lever. Install the new flapper and reconnect the chain.
Part swap tip: Many flappers look “universal,” but some toilets use a specific shape or size. If yours has a brand name stamped inside the tank, matching that brand can save you a second trip.
Step 2: Check the float height (water level too high)
If the tank water level is set too high, water will spill into the overflow tube and the fill valve may cycle on and off. This is one of the easiest fixes because you are not replacing anything, just adjusting.
How to tell the float is too high
- Look for the overflow tube (the open vertical tube near the center of the tank).
- Find the tank waterline. Many tanks have a molded line or a stamp.
- If the water level is at or above the top of the overflow opening, or you see water trickling into it, the float setting is too high.
Float fix: lower the water level
There are a few common float styles:
- Float cup (modern style): Squeeze the clip on the float cup and slide it down the fill valve shaft, or turn the adjustment screw (depends on model).
- Float ball on an arm (older style): Turn the adjustment screw where the arm meets the fill valve, or gently bend the metal arm down slightly.
A good target is water sitting about 1 inch below the top of the overflow tube or right at the tank’s marked waterline.
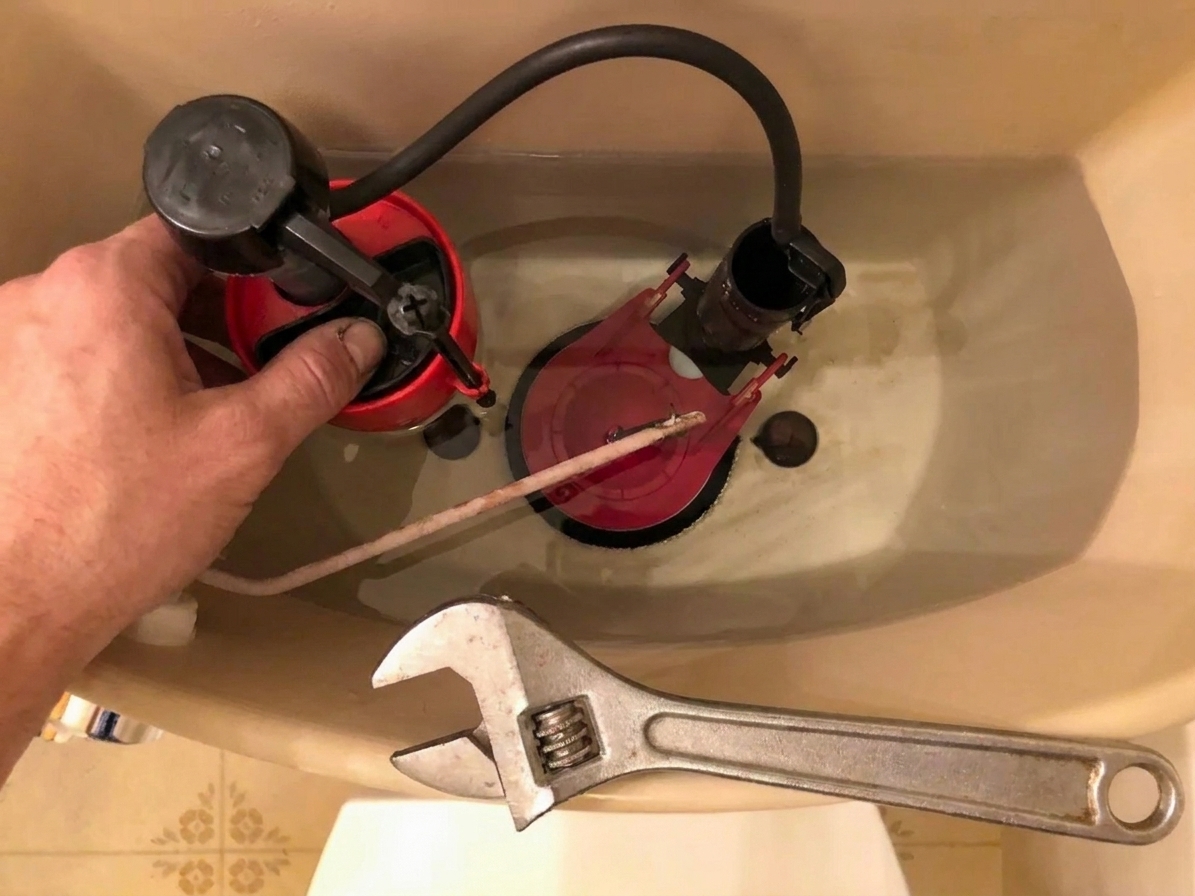
Step 3: Check the fill valve (won’t shut off)
If the flapper is sealing and the water level is not too high but you still hear a constant hiss, the fill valve may not be shutting off. Sometimes debris gets lodged in it. Other times the internal seal is simply worn out.
How to diagnose a bad fill valve
- Remove the tank lid and listen. If the sound is coming from the left side where the water enters the tank, that is the fill valve.
- Watch the water level. If the valve keeps feeding water but the level does not rise much, water is likely escaping through the flapper. If the level rises and keeps rising toward the overflow, the valve is not shutting off or the float is mis-set.
- Try a quick flush-out. Some fill valves have a top cap you can remove to rinse debris. If you do not know your model, it is usually faster and safer to replace the whole valve than to wrestle with tiny parts.
Fill valve fix: replace the valve (best long-term)
This is a beginner-friendly swap. Expect 20 to 45 minutes the first time.
- Shut off the water at the stop valve.
- Flush and hold the handle down to drain as much tank water as possible. Sponge out the remaining water.
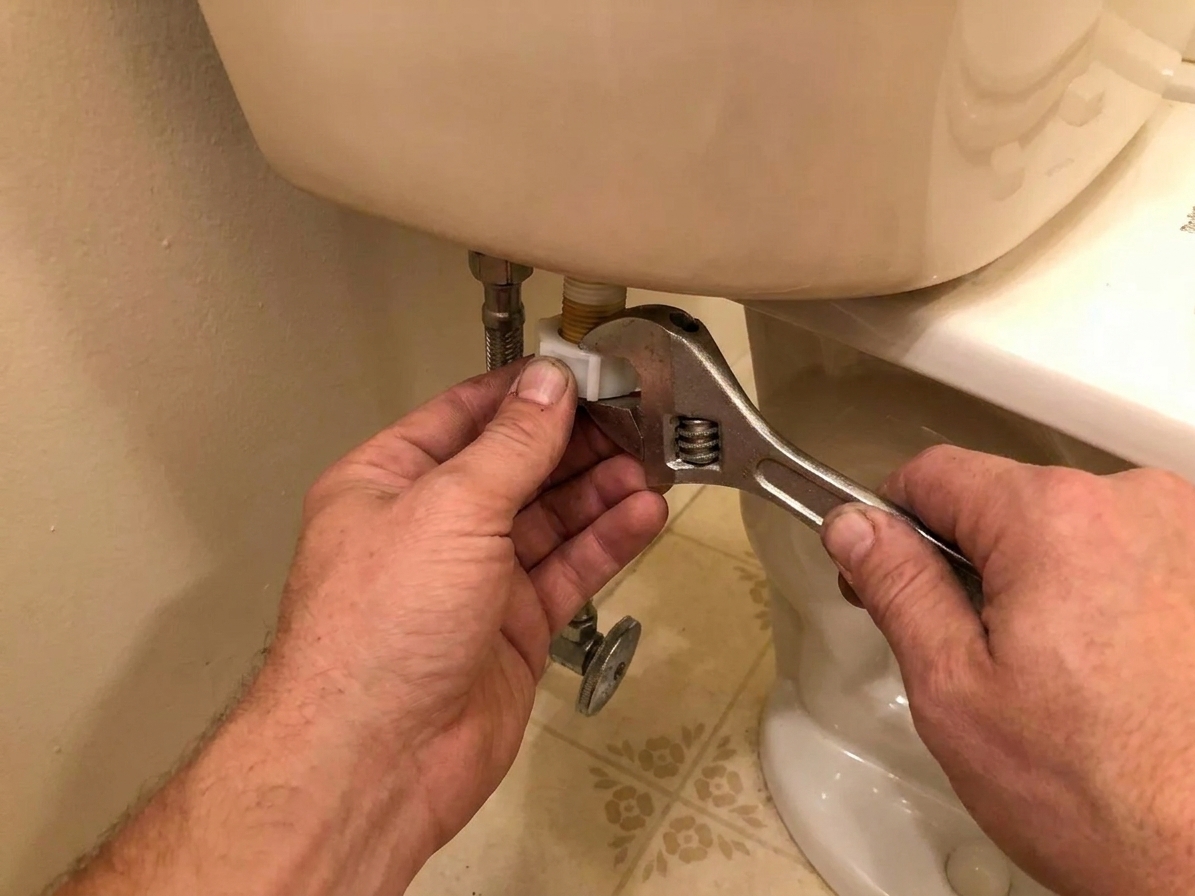
- Disconnect the supply line from the bottom of the tank (have a towel ready for drips).
- Remove the old fill valve lock nut under the tank.
- Install the new fill valve per the included instructions and set the height so the critical level mark is above the overflow tube.
- Reconnect the supply line, turn the water back on, and check for leaks.
- Adjust the float so the water stops at the correct level.
Safety reminder If you see cracking around the tank bolts or any hairline cracks in the porcelain, stop and consider calling a pro. Porcelain failures are rare, but they are not forgiving.
Step 4: Check the refill tube (pushed too far into the overflow)
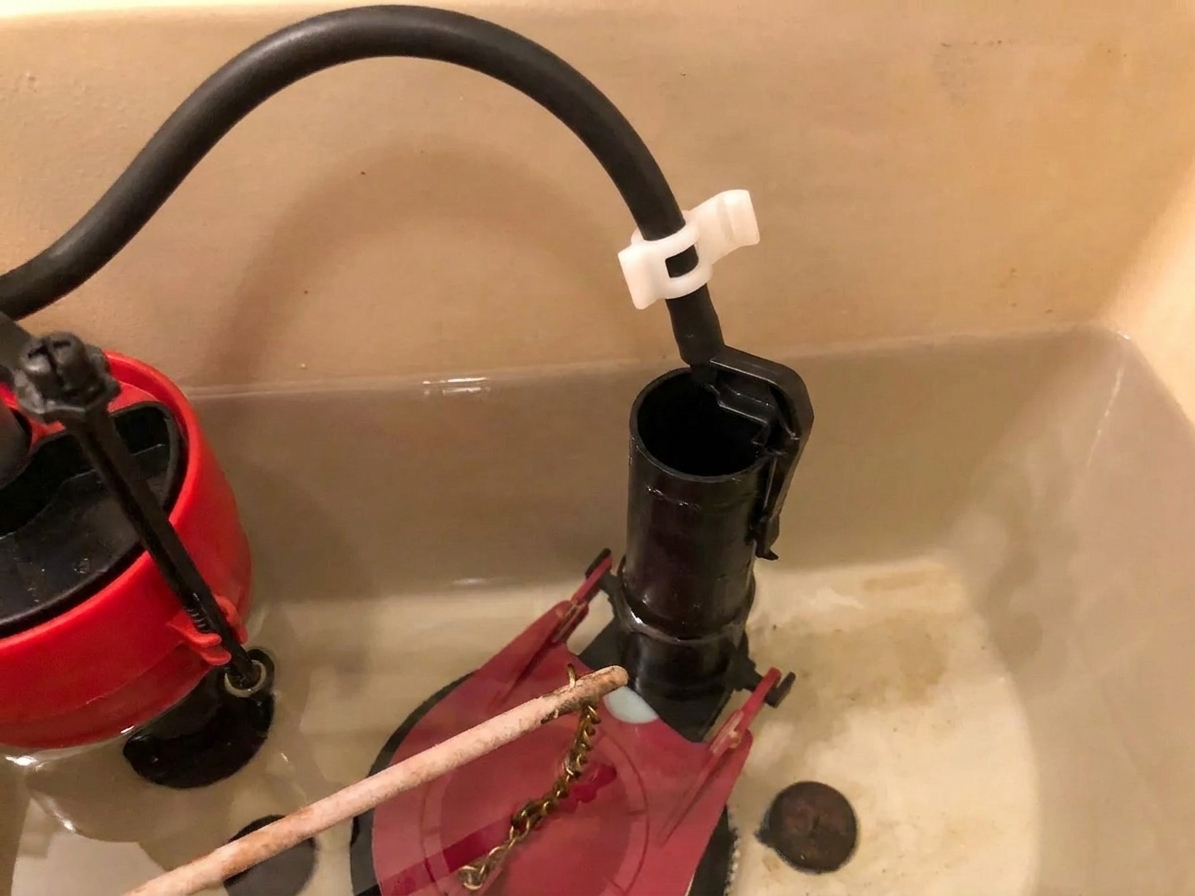
The refill tube is the small flexible tube that sends water into the overflow tube after a flush. Its job is to refill the bowl. If it is shoved down into the overflow tube, it can create a siphon effect that slowly pulls water out of the tank, which makes the fill valve kick on again and again.
How to diagnose a siphoning refill tube
- Look at the small tube running from the fill valve to the overflow tube.
- If the tube end is below the top of the overflow tube, or actually submerged, it can siphon.
- You may notice the toilet refills normally, then quietly “steals” water from the tank over time.
Refill tube fix: reposition it correctly
- Pull the refill tube out so it ends above the overflow opening.
- Use a refill tube clip that hooks to the overflow tube and holds the tube in place with an air gap. Many fill valves include one.
- If the tube is brittle or kinked, replace it. It is cheap and takes minutes.
Quick troubleshooting: match the symptom
| What you notice | Most likely cause | What to do first |
|---|---|---|
| Toilet runs for a few seconds every so often | Flapper leak | Press test the flapper, adjust chain, replace flapper |
| Constant hissing, tank water level high | Float too high or fill valve not shutting off | Lower float, then replace fill valve if needed |
| Water trickling into overflow tube | Float set too high | Lower float until trickle stops |
| Tank refills fine, then slowly loses water again | Refill tube siphoning or slow flapper leak | Check refill tube position, then check flapper seal |
When to call a plumber
I am all for DIY, but here are a few moments when calling in help is smart:
- You have cracked porcelain in the tank or bowl.
- The shutoff valve will not close, or it leaks after you touch it.
- You replaced the flapper and fill valve and still cannot stop the running. At that point you may be looking at a less common issue like a damaged flush valve seat that needs a different repair approach.
FAQ
Does a running toilet waste a lot of water?
Yes. Even a small, quiet leak can add up quickly. Fixing it is one of the highest-impact, lowest-effort repairs in most homes.
Can I just replace everything in the tank?
You can, and some homeowners prefer a full rebuild kit. I still recommend diagnosing first. Often a $10 flapper solves it. If your toilet is older and multiple parts look tired, replacing the fill valve and flapper together is a reasonable approach.
My toilet keeps clogging. Is that related to running?
Usually no. Running is about the tank refilling due to a leak or valve issue. Clogging is about waste and paper not moving through the trapway or drain line. Treat those as separate problems.