
How to Insulate an Attic Knee Wall
Stop drafts in a story-and-a-half house by treating the knee wall, sloped ceiling, and attic floor behind it as one insulated, air-sealed system. Here’s the step-by-step.
I’ve lost count of how many Michigan winters I spent blaming my windows for cold bedrooms… only to finally crawl into a knee wall space and feel a steady breeze coming right through the “side attic.” In a story-and-a-half house, that little triangular attic behind the upstairs walls is often the real culprit.
Here’s the big idea: you do not insulate a knee wall by itself. You insulate an assembly made up of three connected parts:
- The knee wall (the short wall that forms the back of a closet or the side of an upstairs room)
- The sloped ceiling above it (the underside of the roof slope next to your room)
- The attic floor behind it (the “triangle floor” in the side attic)
When you air seal and insulate all three as one job, you stop the wind washing, reduce ice dams, and make those upstairs rooms feel like they belong to the same house as the thermostat.
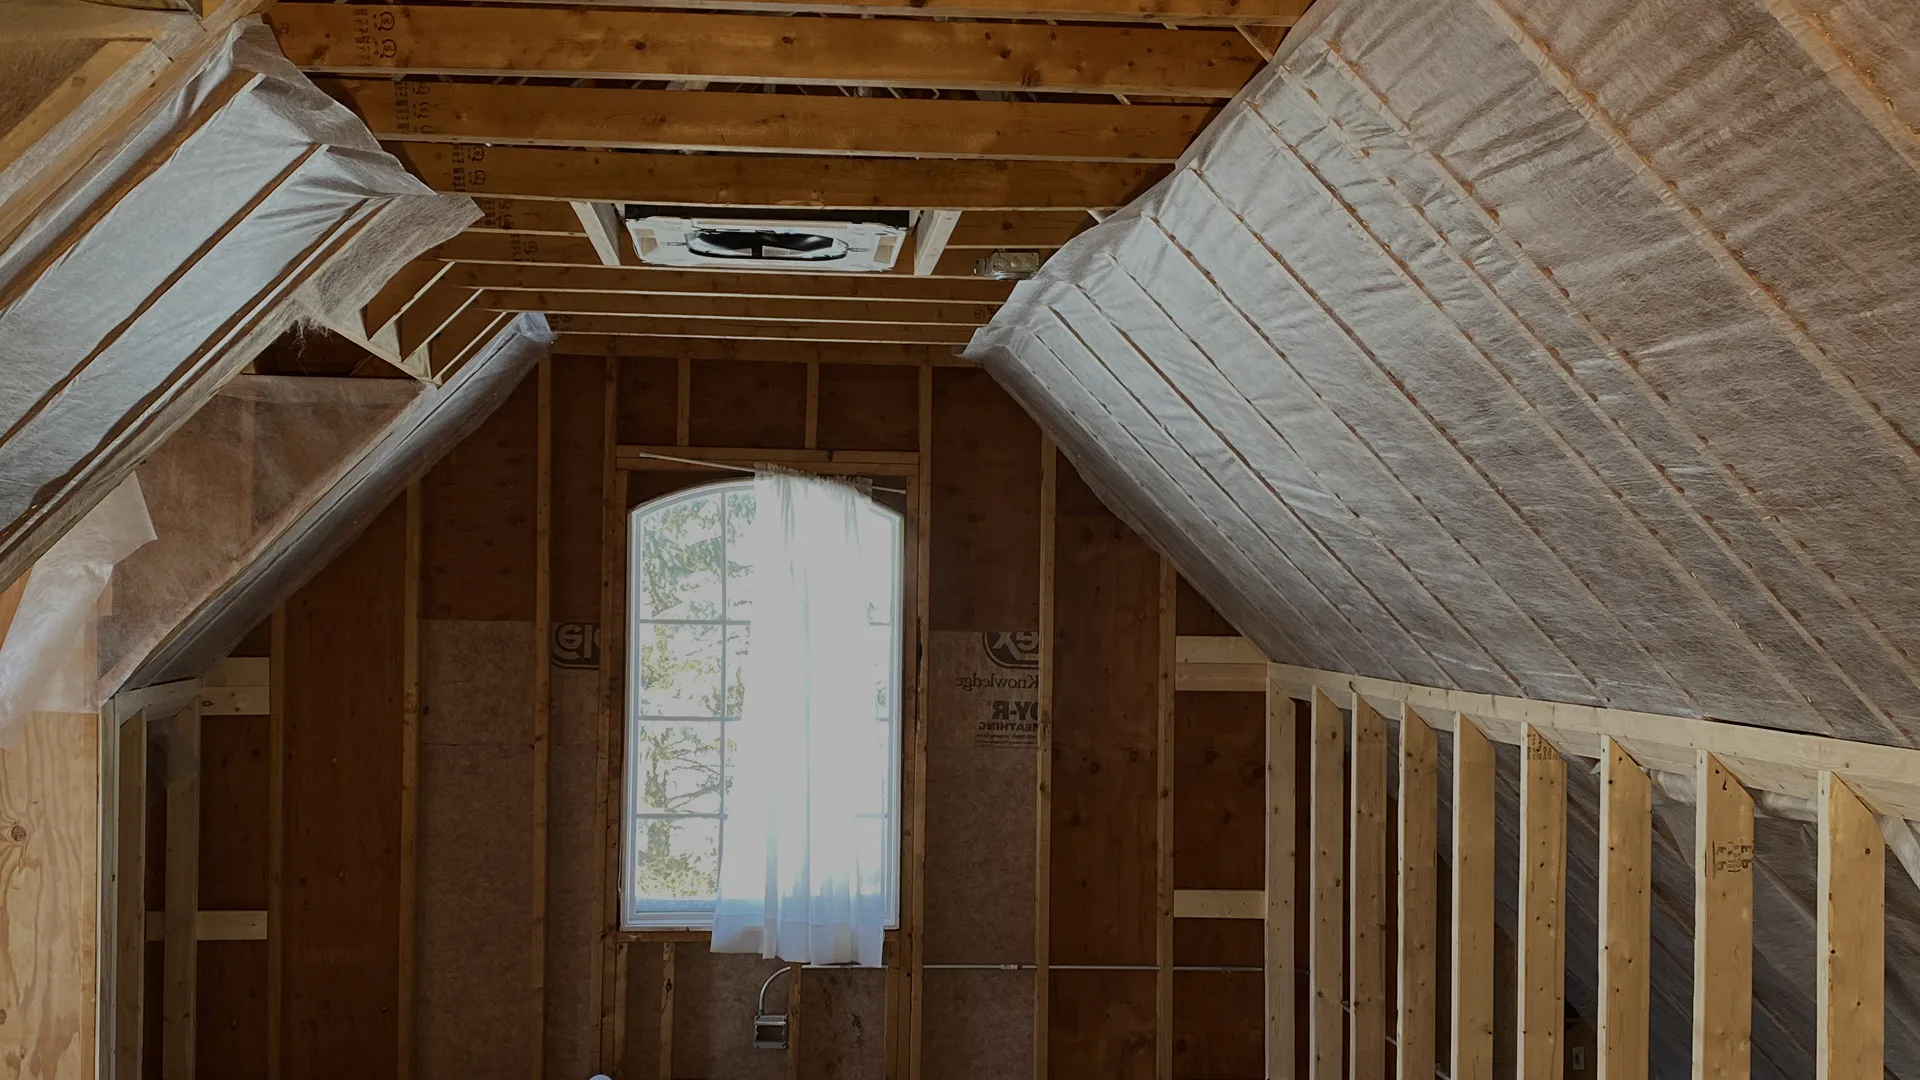
Before you start: what you’re building
Think of the side attic behind a knee wall as outdoors unless you deliberately bring it inside your home’s thermal boundary. Most homes do not condition that side attic, so the most common approach is:
- Keep the side attic cold (outside your thermal boundary).
- Insulate and air seal the boundary between your living space and that side attic.
That boundary is the knee wall + the sloped section above it + the attic floor behind it. If any one of those is missing insulation or air sealing, the whole setup underperforms.
Quick diagnose first: peek for ductwork, an air handler, or HVAC supplies/returns running through the side attic. If your heating or cooling equipment lives in that space, you might be better off improving and insulating the ducts (or relocating them) and thinking carefully about whether you really want that attic “outside.”
Safety first
Turn on a headlamp, wear a respirator or a quality dust mask, gloves, long sleeves, and knee pads. Watch for roofing nails poking through the roof deck. Do not cover knob-and-tube wiring with insulation, and treat any mystery wiring like it can bite.
Which side gets the insulation?
This is the part that confuses almost everyone the first time.
If you are keeping the side attic outside the thermal boundary (the usual vented-roof setup), the insulation typically belongs on the attic side of the knee wall, not the room side. In other words, if you are standing in the little side attic looking at the back of the knee wall studs, that is where insulation should be installed and detailed.
The goal is to keep the knee wall studs and drywall on the warm side, and keep the side attic cold. If your plan is different, for example insulating the roofline and bringing that space “inside,” the details change.
Two quick rules of thumb that keep you out of trouble:
- Air seal first, then insulate. Insulation does not stop air movement.
- Do not leave fiberglass exposed to the side attic air if it’s going to get wind blowing through it. Wind washing, meaning air moving through and over fluffy insulation, can cut the real-world performance dramatically. A rigid or sealed facing on the attic side fixes that.
Tools and materials that make this go smoothly
You can do this with basic DIY gear. In tight side attics, organization matters more than horsepower.
Tools
- Headlamp or work light
- Utility knife with extra blades
- Tape measure and straightedge
- Caulk gun
- Staple gun (if using faced batts)
- Drill/driver
- Hand saw or insulation knife (for rigid foam)
- Nice-to-have: shop vac
Air sealing supplies
- One-part spray foam (for gaps and cracks)
- High-quality acrylic latex caulk (small seams)
- Fire-rated sealant for code-required areas around flues or chases (use what your local code and the situation calls for)
- Rigid foam board (polyiso or XPS) for blocking large openings
- Foil tape or compatible sheathing tape for foam board seams
Insulation options
- Fiberglass or mineral wool batts sized for your framing (2x4, 2x6)
- Rigid foam board for the attic side of the knee wall to stop wind washing
- Blown-in insulation for the attic floor behind the knee wall (often the easiest way to get depth in a cramped triangle)
If I’m picking favorites: mineral wool is more pleasant to install than fiberglass, and rigid foam on the attic side of the knee wall is the difference between “insulated” and “actually comfortable.”
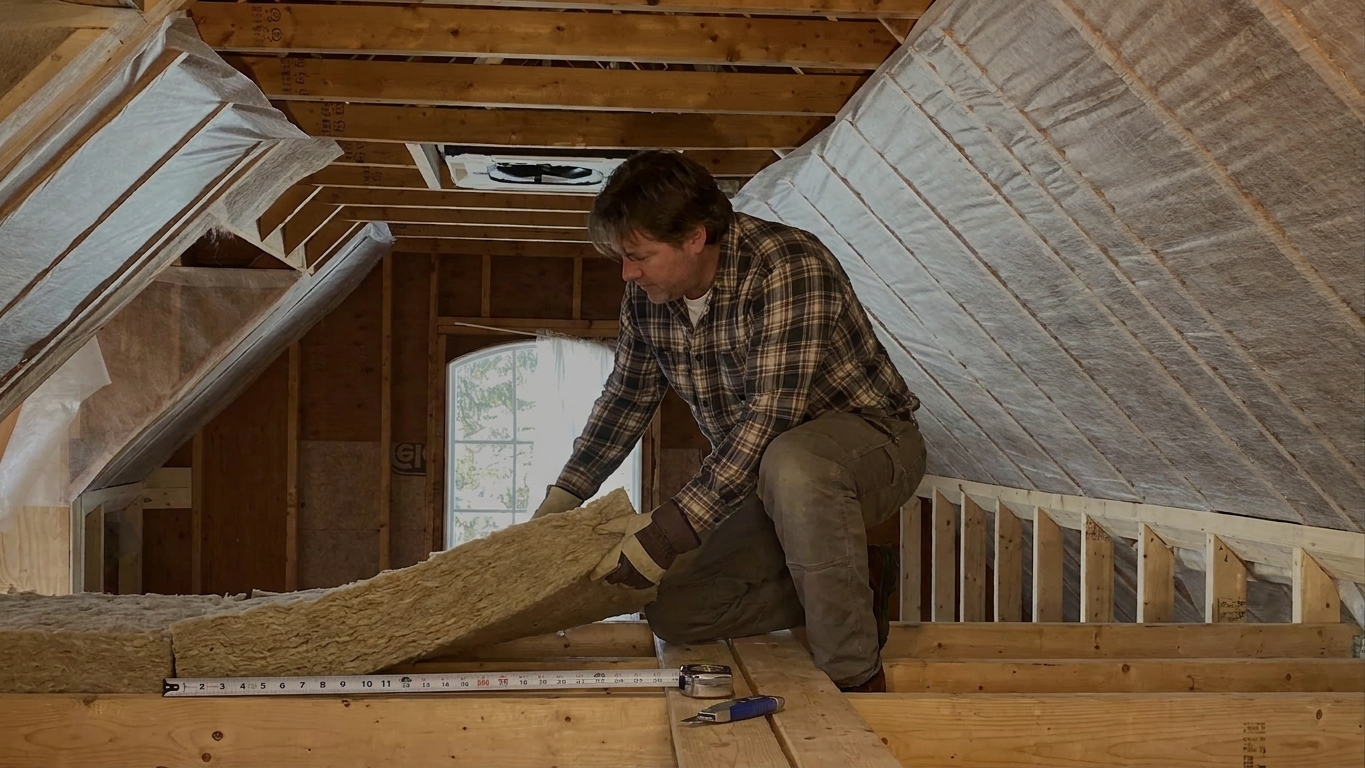
Step 1: Clear a path and plan your access
Most knee wall spaces are accessed through a tiny door in a closet or a short hallway wall. Working through that opening is half the battle, so do a quick setup:
- Lay down plywood scraps or wide boards to create a stable crawling path over ceiling joists.
- Bring in a contractor bag for old scraps and debris. Tight attics get chaotic fast.
- Locate any bathroom fans, plumbing vents, chimney chases, duct runs, or wiring runs before you start sealing things up.
You are going to be going in and out a lot. Keep your foam, tape, and knife close to the opening so you are not playing attic hide-and-seek with tools.
Step 2: Air seal the knee wall bottom and top
The knee wall leaks air like a screen door if you let it. The biggest leaks are typically at the bottom plate (where the wall meets the floor) and the top plate (where the wall meets the sloped ceiling/rafters).
Seal the bottom of the knee wall
From the side attic, look along the base of the knee wall where it sits on the attic floor. Common problems:
- Gaps where drywall meets framing
- Openings around electrical wires
- Cracks between the bottom plate and the subfloor
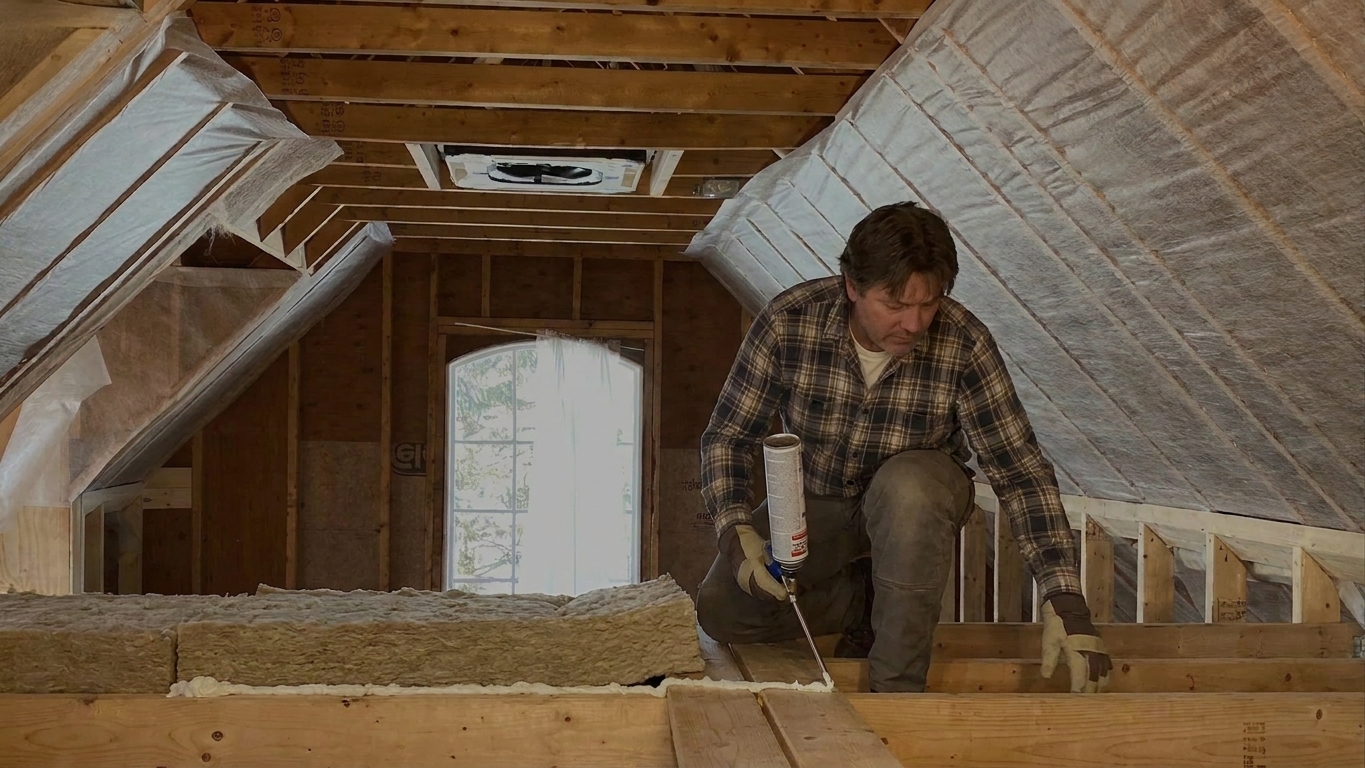
Use caulk for small gaps and spray foam for larger ones. If you find big open cavities or missing blocking, cut rigid foam to fit and seal the edges with spray foam.
Seal the top of the knee wall
At the top of the knee wall, you’ll often see irregular framing where rafters, collar ties, and the top plate meet. Any visible crack that leads into the room side needs to be sealed.
Again: rigid foam for large gaps, foam around the perimeter, then tape seams where appropriate.
Heads up on hot stuff
If you have a chimney, metal flue, or vent pipe in this area, do not foam tight to a hot flue. Maintain required clearances and use code-appropriate, fire-rated materials. A common method is sheet metal as a noncombustible blockoff plus fire-rated sealant at the edges, but your clearance-to-combustibles requirements still rule the day. When in doubt, this is worth a call to your local building department or a pro.
Step 3: Insulate the sloped ceiling above the knee wall
This sloped section is easy to forget because it is not vertical like the knee wall or flat like the attic floor. But it is part of the same boundary.
Confirm the roof venting plan
If your roof is vented (many are), you need an air channel from soffit intake to a high exhaust point like a ridge vent or roof vents. Before you assume you have that path, take a minute to confirm you actually have soffit intake and somewhere for air to leave. In some story-and-a-half roofs, venting is complicated, blocked, or effectively nonexistent.
Keep the vent channel open
If you do have a vented roof, that means:
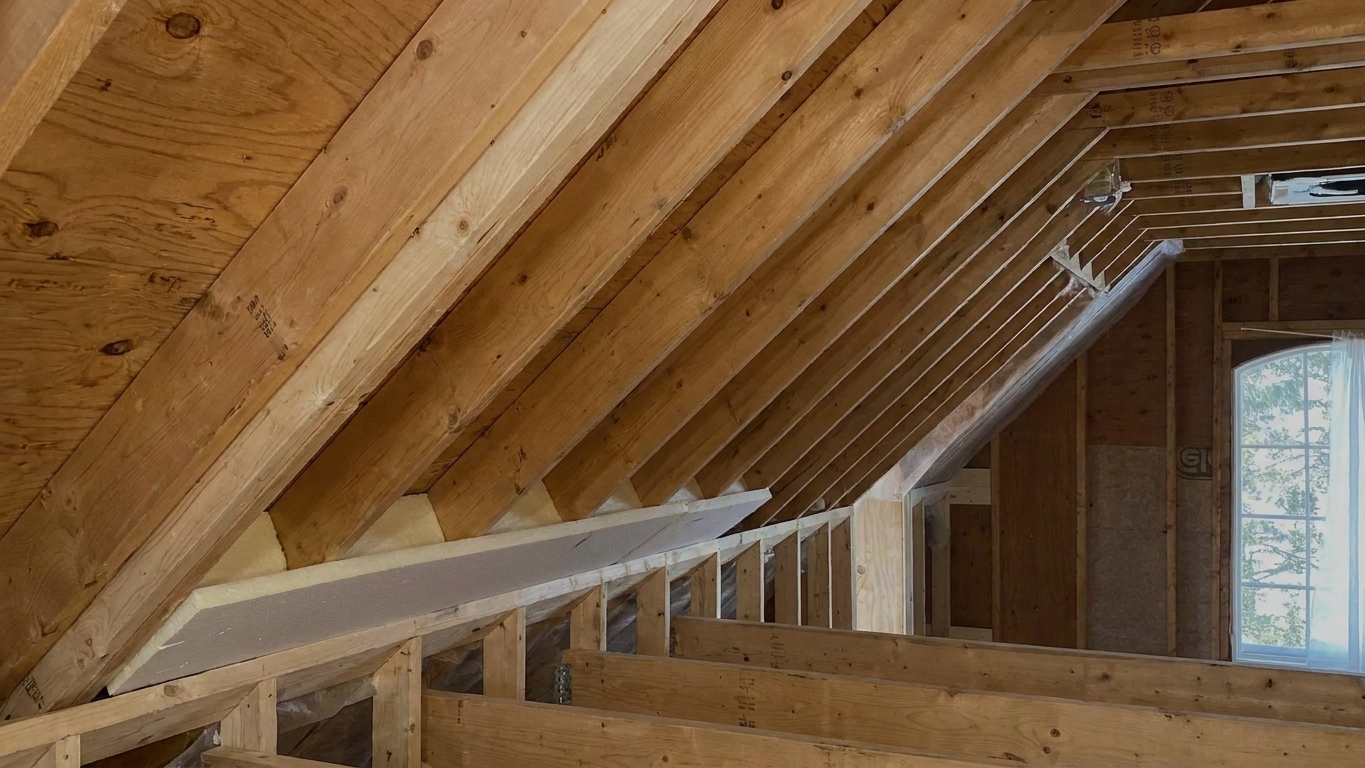
- Install baffles or ventilation chutes in each rafter bay at the eaves.
- Do not pack insulation tight to the roof deck where it blocks airflow.
Add insulation to the rafter bays
You can use batts in the sloped rafter cavities. Cut batts to fit snugly, but do not compress them. Compression lowers R-value and can create gaps.
If your rafter depth is limited, many homeowners combine a thin layer of rigid foam with batt insulation to boost performance. The right approach depends on your roof assembly and climate, so stay within what your local code and roof venting strategy support.
One moisture note from the trenches: when you add a more air-impermeable layer (like rigid foam) on the cold-side of a leaky assembly, any missed air leaks can concentrate condensation in the wrong spots. That is another reason air sealing comes first and vent paths matter.
Step 4: Insulate the attic floor behind the knee wall
The “triangle floor” behind the knee wall is often bare or lightly insulated, and it is usually full of air leaks. If you only insulate the knee wall, the floor behind it can still dump cold air into the room through all the cracks at the baseboards and framing.
Air seal the attic floor first
Look for:
- Wire holes through top plates
- Plumbing penetrations
- Gaps at the rim joist area (if accessible)
- Open chases around soffits, dropped ceilings, or built-ins
Seal small gaps with caulk and larger ones with foam or rigid blocking plus foam.
Add insulation depth
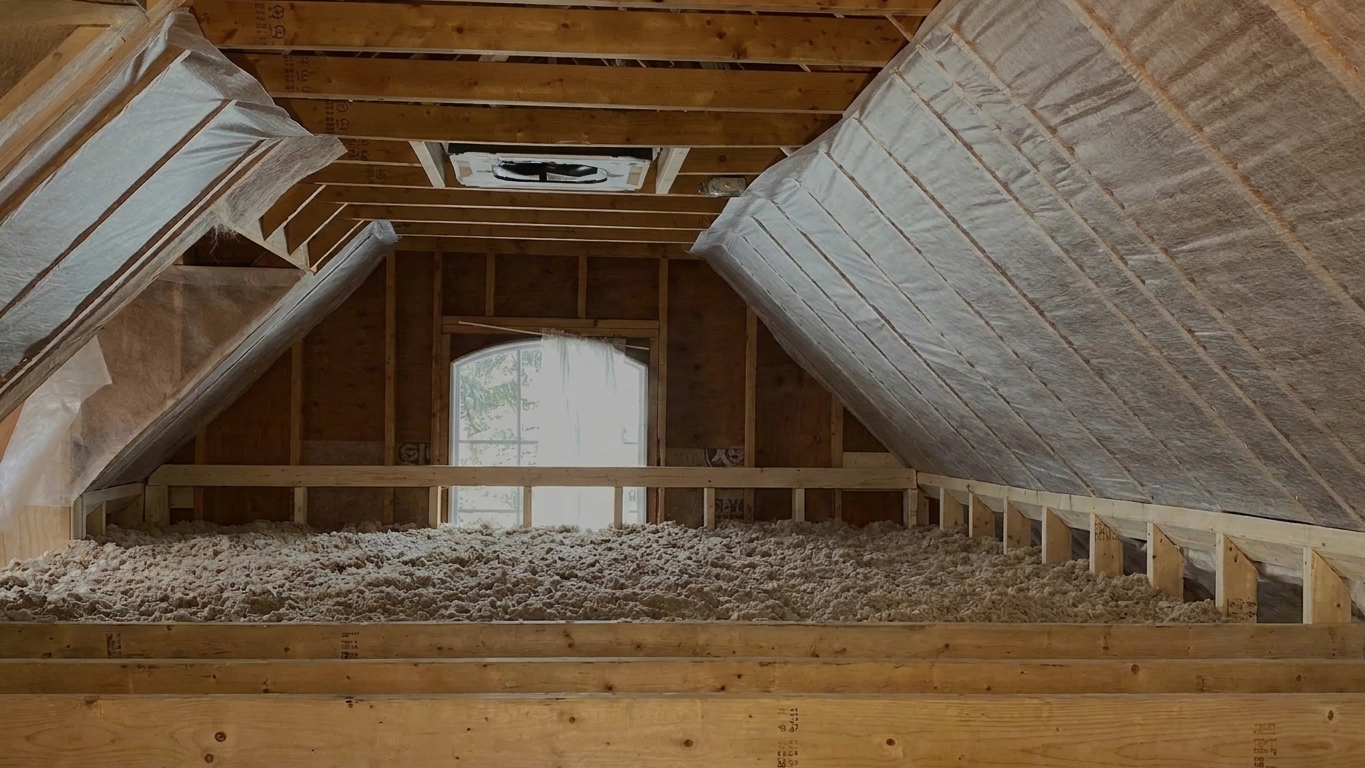
Then insulate the attic floor. In tight side attics, blown-in insulation is often the simplest way to get consistent coverage. If you use batts, take the time to fit them without gaps and without compressing them.
If you are blowing in insulation on that triangle floor, build a simple insulation dam near any open edges and at the eaves. Rigid foam, thin plywood, or even sturdy cardboard can work, as long as it holds the insulation back and does not block your ventilation path.
One practical tip: if you are increasing insulation depth on the attic floor, you may need to add simple rulers or depth markers so you can keep the thickness consistent as you work in the cramped space.
Step 5: Make the knee wall insulation actually work
This is where most knee wall jobs fail. The insulation is there, but cold air is free to move through it. That is why upstairs rooms still feel drafty.
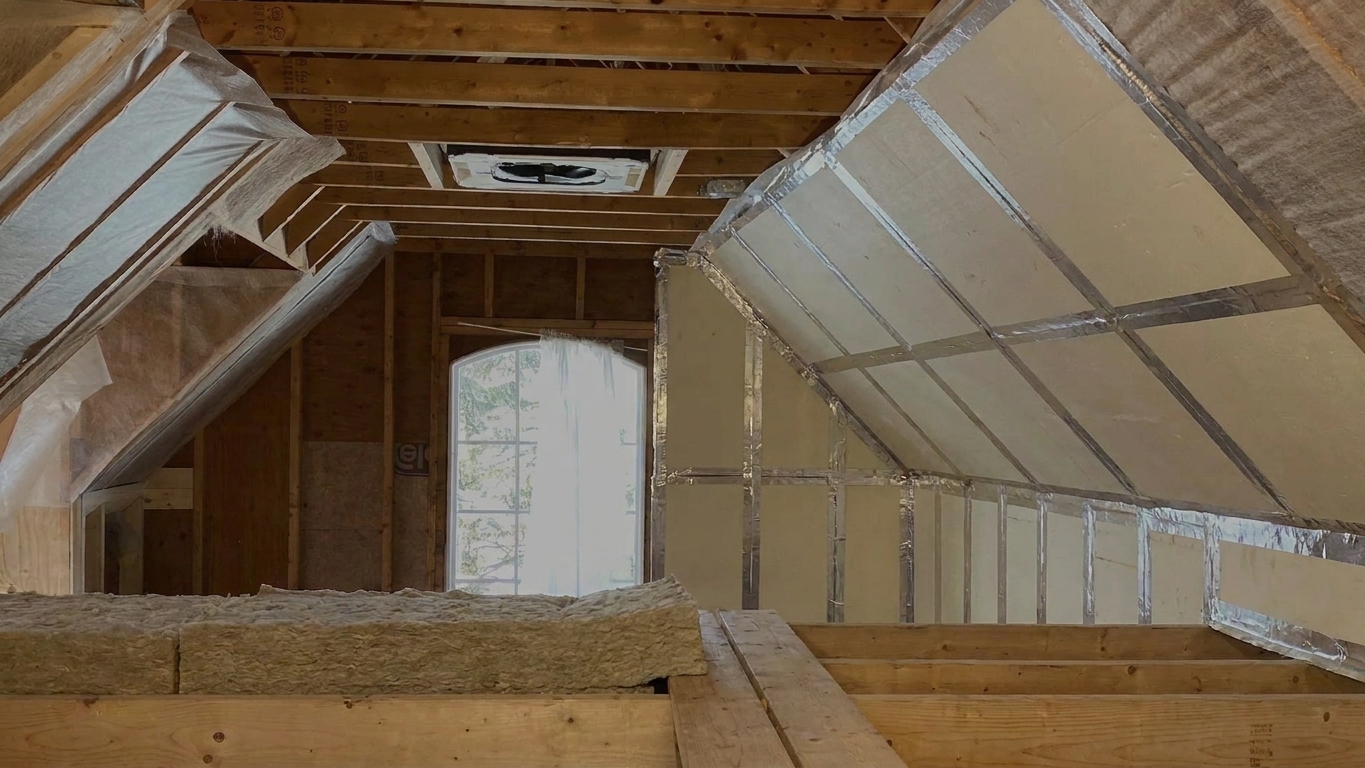
Option A: Batts plus an air barrier
Install batts in the knee wall stud cavities, then cover the entire attic side of the knee wall with a continuous air barrier. Common choices include rigid foam board sealed at seams, or housewrap carefully stapled and taped. Rigid foam is my go-to because it is both an air barrier and adds R-value.
Key detail: seal the edges of the air barrier to framing at the top, bottom, and sides so air cannot sneak around it.
Option B: Cut-and-cobble plus sealing
In very tight spaces, some homeowners cut rigid foam to fit between studs, foam the edges, and then add another continuous layer over the studs. It is more cutting, but it can be very effective.
Where faced batts fit into this
If you use kraft-faced batts, the facing is typically installed toward the warm-in-winter side. In many knee wall situations, the bigger issue is not the facing, it’s the lack of an airtight layer on the attic side. A leaky knee wall with “perfectly faced batts” is still a leaky knee wall.
Step 6: Insulate and weatherstrip the access door
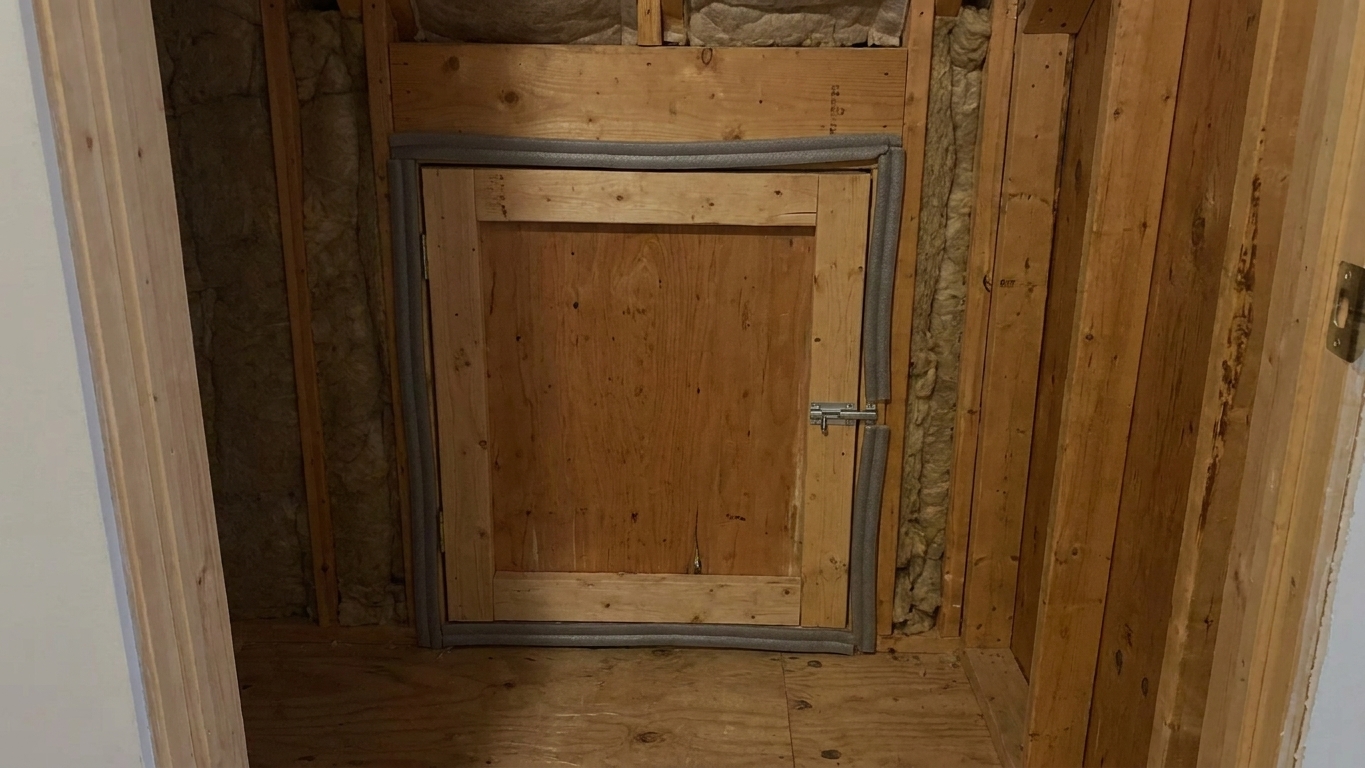
That tiny knee wall door is basically a mini exterior door if it opens into a cold side attic. If it is unsealed, it will undo a lot of your hard work.
- Add adhesive foam weatherstripping around the door stop so it seals when closed.
- Add a tight latch if it does not pull snug.
- Glue rigid foam to the back of the door (cut it so it does not interfere with closing), and tape the foam seams if you use multiple pieces.
If the access is just a loose panel, consider adding simple turn buttons or latches so it compresses the weatherstrip.
Quick checklist
- Air seal the bottom of the knee wall
- Air seal the top of the knee wall
- Insulate the sloped ceiling above the knee wall, keeping ventilation open (if the roof is vented)
- Air seal the attic floor behind the knee wall
- Insulate the attic floor behind the knee wall to your target depth
- Add an insulation dam where needed to hold loose-fill back and protect vent paths
- Insulate the knee wall and add an air barrier on the attic side
- Seal and insulate the access door
Common knee wall mistakes
Insulating only the knee wall
If the attic floor behind it is bare or leaky, cold air will still get you. Treat the whole assembly as one job.
Leaving fiberglass exposed to moving air
Fiberglass needs an air barrier. Add rigid foam or another continuous, sealed layer on the attic side.
Blocking roof ventilation
Stuffing insulation tight to the roof deck at the eaves is a recipe for moisture trouble. Use baffles and keep the vent channel open, assuming your roof is designed to be vented.
Ignoring ducts in the side attic
If you have ducts running through that space, a “cold side attic” strategy can punish you with comfort issues and higher bills. At minimum, air seal and insulate the ducts well, and consider whether a different thermal boundary makes more sense for your house.
Ignoring the access door
A leaky access door can feel like a constant draft in the room. Weatherstrip it and insulate it.
FAQ
Should I insulate the knee wall or the roofline instead?
Most story-and-a-half homes keep the side attic cold and insulate at the knee wall and the connected surfaces. Insulating the roofline can work too, but it changes how the attic behaves and may require different details for venting and moisture control. If you are not sure, stick with the knee wall boundary approach and do it thoroughly.
Do I need a vapor barrier?
It depends on your climate zone, existing materials, and what type of insulation you use. Many homes already have a vapor retarder in the drywall assembly or paint layer. The safest universal advice: focus on air sealing first, because air leaks move far more moisture than vapor diffusion. Also, be careful about creating a double vapor barrier. Avoid adding interior polyethylene unless you’re confident it makes sense for your climate and the layers you already have.
What R-value should I aim for?
Code targets vary by region, and older homes have practical limitations in tight framing cavities. Aim as high as reasonably achievable without crushing insulation, blocking ventilation, or creating moisture issues. The biggest performance gains often come from air sealing and adding an air barrier on the attic side of the knee wall.
Can I do this without crawling all the way into the side attic?
You can improve the access door and you can sometimes add insulation from the room side during a remodel, but the real payoff comes from sealing and detailing the attic side. Unfortunately, that usually means at least some crawling.
My final advice
If you only remember one thing: a knee wall job is an air sealing job first. Once the leaks are controlled, insulation starts acting like the cozy blanket it was meant to be, instead of a windbreaker full of holes.
Take it in sections, keep your tools near the access door, and do not be afraid to call it after an hour and come back fresh. Side attics reward patience.