
How to Insulate a Crawl Space
Two proven ways to insulate a crawl space: insulate the floor with a vented crawl, or insulate the walls and seal the crawl. Learn moisture steps, vapor barriers, vents, and what to fix before insulation.
The first crawl space I ever worked in as a young carpenter was a classic Michigan special: cold floor above, damp air below, and a mysterious smell that could only be described as “old lake.” My grandpa’s rule would’ve fixed it in one sentence: don’t insulate a wet problem. He was right then, and he’s right now.
Most residential crawl spaces get insulated one of two main ways. Both can work. The best choice depends on your climate, your moisture situation, and what your local code allows. I’ll walk you through the two approaches, what to do about vents, and the non-negotiable moisture steps that come before any insulation goes in.
Start here: is your crawl space wet?
If the crawl is actively wet, insulating is like putting on a winter coat after you jumped in a pond. You’ll trap moisture where you don’t want it, and that’s how you get mold, wood rot, and sagging insulation.
Signs you need to dry it out first
- Standing water, muddy soil, or a sump that runs constantly
- Condensation on ductwork or pipes
- Water stains on foundation walls
- Musty odor that hits you immediately after opening the access
- Visible mold growth or damp, dark framing
Stop point: If you have standing water or ongoing seepage, fix the water source first. Insulation isn’t the fix for bulk water.
Dry out steps before insulation
- Control roof water: Clean gutters, extend downspouts well away from the foundation, and confirm the grade slopes away from the house.
- Fix plumbing leaks: Even a slow drip can keep a crawl humid year-round.
- Address groundwater: If water comes up through the soil or in at the wall, you may need a sump system and perimeter drain work. That can be a pro job.
- Run a dehumidifier temporarily: After the water source is controlled, a dehumidifier can help you get the space dry enough to proceed.
- Let materials dry: Wet wood and wet soil don’t dry instantly. Give it time.
If you see extensive mold, damaged joists, or you suspect pests, it’s worth bringing in a qualified inspector. I love DIY, but I also love floors that don’t collapse.
The two insulation strategies
Crawl space insulation is really about where you draw the boundary between indoor and outdoor air.
Strategy A: Vented crawl (insulate the floor)
This is the traditional setup: vents stay open to the outside, the crawl space is treated like outdoor air, and you insulate the underside of the floor above. When I say “crawl ceiling,” I mean the underside of your subfloor and joists.
Typical parts: floor insulation between joists, air sealing at the rim joist, and a ground vapor barrier.
Strategy B: Closed crawl (insulate the walls)
This approach brings the crawl space inside the home’s “envelope.” Vents are sealed, the soil is covered and sealed, and insulation goes on the crawl space walls instead of the floor above.
Typical parts: sealed ground vapor barrier, sealed vents, wall insulation, and a plan for humidity control.
What about hybrids?
Real houses don’t always fit neatly in a diagram. You’ll see partial encapsulations, rim joist-only upgrades, and mixed setups after remodels. My advice: pick a strategy and build it like a system. Mixing assumptions is where crawl spaces get weird.
Which one should you choose?
Here’s the practical way I explain it in my weekend workshops:
- If you want a simpler DIY job and your crawl is already dry: a vented crawl with floor insulation is usually straightforward.
- If your crawl tends to be damp or you have comfort issues (cold floors, sweaty ducts, musty air): a closed crawl often performs better, but only if you do the sealing and humidity control correctly.
Quick climate reality check: In hot-humid and mixed-humid climates, venting can actually bring in more moisture (think: warm outdoor air hitting cooler surfaces and condensing). In cold climates, vented crawls can mean cold floors and frozen pipes. Local code and local building-science guidance should drive this call.
| Approach | Where insulation goes | Vents | Main moisture defense |
|---|---|---|---|
| Vented crawl | Between floor joists (underside of floor) | Open (code-driven) | Ground vapor barrier + venting that’s required but not always great at moisture control |
| Closed crawl | Foundation walls (and rim joist) | Closed and sealed | Sealed ground cover + air sealing + active humidity control |
Before you insulate: must-do checklist
Regardless of which strategy you use, these steps make the insulation work better and last longer.
1) Air seal the big leaks
Air movement is the enemy of insulation. In a crawl, the biggest leaks are usually at the rim joist area, plumbing and wiring penetrations, and open chases into walls.
- Seal gaps with caulk or spray foam rated for the purpose.
- Cover larger openings with rigid material and seal edges.
2) Install a ground vapor barrier
Bare soil constantly releases moisture. A vapor barrier is one of the highest-value crawl space upgrades you can make, whether the crawl is vented or closed.
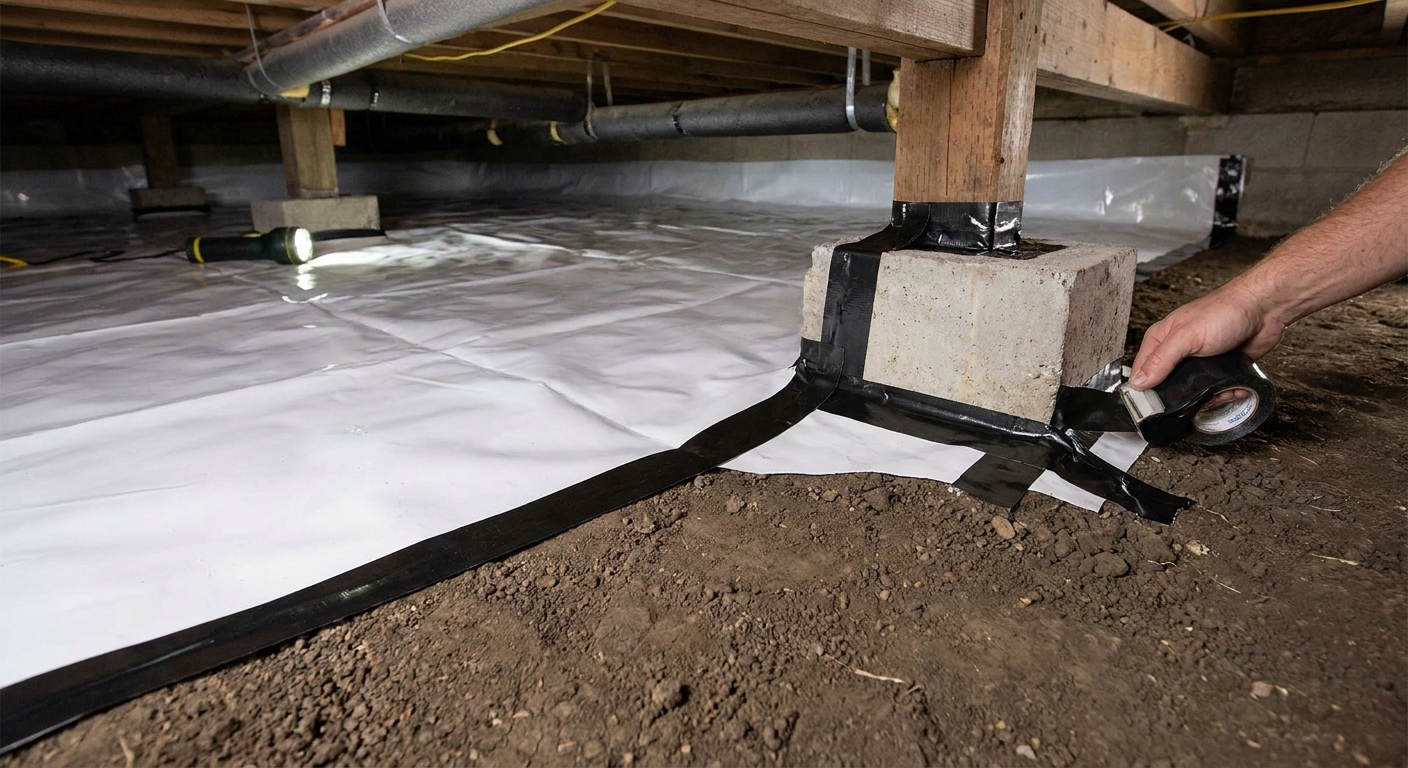
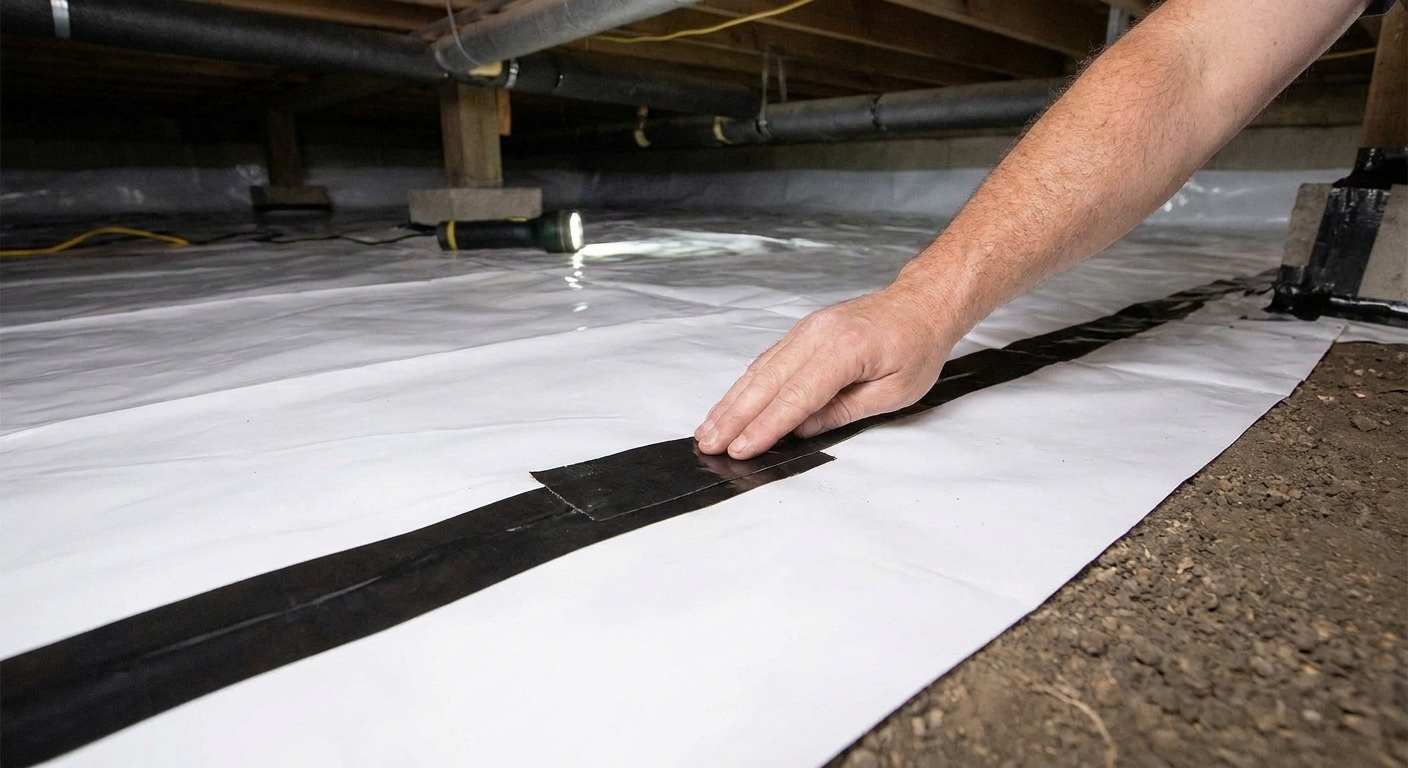
- Thickness: 6-mil polyethylene is a common minimum for basic coverage. For a closed crawl or any crawl that gets trafficked, thicker (10 to 20 mil, often reinforced) holds up better.
- Overlap seams and tape them.
- In a vented crawl, run the barrier up the foundation wall several inches and secure it where appropriate.
- In a closed crawl, run it up the wall higher and seal it to the wall to create a continuous ground-to-wall layer.
- Seal around piers and posts as neatly as you can.
3) Deal with ducts and pipes
- Leaky ducts: Seal connections with mastic, not duct tape.
- Cold water lines sweating: Add pipe insulation to reduce condensation.
- Dryer vents: Never vent a dryer into a crawl space.
4) Don’t ignore pests and combustion safety
- Termites: In termite zones, your local rules may require an inspection gap at the top of the foundation wall (especially with wall foam). Don’t cover up something an inspector needs to see.
- Combustion appliances: If you have an atmospherically vented furnace or water heater that pulls air from the crawl or is connected to the crawl, sealing can create backdrafting risks. If you’re not 100 percent sure, get it checked.
Option A: Insulate the floor in a vented crawl
If your crawl vents are intended to stay open, your goal is to keep the floor above warm and slow moisture from rising off the ground.
Materials that work well
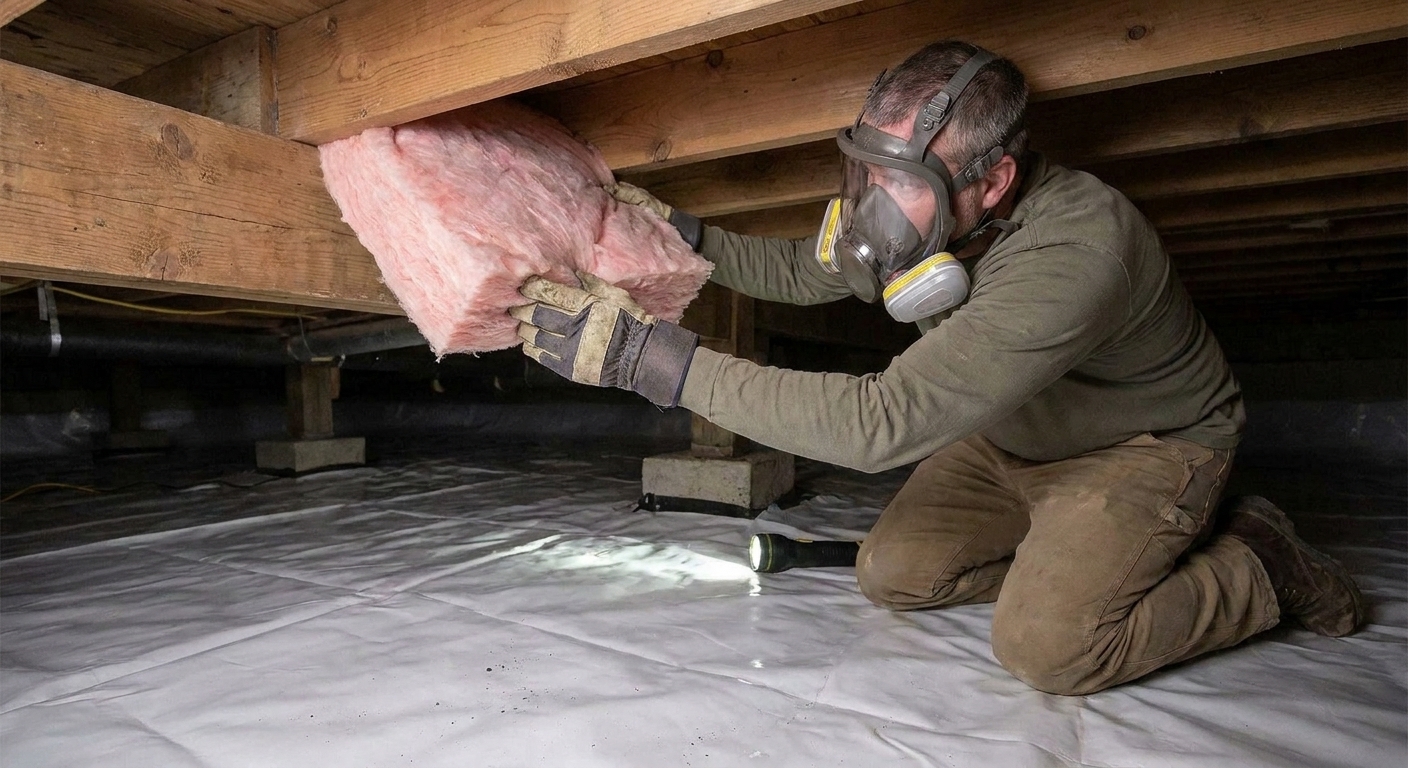
- Fiberglass batts: Common and affordable, but they need to be installed snugly and supported properly.
- Mineral wool batts: More rigid than fiberglass and tends to hold shape better. Great around irregular bays.
Foam board and spray foam can also be used in specific details, especially for air sealing. If you’re not comfortable with foam chemistry and fire-safety requirements, stick with batts plus careful air sealing.
Steps
- Confirm the crawl is dry enough to proceed. If wood feels damp or you see condensation, pause and address moisture first.
- Install or repair the ground vapor barrier. Tape seams and cover as much soil as possible.
- Air seal penetrations in the subfloor. Plumbing cutouts, wiring holes, and open chases leak a surprising amount of air.
- Insulate between joists. Fit batts to the full depth of the cavity without compressing them. Split batts around wiring and pipes rather than smashing them behind.
- Support the insulation. Use wire supports or appropriate strapping so batts stay tight to the subfloor. Sagging batts become cold batts.
- Protect against wind-washing. In some vented crawls, outside air moving through the vents can reduce batt performance. A properly detailed air barrier on the crawl side (where code and assembly allow) or choosing a more air-resistant insulation approach can help.
- Insulate and air seal the rim joist. This is a major heat loss zone. Rigid foam cut and sealed can work well here, but remember foam products may require an ignition or thermal barrier depending on the product and local code.
Vents: follow your local rules
In this strategy, the crawl is still treated like outdoor air. Don’t block vents just because it feels drafty under there. At the same time, in some climates and jurisdictions, vented crawls are falling out of favor for moisture reasons. The safe move is this: follow local code and don’t mix systems. If you want a closed crawl, do the full closed-crawl package.
Common failure: Floor insulation installed over a damp crawl, with no ground cover. That’s how batts turn into soggy blankets and start falling down.
Option B: Insulate the walls in a closed crawl
A closed crawl space can make floors warmer, protect plumbing, and reduce musty air drifting into the house. But it only works if you commit to the moisture control pieces.
What “closed” really means
- Crawl vents are closed and sealed.
- The ground is covered with a sealed vapor barrier.
- Air leaks to the outside are sealed as much as practical.
- The crawl has a plan for managing humidity long term.
Steps
- Fix bulk water first. No exceptions. If water enters during storms, address drainage and groundwater issues before sealing.
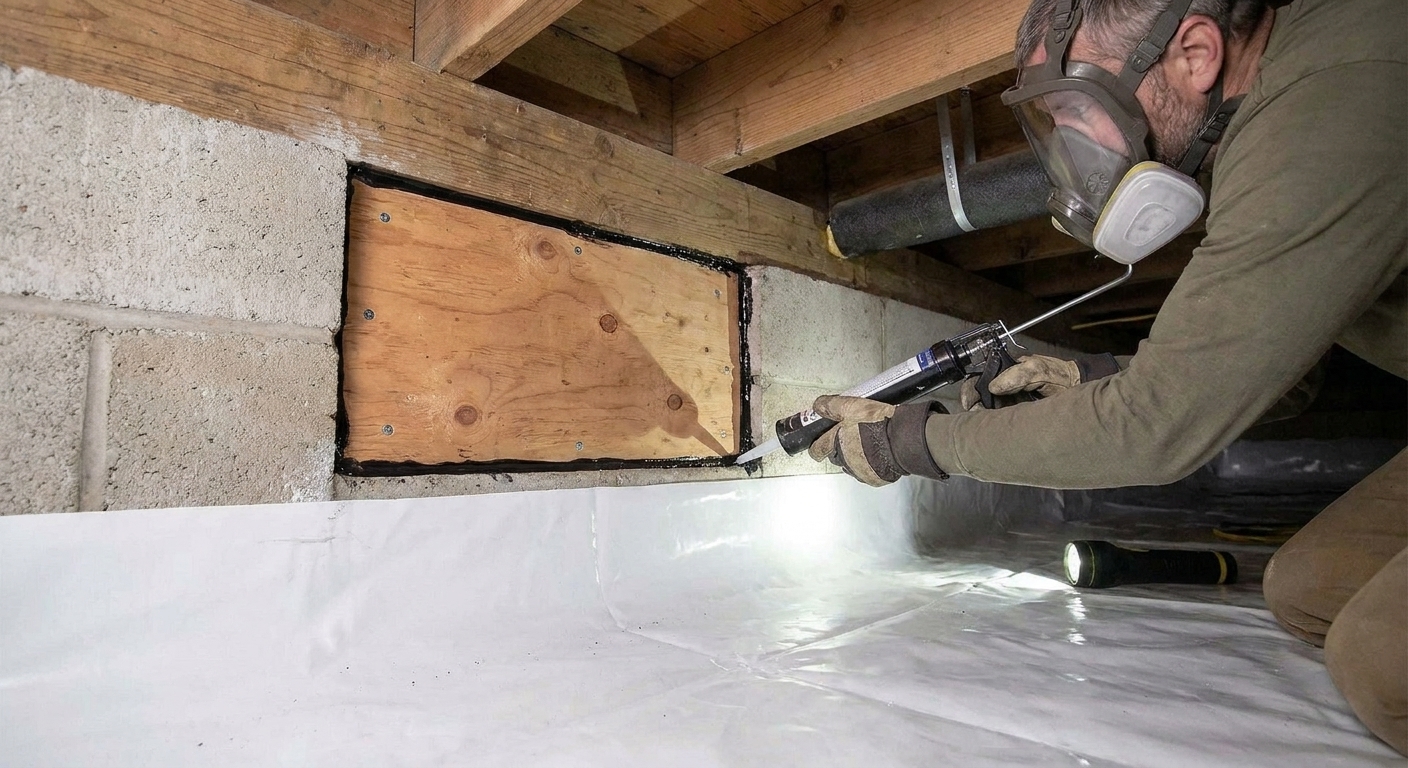
- Seal the vents. Use rigid material cut to fit, fastened securely, and sealed at the edges so outside air isn’t leaking in.
- Install a full ground vapor barrier. Cover the entire soil surface, overlap and tape seams, and seal around piers. Run it up the foundation walls and seal it to the wall. Don’t be shy here, continuity is the whole game.
- Air seal the rim joist and penetrations. This reduces humid outdoor air sneaking in and warm indoor air leaking out.
- Insulate the crawl space walls. Use an insulation approach suited to foundation walls and local code requirements. The goal is continuous coverage with minimal gaps. In termite zones, maintain any required inspection strip.
- Plan for humidity control. Many closed crawls use a dehumidifier or a small amount of conditioned air. Codes (often based on the IRC) may require specific provisions like a set amount of conditioned supply air, a return-air path, or a dedicated dehumidifier. Do what your local code requires, not what a random forum post prefers.
- Think radon before you seal everything up. If you’re in a radon-prone area, test and plan mitigation as needed. Encapsulation and radon work can complement each other, but you want the plan before you tape the last seam.
Moisture reality check
When you close vents, you’re reducing natural air exchange. That’s the point, but it means you must be confident the space won’t stay damp. If you’re unsure, talk with a local building pro or energy auditor who understands crawl spaces in your region.
R-values and comfort
I’ll keep this simple: the right R-value is partly climate and partly code. What matters most for DIY success is complete coverage and good air sealing. An average R-value installed perfectly usually beats a higher R-value installed with gaps and airflow washing through it.
- Colder climates: higher insulation levels make a noticeable comfort difference in floor temps.
- Milder climates: moisture control and air sealing often provide the biggest payoff.
If you want exact targets, check your local code requirements for crawl space insulation and verify whether your area recognizes vented or unvented crawl spaces in the way you plan to build.
Safety warnings
Watch out for crawl space hazards
- Electrical wiring: Stay clear of exposed splices or questionable wiring. Turn off circuits if you need to work near them.
- Asbestos: Older homes may have asbestos on pipes, ducts, or old insulation. If you suspect it, stop and test before disturbing anything.
- Rodents and droppings: Wear gloves and a proper respirator. Clean up safely before spending hours down there.
- Radon: Many regions have radon risk. If you haven’t tested, consider doing so. Sealing a crawl can change air movement patterns.
Don’t trap moisture against wood
A poorly placed vapor barrier or insulation installed against damp framing can cause rot. If you’re not sure where moisture will go, slow down and research climate-specific best practices or consult a pro.
Foam needs the right fire protection
Rigid foam and spray foam are great tools, but exposed foam may require an ignition barrier or thermal barrier depending on the product, location, and code. Read the product listing and follow local requirements.
Quick decision guide
Choose a vented crawl with floor insulation if:
- Your crawl stays dry most of the year
- Your local code allows a vented crawl and your vents are functional
- You want a simpler, familiar DIY approach
Choose a closed crawl with wall insulation if:
- You battle damp air, musty smells, or cold floors
- You can fully cover and seal the ground and seal the vents
- You can confidently control humidity after closing vents
Marcus tipIf you only do one thing this month, do the ground vapor barrier. It’s not glamorous, but it’s one of the most effective ways to calm down crawl space moisture.
FAQ
Can I just insulate the floor and skip the vapor barrier?
I wouldn’t. Bare soil can feed moisture into insulation and framing, and it makes the crawl smellier. A ground vapor barrier is a foundational step in both approaches.
Should crawl space vents be open in winter?
It depends on your climate and how the crawl was designed. If you’re keeping a vented crawl, follow local code and the original design intent, and don’t start closing vents seasonally unless a local pro tells you that’s appropriate for your setup. If you’re converting to a closed crawl, vents are sealed shut as part of the system. Mixing the two approaches often leads to condensation, odors, and mold.
What if my insulation keeps falling down?
That’s usually one of three issues: it’s getting damp, it wasn’t supported well, or it was cut too small. Fix moisture first, then rehang insulation with proper supports and full contact to the subfloor.
Do I need a dehumidifier in a closed crawl?
Often, yes, or another code-approved method of humidity control. A sealed crawl isn’t “set it and forget it” unless you’ve got a plan to keep relative humidity in check long term.