
How to Clean a Sewage Ejector Basin
If your sewage ejector pit smells or keeps alarming after the lid was loose, here’s how to shut off power, lower the level, remove sludge, rinse safely, reseal the lid, and know when the pump has to come out.
Good grain. Great questions.
If a sealed sewage ejector basin lid has been loose, you can wind up with a special trio: smell, moisture around the lid, and an alarm that seems to have developed an attitude. The fix is usually not exotic. You need to make the basin clean enough that it is not holding a layer of sludge and greasy scum, then get the lid sealed again so odors and humidity stay inside the system where they belong.
Let’s sort it out, workshop-style: safe first, then tidy, then sealed.
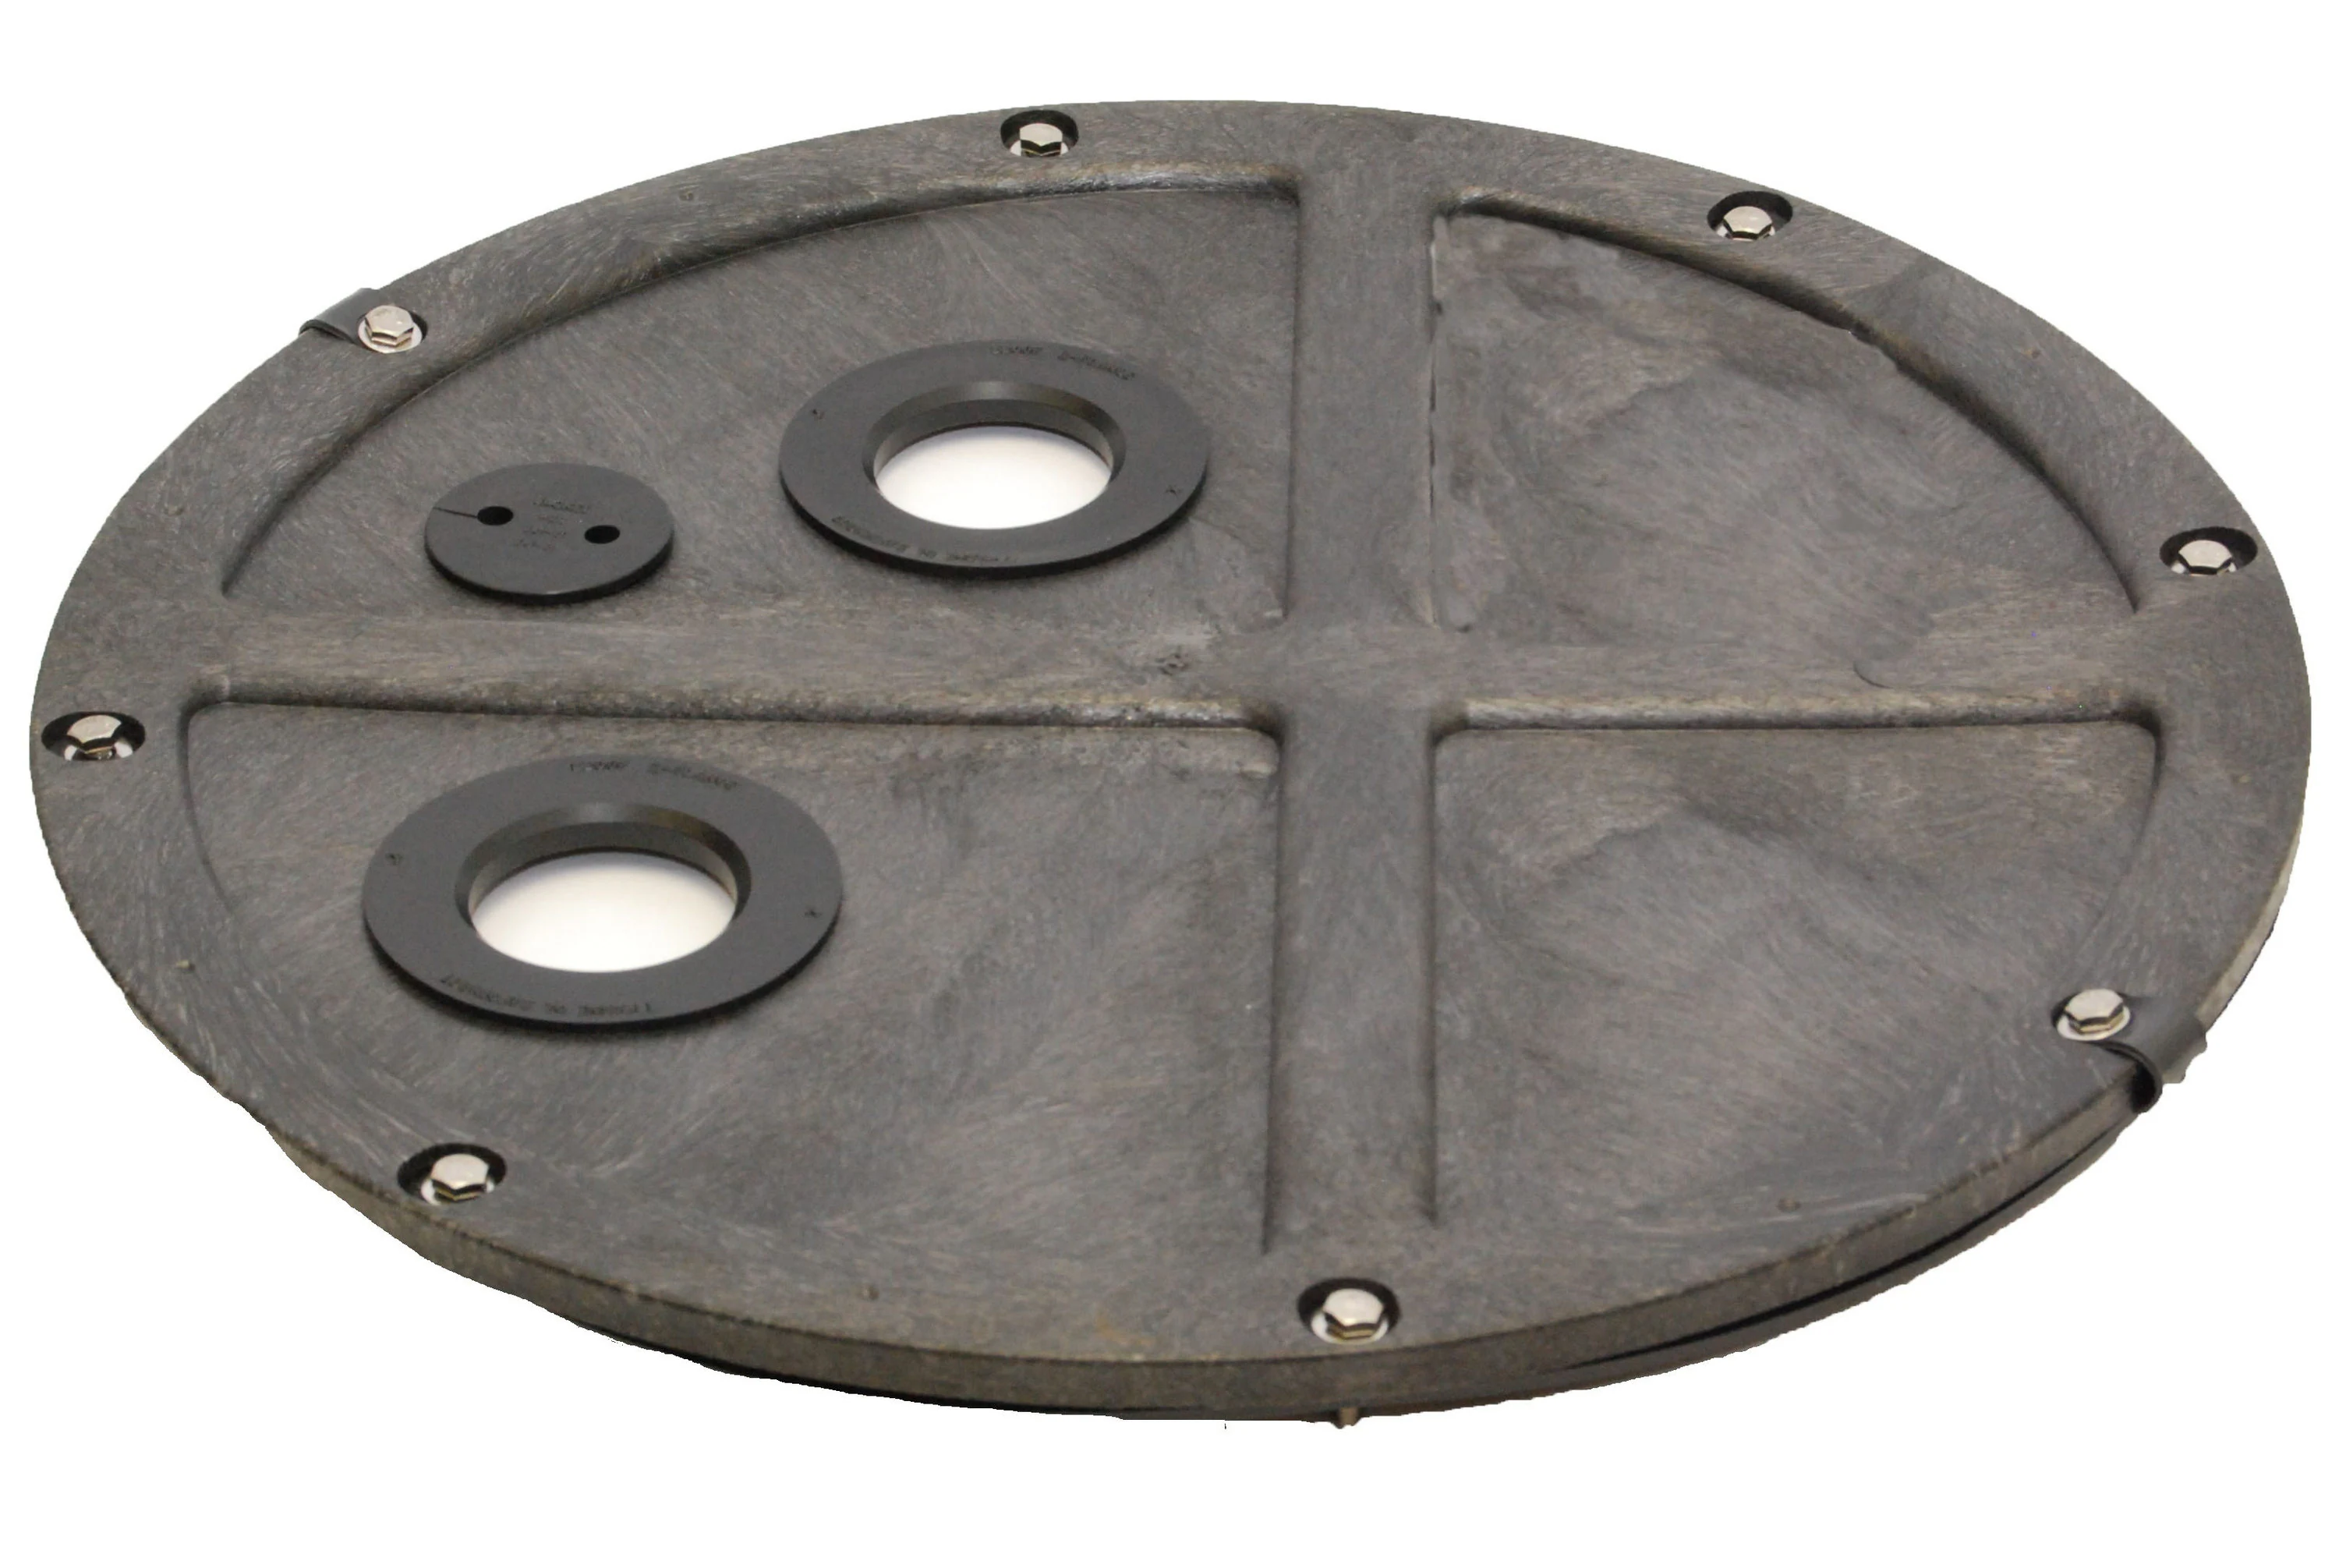
Before you start
A sewage ejector basin is a sealed pit that collects wastewater from below-grade fixtures (basement toilet, shower, sink, laundry) and pumps it up into your home’s main drain line. It is not the same thing as an open groundwater sump pit.
Quick ID check:
- Sewage ejector basin: sealed lid, multiple plumbing pipes through the lid, and usually a vent line. Contents are wastewater and solids.
- Groundwater sump pit: often open or loosely covered, fewer pipes, handles clear groundwater. It can smell musty, but it should not smell like sewage.
Safety note: Ejector basins contain sewage and sewer gases. Wear proper protection and keep kids and pets away. If you are immunocompromised or cannot ventilate the space well, hire this out.
Gas and confined-space warning: Sewer gas can include hydrogen sulfide and methane. If you feel dizzy, nauseated, or get a sudden headache, stop and get fresh air. Avoid open flames, smoking, or anything that can spark near an open basin.
When cleaning helps
Cleaning makes sense when:
- The lid was loose or the gasket was out of place and now you have a persistent sewage odor.
- The alarm went off because the float stuck, grease buildup slowed pumping, or the pit ran “dirty” after being exposed to air.
- You can see residue around the underside of the lid or in the basin (through the access or after opening).
Cleaning is not the fix when:
- The odor is coming from a dry trap (often a floor drain or rarely used sink). That is a pour-water-and-go problem.
- You have a venting issue (gurgling drains, trap siphoning, odor that changes with wind).
- The pump is failing electrically (won’t run, trips breaker, loud grinding, runs but does not move water).
Tools and supplies
You do not need fancy gear, but you do need the right kind of “gross job” setup.
Personal protection
- Nitrile gloves (long cuff if possible) and a second pair as backup
- Eye protection
- Mask or respirator if odors are strong
- Old clothes and washable shoes or disposable boot covers
Cleaning and handling
- Adjustable wrench or nut driver for lid bolts
- Heavy-duty trash bags
- Shop towels or disposable rags
- Long-handled scrub brush
- Garden hose (if a nearby utility sink or spigot is available)
- Bucket
- Wet/dry shop vacuum only if it is rated for wet pickup and you are willing to dedicate it to this kind of work
Optional but helpful
- Enzyme-based drain or basin cleaner labeled safe for sewage systems (for follow-up maintenance, not miracles)
- Replacement lid gasket, if yours is cracked, flattened, or missing
- Silicone grease for rubber gaskets (not caulk, and not petroleum jelly)
Skip the splashy chemicals: Avoid pouring harsh drain openers, acids, or “mix-your-own” chemical cocktails into the basin. Bleach can also be a bad idea in a pit, especially if there is any chance it will mix with other cleaners (ammonia products, acids) because it can create irritating or dangerous fumes. In a confined space, even “just fumes” becomes a real problem. Warm water, a little dish soap, and physical removal are the workhorses here.
About shop vacs: Vacuuming sewage can aerosolize odor and bacteria. If you go this route, dedicate the vacuum to nasty jobs, use a tight-fitting lid and a good filter setup, and clean and disinfect the vacuum afterward. Never dump the contents into a yard, ditch, or storm drain. Dispose of waste according to local rules.
Step 1: Power off and air out
First, stop anything from cycling while you are working.
- Turn off the ejector pump at the breaker. Do not rely on a switch or unplugging alone if it is hardwired.
- Verify it is off. If you are not 100 percent sure, assume it is energized until proven otherwise.
- Ventilate the area. Open basement windows if you have them. Set a fan to move air out of the space.
- Stop water use to anything that drains into the basin. No flushing, no laundry, no basement shower. Put a note on the toilet if needed.
Step 2: Lower the level
Ideally, you want the basin as low as possible so you are cleaning walls and the ring of residue without stirring a full pit.
Option A: Controlled pump-down
If the basin level is high and the pump is otherwise functioning, the cleanest move is often to run a controlled cycle before you open anything.
- Keep the lid fully seated and secured. Bolts snugged down is best. Hands clear, cords clear.
- Turn the breaker on.
- Trigger a normal cycle by adding a small amount of water from a fixture that drains to the basin, or by lifting the float only if you can do it safely through an access port.
- Once it pumps down, turn the breaker off again.
This keeps splashing and odor down because the lid stays on for the messy part.
Option B: Pump-out or vacuum-out
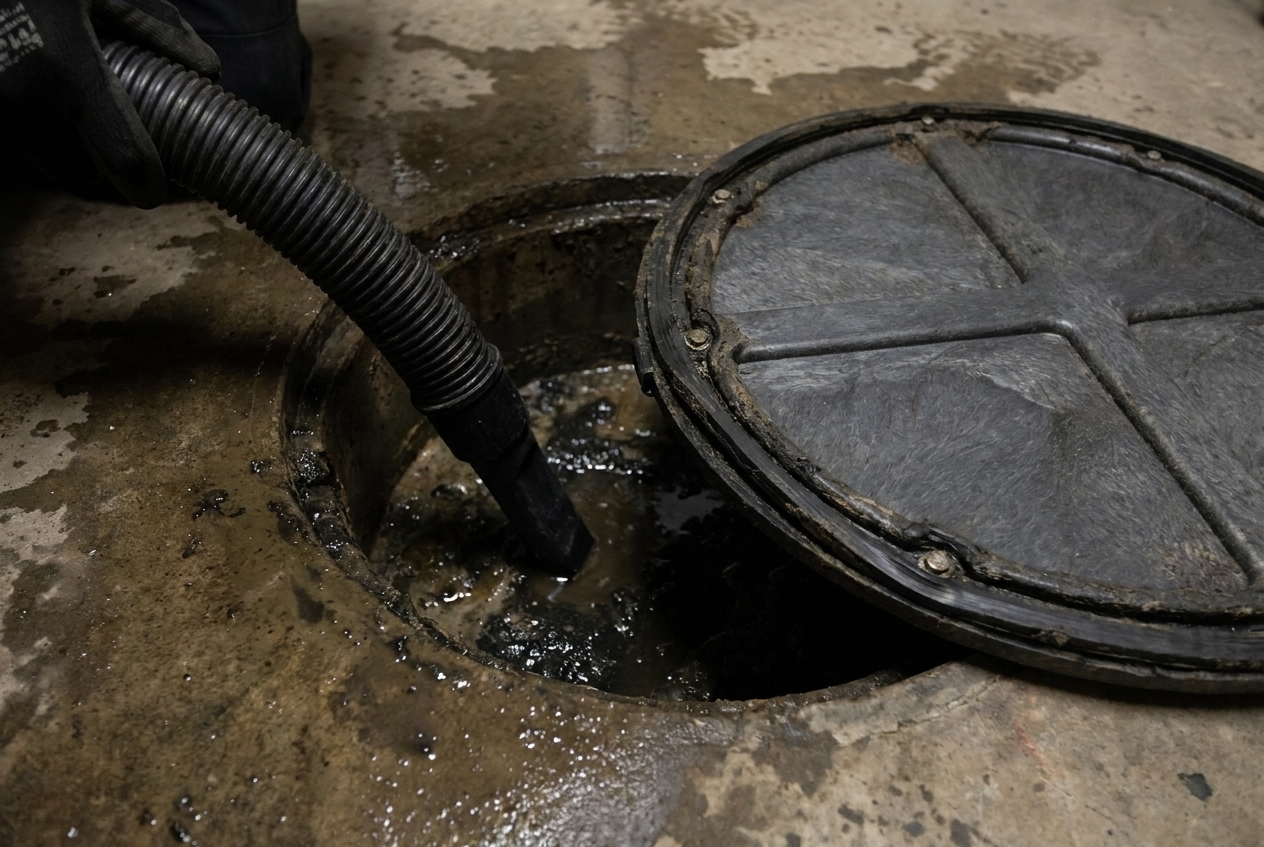
If the pump is jammed, the check valve is stuck, the float is not working, or the pit is too dirty to cycle reliably, you may need to remove liquid with an external pump or a wet/dry vacuum.
- Wet/dry vacuum: workable for small volumes, but messy and easy to do poorly. Plan for careful handling and proper disposal.
- Trash pump or transfer pump: faster, but you need a safe discharge point and hoses that can handle wastewater.
When in doubt, call a pro: If the basin is full and the pump will not run, a plumber or drain service can pump it out safely without turning your basement into a bacteria-themed slip-and-slide.
Step 3: Open the lid
Once power is off and the basin is at a manageable level, it is time to open.
- Loosen bolts evenly around the lid. Do not remove one side completely first. This helps prevent warping and reduces sudden odor release.
- Lift the lid slowly. If it is stuck, gently work it up. Avoid prying hard on plastic lids.
- Do not pull on wires or float cords. Keep everything supported and out of the way.
Step 4: Remove sludge and scum
The smell usually lives in two places: the greasy ring above the waterline and the sludge layer on the bottom.
What to scoop or vacuum
- Floating grease mats and paper residue
- Heavy sediment on the bottom (as much as you can remove without disassembling everything)
- Clumps around the pump base and float
Bag solids carefully. Double-bag if needed. Local rules vary on disposal. One hard rule is universal: do not dump this into a storm drain, ditch, or onto the ground.
What to scrub
- Basin walls, especially the tide mark ring
- Underside of the lid
- Float and tether area (gently, do not force anything)
- Inlet areas where wastewater enters the basin
Warm water with a small amount of dish soap is typically enough to break up grease so you can physically remove it.
Step 5: Rinse without a flood
Rinsing is where people either win the day or accidentally create a sequel.
A controlled rinse method
- Pour or spray clean water down the basin walls to wash residue toward the bottom.
- Agitate with a brush to loosen stubborn buildup.
- Remove dirty rinse water with the pump (preferred) or a wet/dry vacuum.
- Repeat until the basin walls and lid underside are noticeably cleaner and the rinse water is mostly clear.
If your pump can run, the simplest approach is often: rinse, set the lid back on stable, turn power on, let it pump down, turn power off, open again to continue. The lid does not need to be perfectly sealed during intermediate rinses, but it should be seated so it cannot shift or splash.
Step 6: Check alarm parts
Many “cleaning” jobs are really “my float is gross and stuck” jobs.
Float and switch
- Make sure the float moves freely through its full range.
- Look for grease buildup on the float, tether, or guide.
- Check that the float cord is not tangled with the pump cord.
Alarm setup
- Some alarms have their own float and may stay powered even when the pump breaker is off.
- After reassembly, test the alarm if your model has a test button, and make sure the alarm float (if separate) is not hung up.
Check valve and discharge line (quick check)
- After cleaning, when the pump runs you should hear a normal cycle and the water level should drop.
- If the pump runs but the level does not drop, or it refills quickly, you may have a discharge or check valve problem. That is beyond simple cleaning.
Step 7: Reseal the lid
A clean basin with a leaky lid is like storing onions in a paper bag. The odor finds a way.
Know what the seal is
A typical sealed ejector lid relies on three things working together:
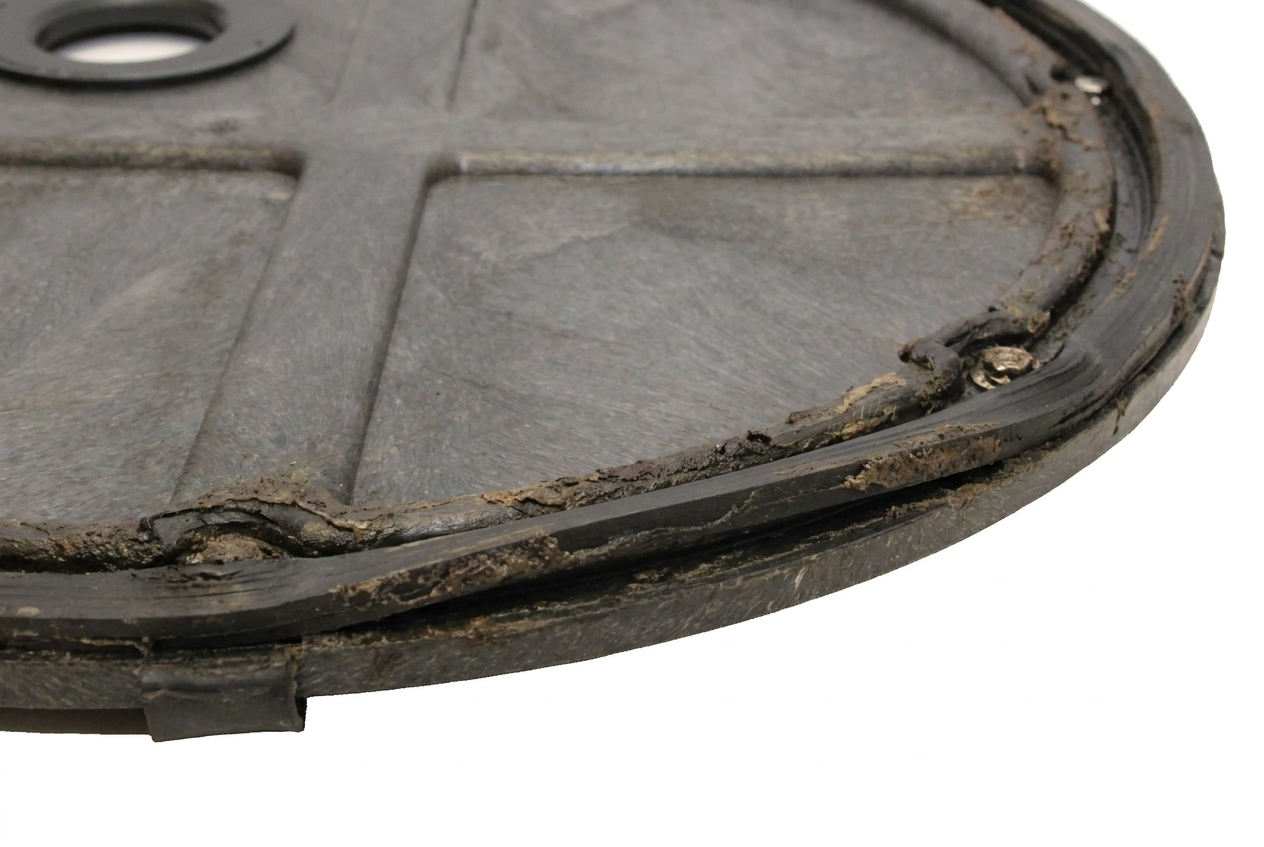
- A gasket between lid and basin rim
- Even bolt pressure around the lid
- Sealed penetrations where pipes, cords, or grommets pass through
Clean and inspect sealing surfaces
- Wipe the lid rim and basin rim clean and dry.
- Inspect the gasket for cracks, missing sections, or flat spots.
- If the gasket is a rubber style and reusable, apply a thin coat of silicone grease to help it seat and reduce sticking next time.
- If the gasket is foam, brittle, or permanently compressed, replacement is usually the better move than greasing it.
Bolt it down evenly
- Set the lid squarely.
- Tighten bolts in a crisscross pattern, like a car wheel.
- Snug is the goal. Over-tightening can warp lids and create leaks.
Seal penetrations if needed
If odors are coming from around pipe penetrations or cord grommets in the lid, the fix may be new grommets or proper sealing hardware. Smearing caulk everywhere can make future service miserable and still not hold up.
Step 8: Test the system
- Make sure the lid is secured.
- Turn the breaker back on.
- Run water from a basement fixture that drains to the basin.
- Listen for a normal pump cycle: fill, pump on, water level drops, pump off.
- Check for leaks around the lid and plumbing connections.
- Confirm the alarm is quiet and (if applicable) that it passes its test function.
Some odor right after opening the pit is normal. What you are watching for is whether the smell lingers once the lid is sealed and the room has aired out.
When to pull the pump
Cleaning the basin is one level. Removing the pump is the next, and it is sometimes the right call.
Consider pulling the pump (or hiring it out) if:
- The float is clean but the pump cycles oddly, runs too long, or short cycles.
- The pump jams repeatedly from stringy debris.
- You see heavy buildup packed under or around the pump intake that you cannot remove in place.
- The pump is more than several years old and showing failure signs: grinding noise, tripping breaker, weak pumping.
- The basin bottom has a thick sludge layer you cannot remove without moving the pump.
Heads up: A sewage ejector pump is heavy, messy, and attached to plumbing. If you are not comfortable disconnecting unions and handling wastewater safely, this is an excellent time to call a plumber.
Prevent the next smell
- Keep the lid sealed. If you had it loose for service, re-tighten the same day.
- Do not use the ejector as a trash can. “Flushable” wipes are not your pump’s friend.
- Go easy on grease. Even with hot water, fats cool in the basin and coat everything.
- Listen for pattern changes. Longer run times or more frequent cycling can be an early sign of buildup or discharge issues.
FAQ
Is a sewage ejector basin the same as my sump pit?
No. A sewage ejector basin is sealed and handles wastewater and solids. A sump pit is typically for groundwater and is often open or lightly covered. Cleaning steps, risk level, and odors are very different.
Can I pour bleach into the basin to kill odor?
It may reduce odor briefly, but it does not remove the sludge and grease that keep feeding smell. It can also create harsh fumes, especially if it mixes with other cleaners. Physical cleaning plus a good lid seal is the better long-term fix.
My basin smells but looks clean. Now what?
Most often it is a seal problem (gasket, lid bolts, pipe grommets) or a venting problem. Also check for a nearby floor drain with a dry trap. If the smell changes with weather or you hear gurgling, look at venting next.
How often should an ejector basin be cleaned?
There is no one schedule that fits every house. If it is sealed and working well, many homeowners never open it unless there is a problem. If you have grease-heavy use or recurring alarms, a periodic cleaning can help.