
How to Clean a Furnace Flame Sensor
If your furnace lights and then shuts off after a few seconds, a dirty flame sensor is a common culprit. Here’s how to shut off power and gas, remove the sensor, clean it safely, and reinstall it.
The first time my furnace did the “lights for five seconds, then quits” routine, I stood there in my Michigan basement like it had personally betrayed me. The good news is: that exact symptom is often caused by one small part getting a little dirty. The flame sensor is basically your furnace’s safety guard. If it cannot prove there’s a flame, it shuts the burners down fast.
Cleaning a flame sensor is a very doable homeowner fix, as long as you respect the safety steps. We are going to stop well short of anything involving the gas valve, burner adjustments, or heat exchanger inspection. If you get to a point where you are unsure, call a pro. No shame in that.
Time to complete: Plan on about 10 to 20 minutes if you can easily access the burner compartment.
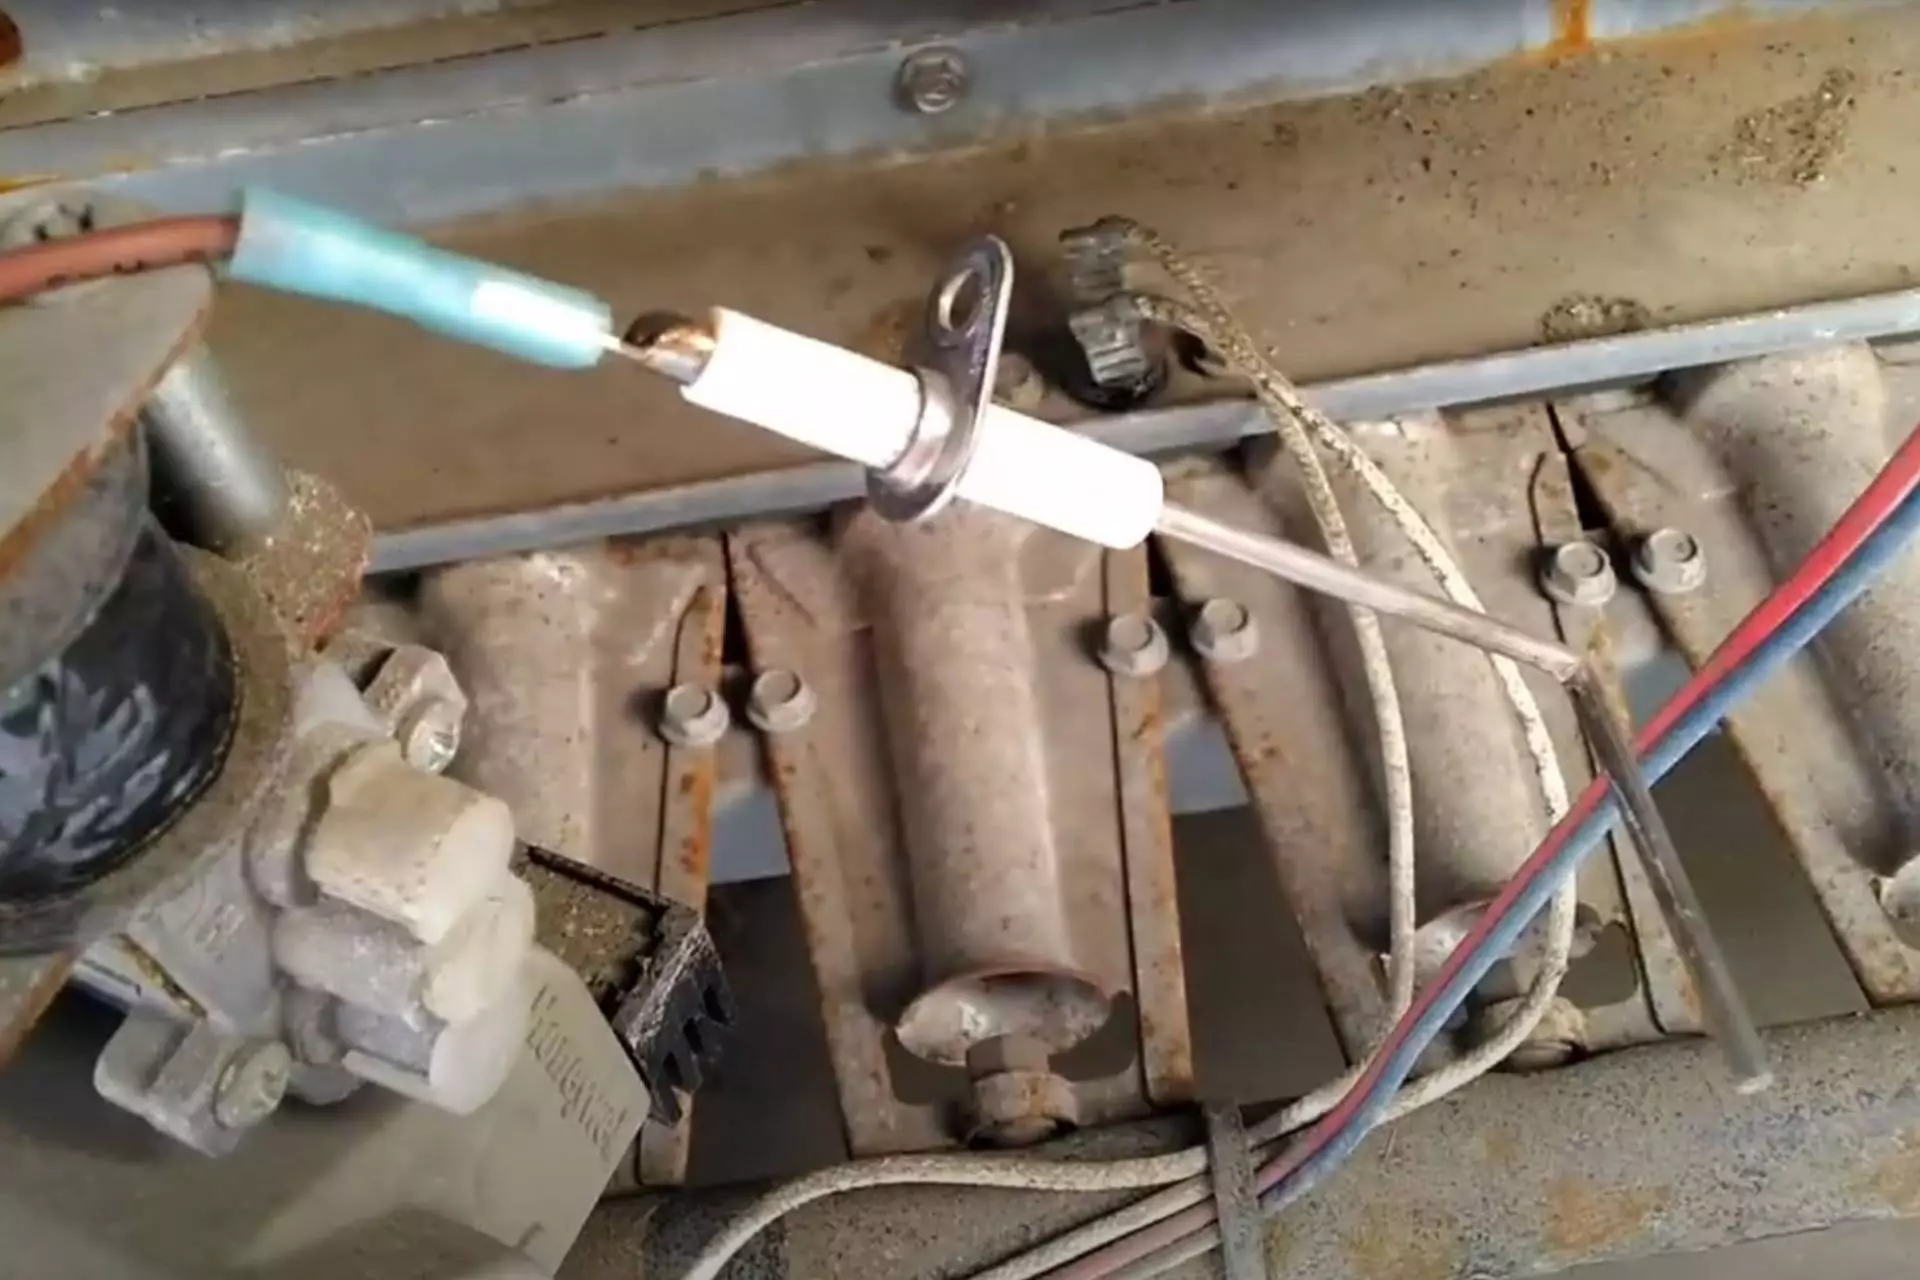
Signs it is the flame sensor
A dirty flame sensor usually shows up the same way: the furnace starts normally, then bails.
- Burners ignite, then shut off in 2 to 10 seconds, and the blower may keep running.
- The furnace tries again a few times, then locks out and may run the blower so you feel cool or room-temp air.
- You can hear ignition happen (click of igniter or whoosh of flame), then it cuts out.
- No strange gas smell (if you smell gas, stop and leave the house, then call your gas utility or your local emergency number).
That said, this symptom is not exclusive to a dirty sensor. A failed flame sensor, a bad furnace ground, poor flame carryover across the burners, pressure switch issues, condensate problems on high-efficiency units, igniter issues, or control board faults can all look similar. Cleaning the flame sensor is still a smart first step because it is quick, cheap, and common.
Safety first: power and gas
I know, I know. It is “just one screw.” Still, treat a furnace like the serious machine it is.
1) Turn off electrical power
- Flip the furnace switch (often mounted on a nearby wall or joist and looks like a normal light switch) to OFF.
- Also turn off the furnace breaker in your electrical panel. This is my belt-and-suspenders habit from construction days.
2) Turn off the gas (recommended)
For flame sensor cleaning, you are not touching gas piping, but shutting the gas off adds a layer of safety while you are working near the burner area.
- Find the manual gas shutoff valve on the gas line feeding the furnace.
- Turn the handle a quarter turn so it is perpendicular to the pipe (that is OFF on most valves).
Safety note: If you smell gas at any point, do not keep troubleshooting. Leave the house and contact your gas utility or your local emergency number.
Tools and supplies
You do not need anything fancy. What you want is gentle cleaning, not grinding the sensor down.
- Screwdriver or nut driver (commonly 1/4-inch hex or Phillips, varies by furnace)
- Fine abrasive: Scotch-Brite pad or fine steel wool (0000)
- Clean paper towel or microfiber cloth
- Flashlight or headlamp
- Vacuum with hose (optional, for loose dust around the burner area)
Skip: sandpaper that is very aggressive, files, grinders, and anything that removes a lot of metal.
Also avoid: leaving fibers or abrasive dust behind. The sensor needs to go back in clean and dry.
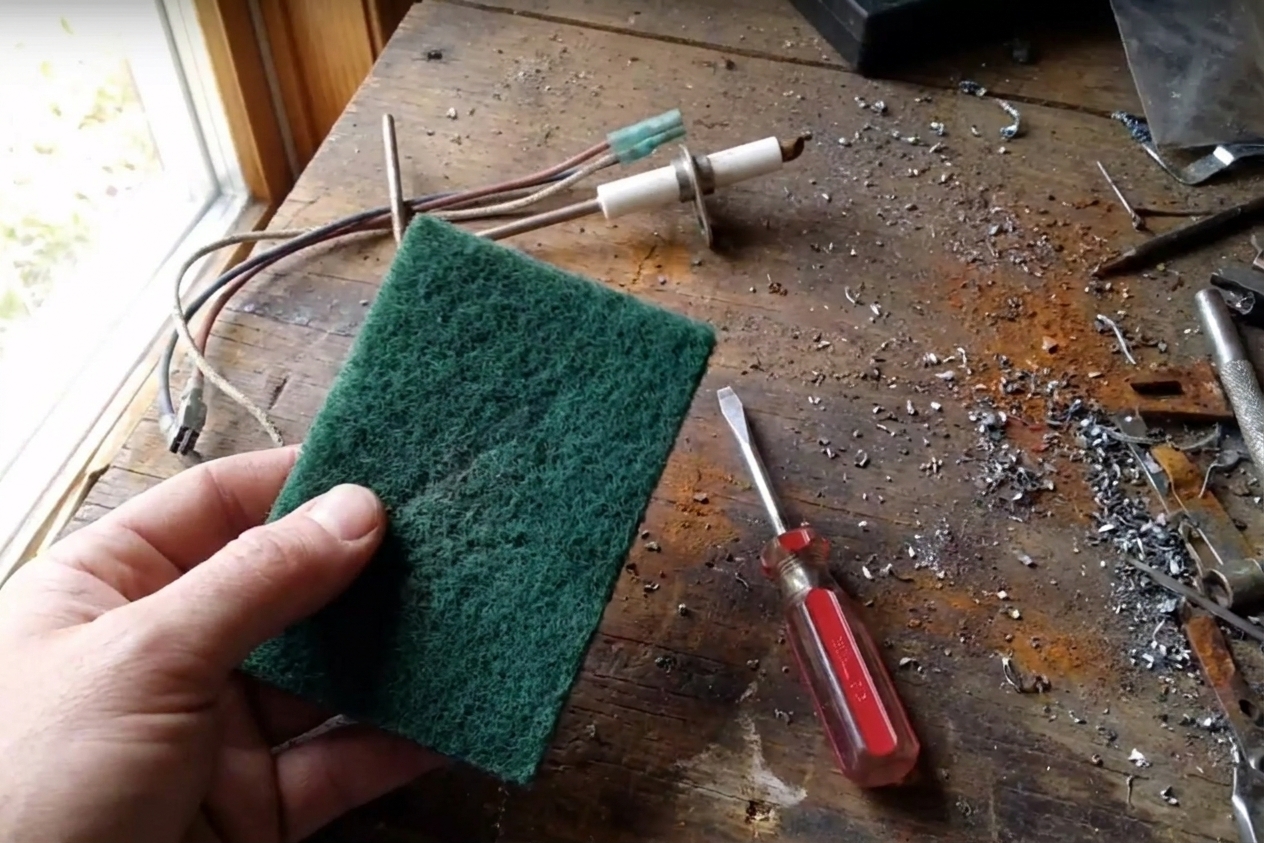
Where the flame sensor is
Many newer gas furnaces are induced-draft. You will usually see a small draft inducer motor and a sealed burner compartment behind a front panel. Older natural-draft furnaces exist too, and packaged or mobile-home units can be laid out differently, but the flame sensor concept is the same.
How to find it
- Remove the furnace’s front access panel(s). Many units have an upper burner or controls panel and a lower blower panel.
- Look at the burner area. You are looking for a single metal rod (the sensor probe) that sticks into the path of a burner flame.
- The flame sensor is usually mounted with one screw and has one wire connected to a spade terminal.
Do not confuse it with the hot surface igniter, which often has a ceramic base and a more delicate element. The flame sensor is usually a simple metal rod with a porcelain insulator.
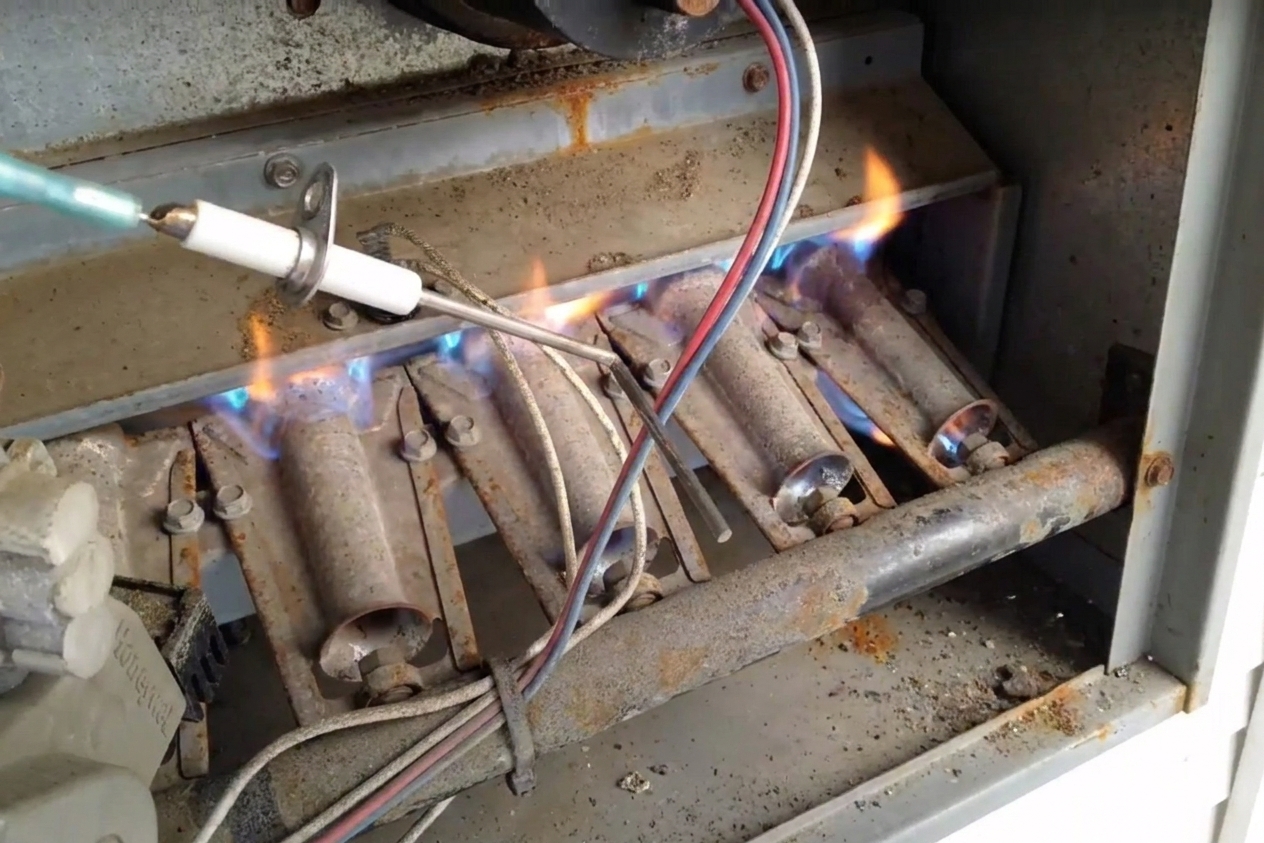
Remove and clean the sensor
1) Double-check power is off
Before you touch anything, confirm the furnace is dead. Nothing should be humming, and the control board should have no lights.
2) Take a quick photo
This is my favorite no-stress trick. Snap a photo of the flame sensor wire connection and how the sensor sits. It makes reassembly almost foolproof.
3) Disconnect the wire
Pull the wire connector off the flame sensor terminal. Pull on the connector, not the wire itself.
4) Remove the mounting screw
Use the correct screwdriver or nut driver and back out the single screw holding the sensor bracket.
5) Gently pull the sensor out
The probe slides out as a unit. Be gentle and do not bang it around. That porcelain insulator can crack.
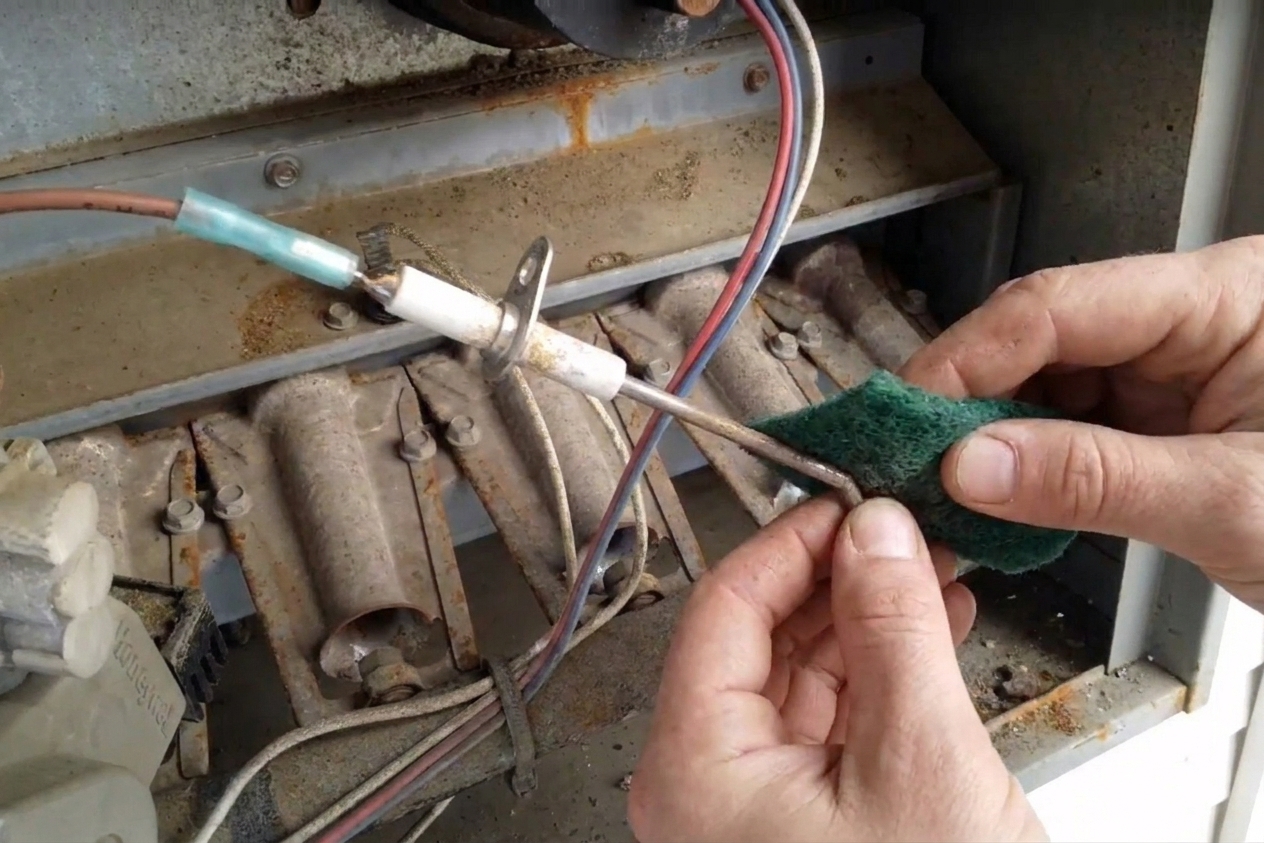
6) Clean the metal rod lightly
This is the whole point. Most modern furnaces “prove flame” by sensing a tiny electrical current through the flame (called flame rectification). A little contamination on the rod can reduce that signal enough that the control board decides, “Nope, not safe,” and shuts the gas off.
- Lightly rub the metal rod with a Scotch-Brite pad or 0000 steel wool.
- Your goal is a clean, shiny surface, not a brand-new mirror finish.
- Wipe the rod with a clean, dry towel to remove any residue.
- Optional: If you want, wipe once more with a cloth lightly dampened with isopropyl alcohol, then let it fully dry. Do not spray anything into the furnace.
Avoid: getting debris into the porcelain area, bending the rod, or leaving steel wool fuzz behind. Dry, gentle cleaning is best here.
Reinstall and test
1) Reinstall the sensor
- Slide the sensor back into the same opening and orientation.
- Reinstall the mounting screw snugly. It should be secure, not over-tightened.
2) Reconnect the wire
Push the connector onto the terminal until it seats firmly.
3) Put the access panels back on
Many furnaces have a door safety switch. If the panel is not on correctly, the furnace may not run.
4) Turn gas and power back on
- Turn the manual gas valve back to ON (handle parallel with the pipe on most valves).
- Turn the breaker back on and flip the furnace switch on.
5) Call for heat and watch one full cycle
Set the thermostat to call for heat and observe:
- Inducer starts
- Igniter glows or sparks
- Burners light and stay lit
- After a short delay, the blower turns on
If it stays running, you likely nailed it. If it still lights then drops out, move to the next section.
If it still shuts off
Here’s where I draw the DIY line for most homeowners. There are a few basic checks you can do safely, and then it is time to call an HVAC tech.
DIY-friendly checks
- Confirm the furnace panels are seated and the door switch is engaged.
- Check the flame sensor wire connection is tight.
- Look for obvious damage like corrosion, heavy pitting, or a cracked porcelain insulator. If it is damaged, replacement is usually inexpensive and often smarter than repeated cleaning.
- Check the diagnostic LED code on the control board. There is usually a blinking light visible through a small sight glass, or you can see it after removing the upper panel. The code legend is often printed on the inside of a door panel. Codes can help separate flame-sense problems from pressure switch, limit, rollout, or venting issues.
- Watch the flame (through the view port if your unit has one). If the flame is weak, lifting, or not carrying over smoothly across burners, that can cause flame-proving failures that look exactly like a bad sensor.
Stop here: Do not attempt gas valve testing, manifold pressure adjustments, burner modifications, or heat exchanger inspection. Those are legitimate safety issues and belong with a licensed HVAC pro.
Call a pro now
- The furnace still shuts down quickly after cleaning the sensor
- Error codes point to pressure switch, venting, rollout, or limit issues
- You see soot, scorch marks, melted wiring, or water dripping onto controls
- The furnace starts making booming or delayed ignition sounds
How often to clean it
In my experience, once a year is a great rhythm, usually at the start of heating season. Some furnaces go multiple years without needing it, but if you have pets, a dusty basement, or you burn a lot of candles, you may see buildup faster.
If you are cleaning it more than once a season to keep the furnace running, take that as a clue. Frequent fouling can point to a combustion or venting issue, a grounding problem, or a sensor that is simply on its way out. That is a good time to bring in a pro.
FAQ
Can I clean a flame sensor without turning off the gas?
Many people do, but I recommend shutting the gas off anyway since you are working in the burner compartment. It is quick, it reduces risk, and it helps you slow down and work deliberately.
Can I use sandpaper?
You can, but choose a very fine grit and use a light touch. A Scotch-Brite pad or 0000 steel wool is usually safer and harder to overdo. Whatever you use, wipe the rod clean afterward so you do not leave abrasive residue behind.
Do I need to replace the flame sensor instead of cleaning it?
Cleaning fixes most dirty-sensor cases. Replace it if the porcelain is cracked, the rod is badly pitted, the rod is bent or deformed, or cleaning only buys you a short-lived fix.
Is this the same thing as a thermocouple?
No. A thermocouple is common on older standing-pilot systems. Most modern furnaces use a flame sensor rod that works by flame rectification.
Before you close the panel
If your furnace was lighting and then quitting, and now it runs a full heat cycle after cleaning the flame sensor, give yourself a little credit. You just solved a problem that leads a lot of homeowners to panic-call for service on the coldest night of the year.
And if it did not fix it, you still did the best first step and you can tell the HVAC tech exactly what you observed, plus any diagnostic LED code you saw. That alone can save time and money.