A homeowner-friendly attic air sealing checklist: top plates, wire holes, plumbing penetrations, chases, bath fans, hatch sealing, and more. Plus what not to...
The Homeroom Fix
October 25, 2026
•
By Marcus Delgado
How to Add Insulation Over Existing Attic Insulation
Learn when existing attic-floor insulation can stay, how to safely top it off with unfaced batts or loose-fill in a typical vented attic, and how to avoid moisture and safety problems.
The first time I topped off attic insulation in my own 1970s Michigan fixer upper, I expected it to be a simple “add more fluffy stuff” situation. Then I pulled back a corner and found a mix of old batts, some loose fill, a few mystery air leaks, and a couple of light fixtures that absolutely did not want to be buried.
This article is about the top-off method: when your existing insulation can stay put and you just want to add more on top. I am not covering a target R-value chart and I am not making the “remove it all” decision for you. We are focusing on how to add insulation correctly so you get the comfort gains without creating a moisture problem or a safety hazard.
Assumption check: This guidance is written for a typical vented attic (soffit intake plus roof or gable exhaust), like a lot of homes in cold or mixed climates. If you have an unvented attic, a conditioned attic, or an unusual roof assembly, your vapor and ventilation strategy can be different. Local code also matters.
When the old attic insulation can stay
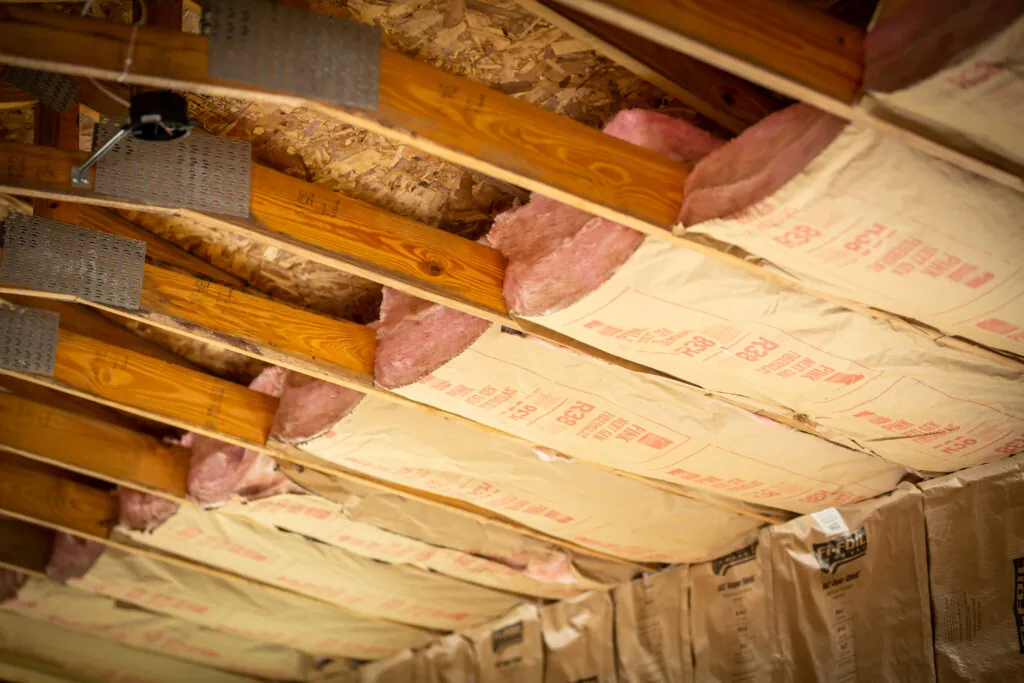
In a lot of homes, the cleanest move is also the simplest: leave the old insulation in place and add more over it. Existing attic-floor insulation can usually stay if it checks these boxes:
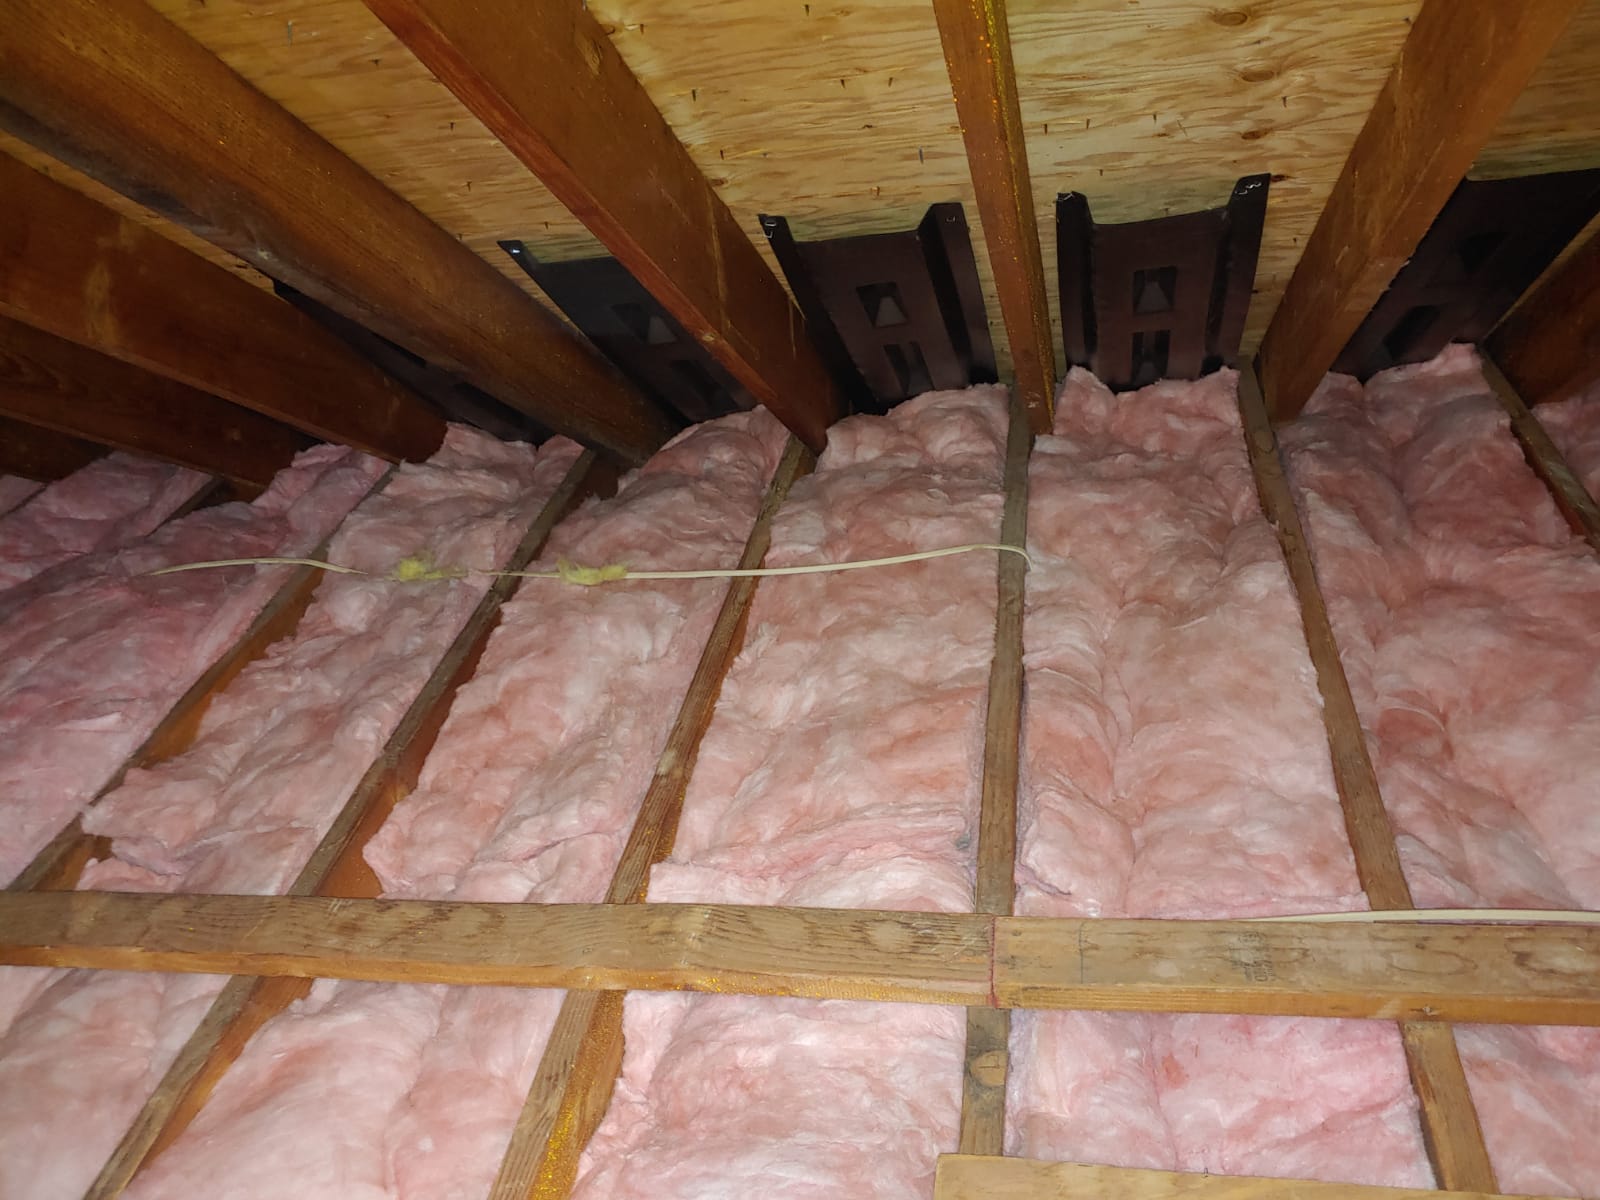
- Dry, not moldy: It looks normal for insulation, maybe dusty, but not wet, matted, or showing mold growth.
- Not contaminated: No obvious rodent nesting, droppings everywhere, or strong odors that tell you the attic has been used as a wildlife hotel.
- Not blocking ventilation at the eaves: You can see soffit baffles or at least airflow paths at the perimeter, and insulation is not stuffed tight into the roof edge.
- Still doing its job: Batts are mostly in contact with the drywall below (no giant gaps), and loose fill is not completely crusted down or missing in big sections.
If the existing material is dry and basically stable, topping off is a normal, effective upgrade.
Safety gear and basics
Attics are not the place to “tough it out.” You will work better and safer if you suit up.
- Respirator: Wear a properly fitted respirator rated for fine particles (commonly a P100 or N95 depending on the material and your comfort level). Dust masks are better than nothing, but a real respirator is a nicer day.
- Eye and skin protection: Safety glasses, gloves, long sleeves, and a hat make fiberglass way less miserable.
- Lighting: Headlamp plus a work light so you can see where you are stepping.
- Footing: Walk on joists or a solid platform, never on drywall.
- Heat stress: Attics get dangerously hot. Take breaks and hydrate.
Before you add anything: do these quick prep steps
Insulation is great, but it is not magic. If warm, moist air from your house is freely leaking into the attic, you can add insulation all day and still have comfort issues, ice dams, and damp insulation.
1) Handle the big air leaks first
You do not have to air seal every last pinhole for a top-off project, but you will get way more payoff if you hit the usual suspects:
- Plumbing stacks and pipe penetrations
- Electrical holes drilled through top plates
- Bath fan housings and duct penetrations
- Chimney or metal flue chase (this one needs fire safe materials)
- The attic hatch or pull-down stair opening
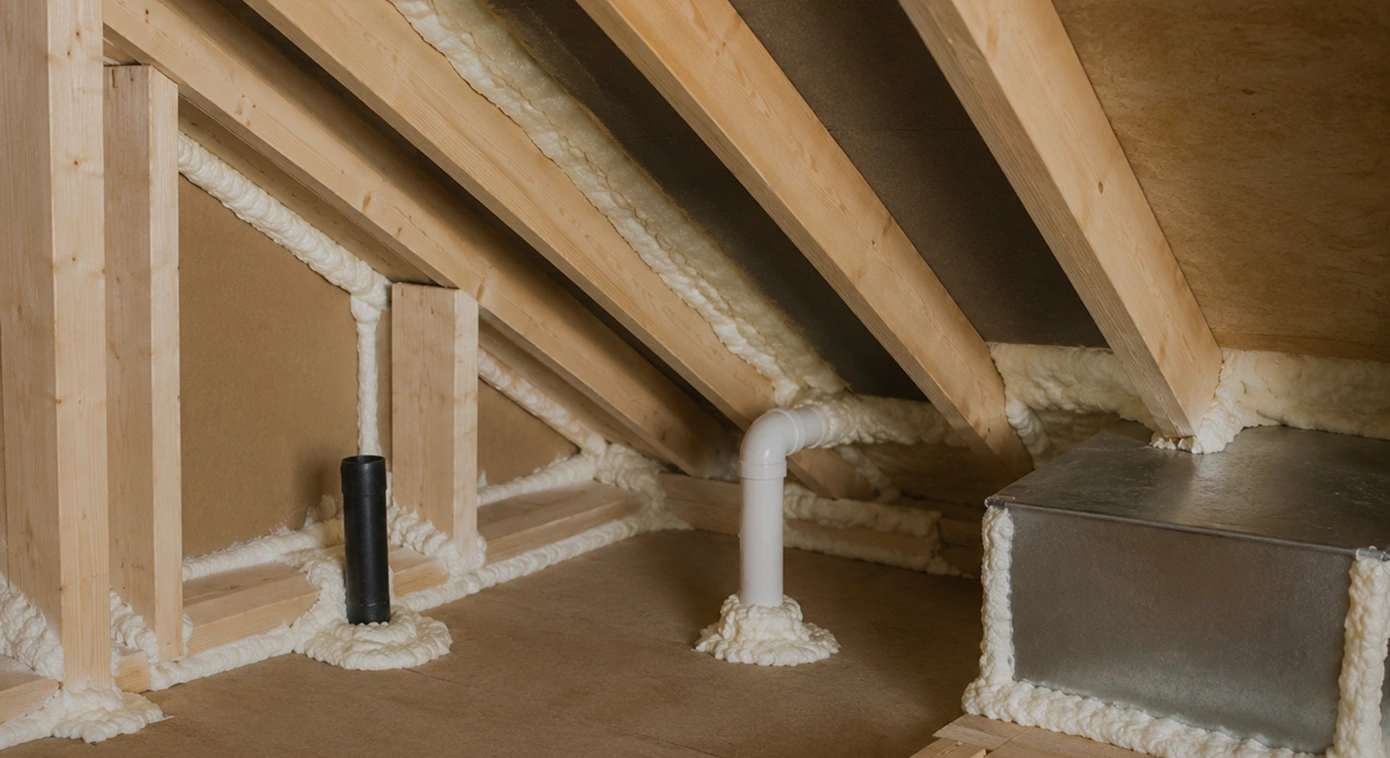
Use caulk or one-part spray foam for small gaps. For larger openings, use rigid material plus sealant as appropriate. Around chimneys and flues, the common approach is sheet metal cut to fit with high-temperature sealant, and you must maintain the required clearance to combustibles. Follow local code and manufacturer instructions.
2) Level what you have (lightly)
This step is for loose-fill only. If you have existing loose fill that is lumpy, you can gently rake it to even it out. Do not mash it down. Fluffy insulation works by trapping air, so compression is the enemy.
If you have batts, do not “rake” them. Instead, straighten any folded sections and tuck them back into place so they touch the drywall below with minimal gaps.
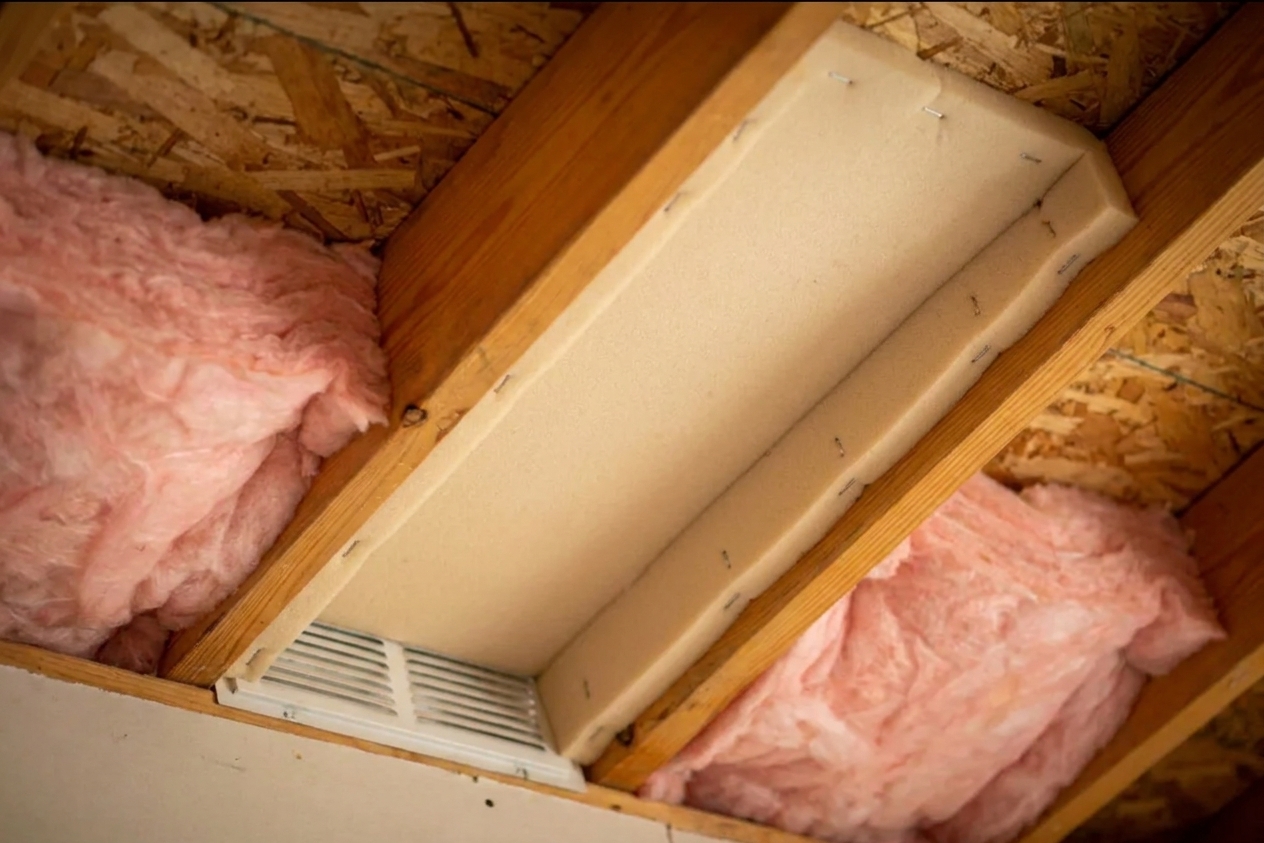
3) Install or fix soffit baffles at the eaves
If your attic has soffit vents, you want air to move from soffit to attic and out through roof or gable vents. That means the insulation at the perimeter needs to be kept back.
Baffles are those foam or cardboard chutes stapled between rafters near the exterior wall line. If you do not already have them, add them before you blow or lay new insulation.
Stop if you see these materials
Most top-off jobs are straightforward. A couple situations are not.
Vermiculite insulation
If you see a lightweight, pebble-like loose fill that looks like shiny gray-brown granules, it may be vermiculite. Some vermiculite insulation can contain asbestos. My advice is simple: do not disturb it. Get it tested and follow proper guidance before you rake, blow, or air seal around it.
Knob-and-tube wiring
If your home still has knob-and-tube wiring in the attic, do not bury it under insulation until it has been evaluated and addressed. Many jurisdictions restrict covering active knob-and-tube because it was designed to dissipate heat in open air.
Pick your top-off material: unfaced batts or loose-fill
For topping off, you typically have two good options. Which one is best depends on what is already in your attic and how accessible the space is.
Option A: Add unfaced fiberglass or mineral wool batts
Unfaced batts (no paper or foil on them) are often the easiest DIY top-off if:
- Your existing insulation is batts between joists
- You can move around the attic without stepping through the ceiling
- You want a cleaner, more controlled install than blowing loose fill
Mineral wool batts are denser and a bit more forgiving around odd framing, but fiberglass batts are widely available and work fine when installed properly.
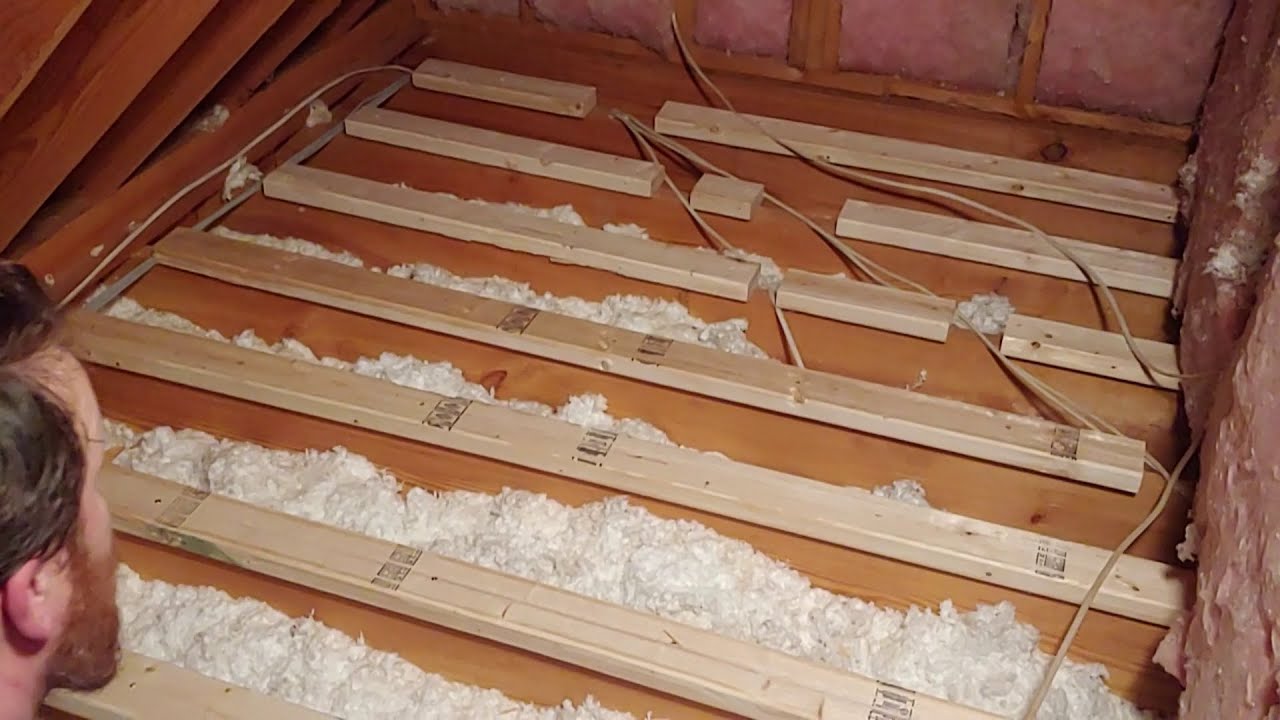
Option B: Blow loose-fill over the top
Loose-fill (fiberglass or cellulose) is great if:
- You have lots of wires, pipes, and uneven coverage to fill around
- Your attic is low and hard to work in
- You want to cover the tops of joists to reduce thermal bridging
Many home centers offer a blower rental when you buy enough bags. Loose-fill can do an excellent job, but it is also easier to accidentally bury things you should not, so you need a plan.
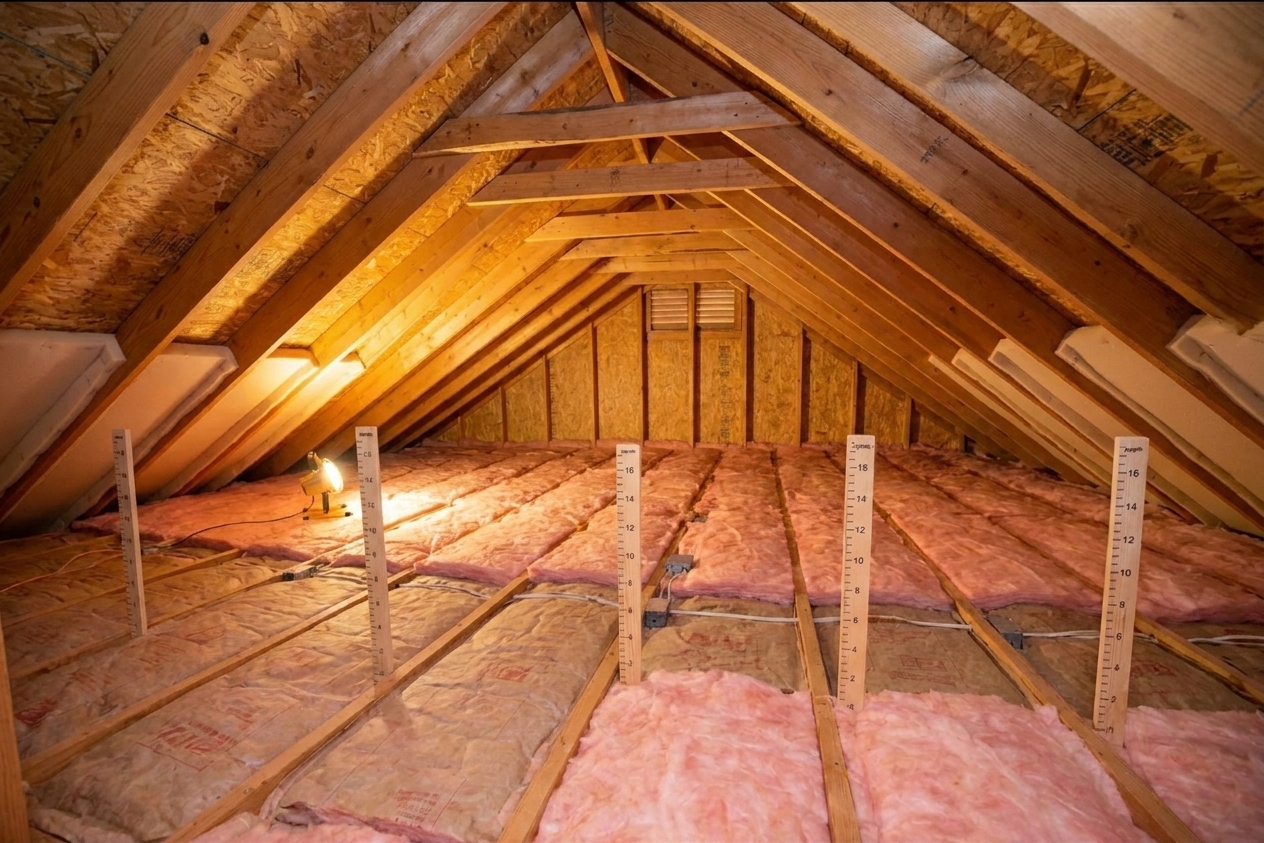
If you want a simple way to dial in “enough,” use the coverage chart on the bag and install depth markers so you can blow to the intended settled depth.
Why a second kraft facing is a problem
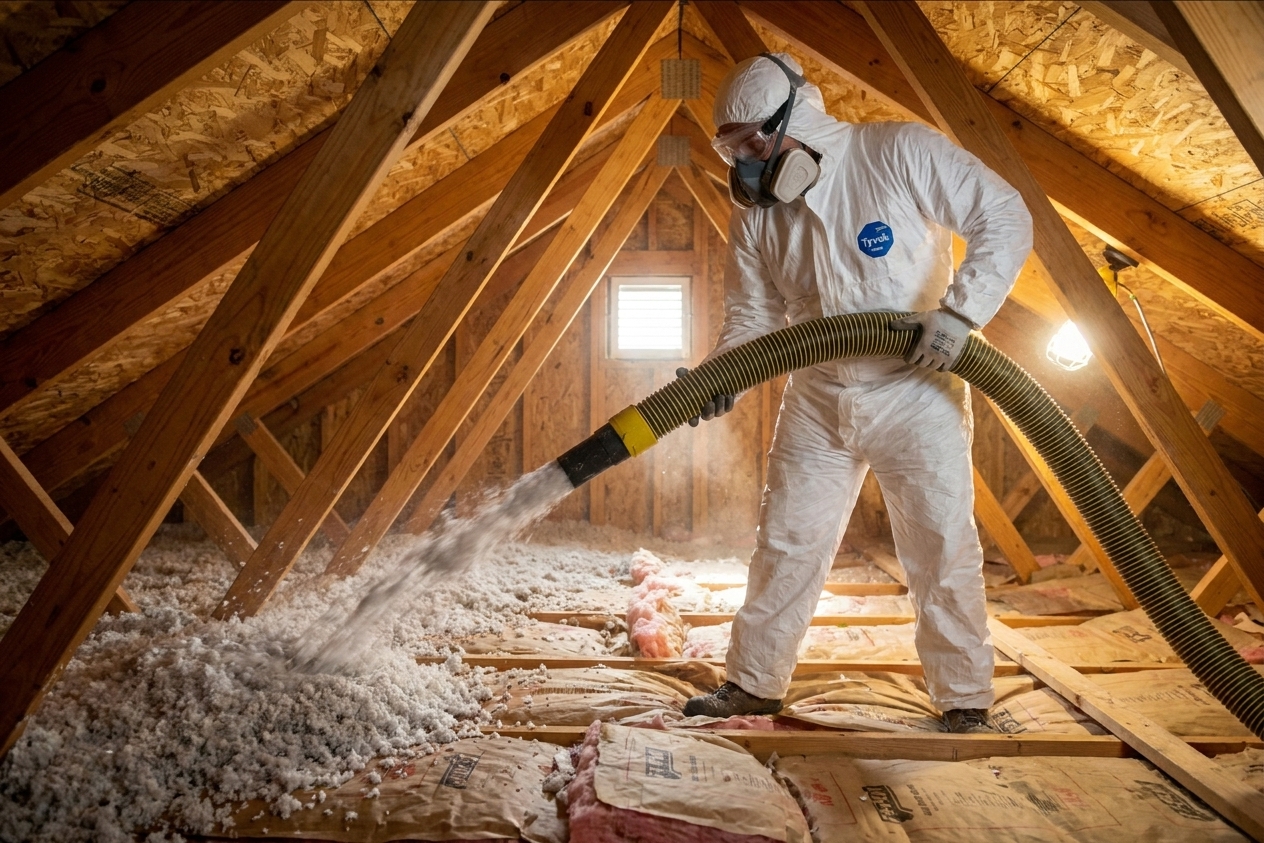
This is the big “do not mess around” point: do not add faced batts (kraft paper or foil facing) on top of existing attic-floor insulation.
The kraft facing is a vapor retarder. In many homes with vented attics, the vapor retarder belongs on the warm-in-winter side of the insulation layer, which is typically down against the ceiling drywall. If you put another vapor retarder up higher in the stack, you can create a moisture trap. Warm, moist indoor air can sneak into the insulation, hit that cooler layer, and condense. Over time, that can mean damp insulation, stained ceilings, and mold risk.
Rule of thumb: When topping off attic-floor insulation in a typical vented attic, use unfaced batts or loose-fill. Avoid creating “paper on paper” layers.
What if the existing insulation already has kraft facing?
That is common. If the existing batts between joists have kraft facing, it should be facing down toward the drywall. If that is the case, you can still top off above it with unfaced batts or loose fill.
If the facing is facing up, or you have batts with paper exposed on top, you are more likely to trap moisture. In some cases people will slit the kraft facing with a utility knife to reduce its vapor-retarding effect. Whether that is appropriate for your home depends on your climate, indoor humidity, attic ventilation, and local code. If you are not sure, use caution and consider getting local guidance. Moisture problems are a lot harder to fix than insulation is to install.
How to add unfaced batts over existing insulation
If you are laying batts on top, the goal is simple: full loft, full coverage, no big gaps, and keep ventilation paths open.
Step-by-step
- Mark your paths first. If you need access to a furnace platform, bathroom fan, or junction box, lay down boards or create a small “catwalk” so you are not doing acrobatics on ceiling drywall.
- Lay the new batts perpendicular to the joists when possible. This helps cover the wood framing that otherwise acts like a heat highway.
- Do not compress the batts. If you crush insulation to fit under a low spot or walkway, you lose performance. Build up a walkway instead of mashing the insulation.
- Cut around obstructions neatly. Use a straightedge and a sharp insulation knife. The neater the fit, the fewer cold spots.
- Keep batts out of soffit baffles. Stop short at the perimeter so air can move from the soffit up into the attic. If needed, add a dam (rigid foam or cardboard) to hold insulation back from the eave area.
How to blow loose-fill over existing insulation
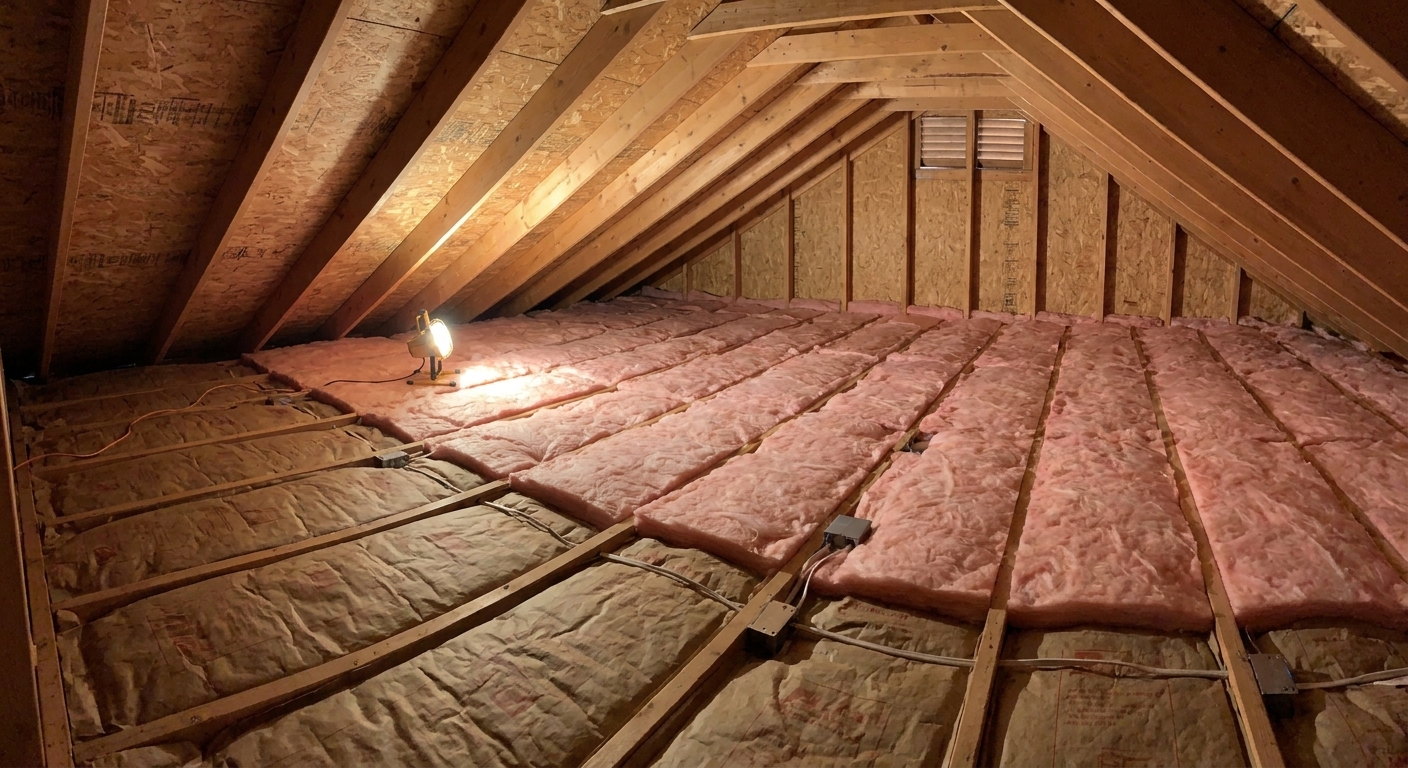
Blowing loose-fill over existing batts is a very common top-off method. It fills gaps well and helps cover framing. The trick is preparation so you do not bury things that need to stay visible, accessible, or need clearance.
Step-by-step
- Install soffit baffles first. Without baffles, loose-fill loves to drift right into the eaves and block intake ventilation.
- Fix major voids before you blow. If batts are missing, folded, or shoved aside, reposition or replace those sections first. Loose-fill is not a great band-aid for a big empty spot.
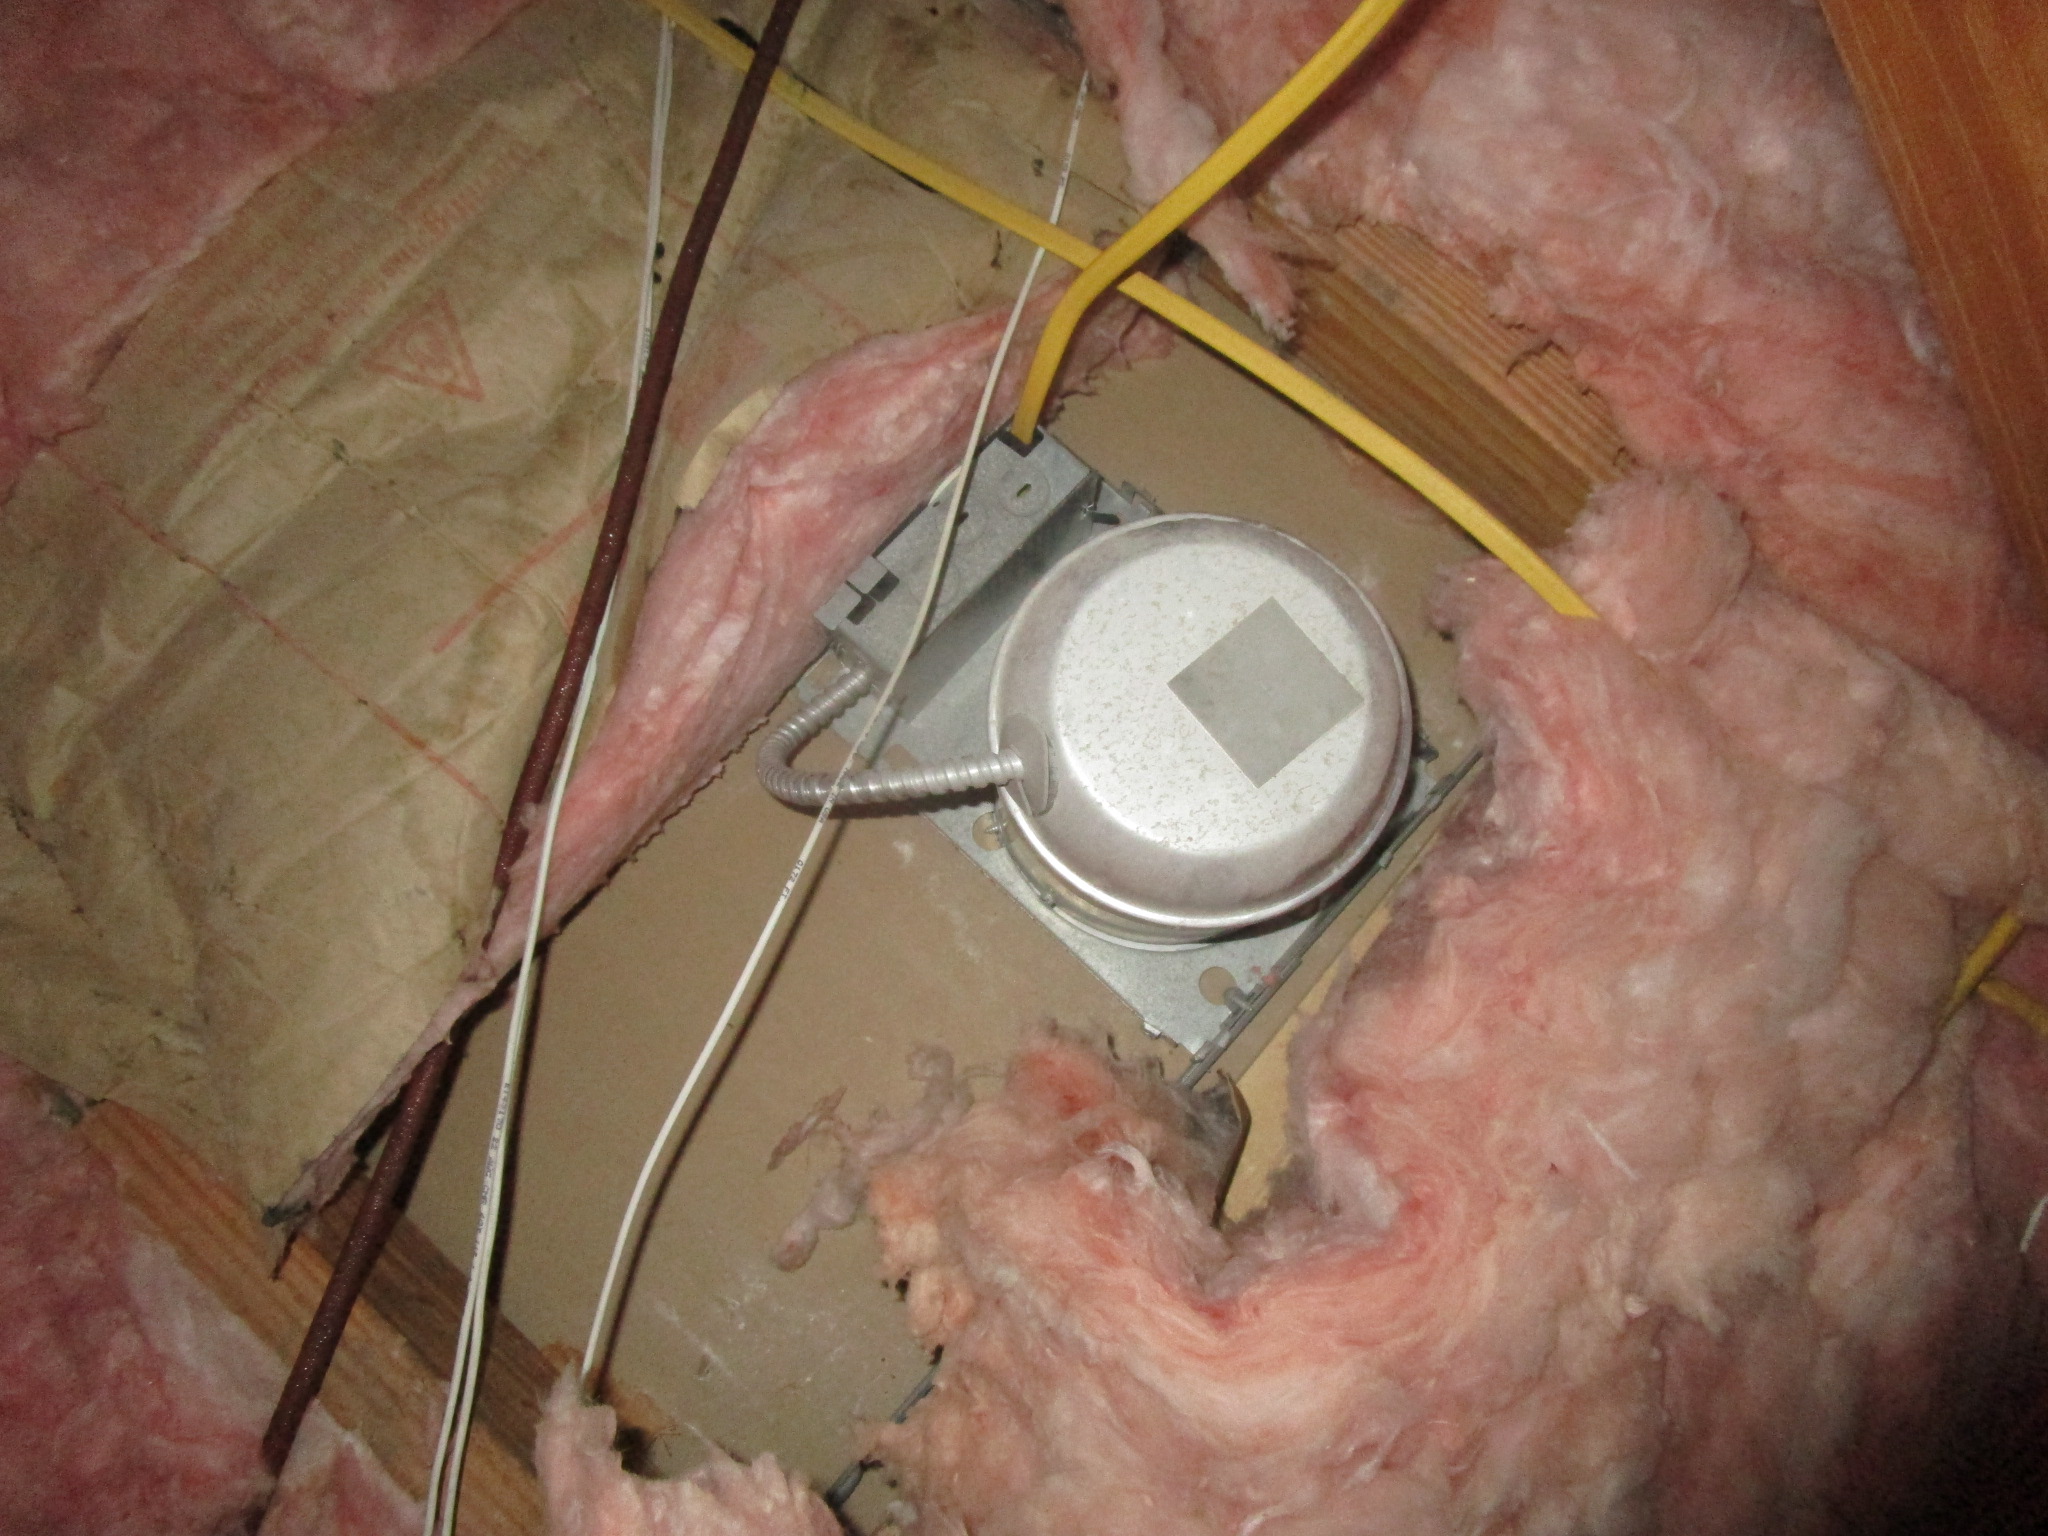
- Create dams around areas you must keep clear or find later. Use scraps of rigid foam board, plywood, or cardboard to build short walls around the attic hatch opening and around service areas you need to locate later. Dams are also useful around non-IC recessed lights or other components that require clearance, but the right approach depends on the fixture and its label.
- Flag important locations. Before blowing, stick tall markers (wood lath, fiberglass driveway markers, or similar) near junction boxes, fans, and other items so you can find them later.
- Start at the farthest corner and work back. You do not want to be crawling over freshly blown insulation like a yeti making snow angels.
- Keep the hose moving. Build depth gradually and evenly. Think “gentle snowfall,” not “fire hose.”
Keep ventilation paths open
Your attic needs to breathe. If you block soffit intake, you can end up with a hotter attic in summer and a wetter attic in winter.
Simple ways to prevent blockage
- Use proper baffles: Stapled in place so they do not flop into the insulation.
- Add an insulation dam at the perimeter: A strip of rigid foam board or cardboard standing vertically near the exterior wall line helps hold loose-fill back.
- Do a final perimeter sweep: After installing, crawl the outer edges and make sure the baffle channels are still open.
Do not bury these fixtures and components
This is where DIY attic work can go sideways fast. Some things are perfectly fine under insulation. Other things need clearance, protection, or an upgrade before they can be safely covered.
Safety note: If you are unsure about a fixture type, stop and verify the manufacturer requirements or ask a pro. Heat plus insulation plus guesswork is a bad combo.
Recessed can lights
Older recessed lights can run hot. Some are rated for insulation contact (often marked “IC”), some are not. If you have non-IC cans, they generally require clearance from insulation to prevent overheating. Clearance distances are fixture-specific, so read the label.
Also, even if a fixture is IC-rated, airtight IC-rated is the winner for energy performance because it cuts down on warm air leaking into the attic.
Junction boxes
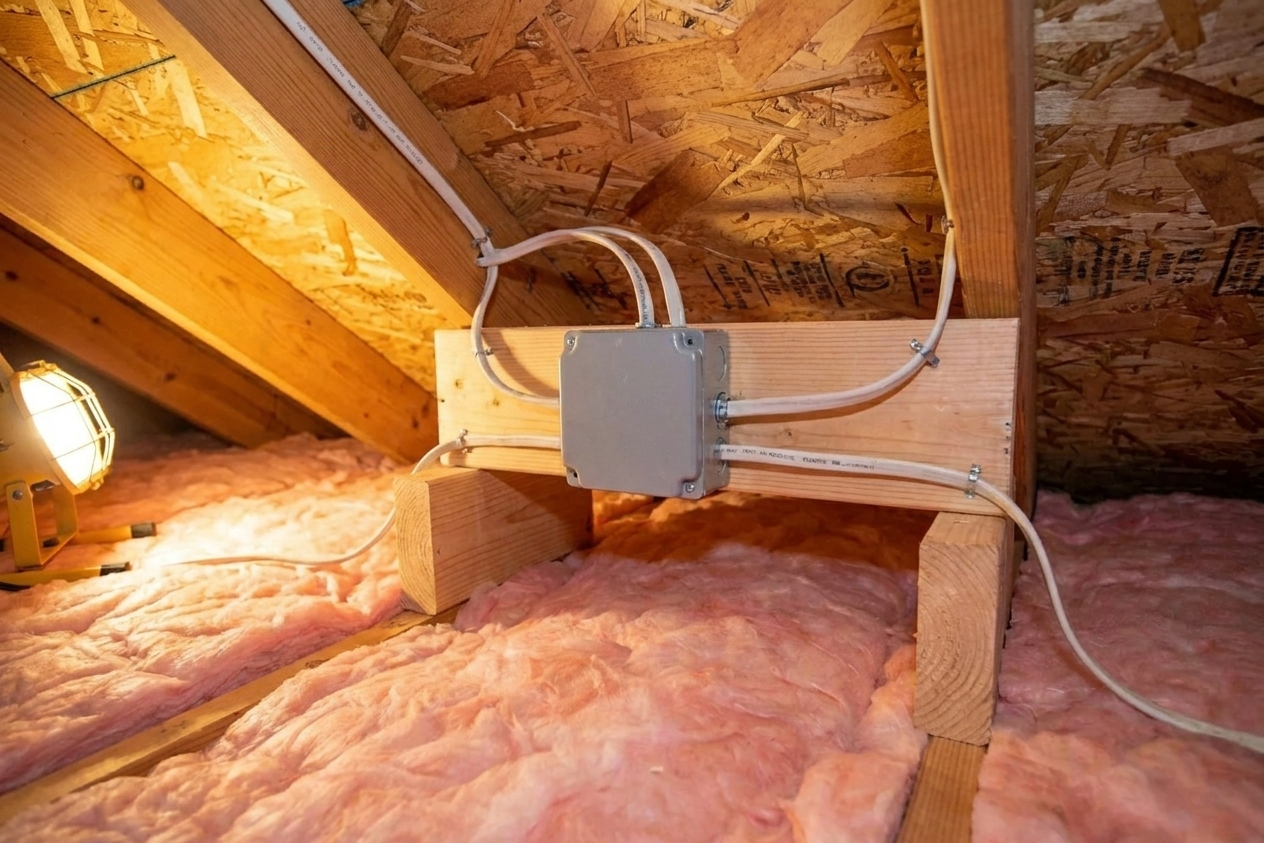
The real rule is: do not permanently conceal junction boxes. Covers must remain accessible and locatable without removing building finish. In the real world, that means do not let a junction box disappear forever under a foot of fluff.
Good fixes include raising the box above the final insulation level, or building a small dam around it and using a tall marker so you can find it fast later.
Bathroom fans and ductwork
Fans are usually fine to have insulation around, but the ducting matters. Make sure bath fan ducts actually exhaust to the exterior and that connections are tight. In cold climates, it also helps to insulate the duct and run it with a slight slope to the exterior so condensation does not drain back toward the fan.
One common mistake: terminating a bath fan into a soffit. It can look like “outside,” but it often blows moist air right back into the attic through the vents. Exhaust should go to a proper roof cap or wall cap.
Attic access and pull-down stairs
Topping off the attic floor often leaves the attic hatch as the weak link. If your attic access is just a thin piece of plywood, you will feel that cold radiating down all winter. Seal and insulate the hatch so it matches your new attic floor setup as closely as possible.
Common top-off mistakes I see all the time
- Adding faced batts on top: Creates a second vapor retarder and increases moisture risk.
- Blocking soffits: Cuts off intake ventilation and can lead to moisture buildup.
- Compressing insulation under storage: Turns good insulation into a sad blanket.
- Making service items disappear: Junction boxes, exhaust fans, and anything you may need to inspect later should stay accessible and easy to locate.
- Ignoring air leaks: Even a little air sealing before topping off makes the insulation work harder for you.
Quick FAQ
Can I put new fiberglass batts on top of old fiberglass batts?
Yes, as long as the new batts are unfaced and you do not compress them. Lay them neatly and keep ventilation paths open at the eaves.
Can I blow loose-fill over existing batts?
Yes. It is a very common approach. Prep with soffit baffles, dams around keep-clear areas, and markers so you do not lose track of junction boxes or other important components.
Do I need a vapor barrier on top?
In most vented attics, no. For a top-off, you typically want to avoid adding a vapor retarder layer up high. Use unfaced material above existing insulation, unless local code or a specific roof assembly requires a different approach.
What if I already have kraft faced batts and the paper is facing up?
That setup is more likely to trap moisture. Some people slit the facing to reduce its vapor resistance, but the right choice depends on conditions in your home. If you are not confident, this is a good moment to get local advice.
My simple game plan for a clean top-off
If you want the shortest path to “warmer rooms, lower bills, fewer drafts,” here is what I recommend in plain neighbor language:
- Do basic air sealing first, especially around big penetrations.
- Make sure soffit baffles exist and stay open.
- Top off with unfaced batts laid across joists, or blow loose-fill evenly over everything.
- Keep insulation away from places that need clearance or access, and mark what you cannot see later.
Take your time up there. Attics punish rushing. But done right, topping off existing insulation is one of the most satisfying DIY upgrades because you feel it almost immediately the next cold night.