
How to Replace a Leaky Shower Cartridge
Fix a shower that drips from the head or handle when it’s off. Learn how to shut off water, remove the trim, pull the cartridge, match a replacement, and get a drip-free shower again.
If your shower drips from the head after you shut it off, or you see water sneaking out around the handle, the most common culprit is a worn shower cartridge. The cartridge is the “guts” of a single-handle mixing valve that blends hot and cold and seals the water when you turn the handle off.
I’ve replaced a lot of these over the years, and the job is usually very doable for a homeowner with patience and a couple basic tools. The two big keys are: shut the water off correctly and match the cartridge exactly. Do those two things and you are 90 percent of the way there.
Quick scope note: this guide is written for single-handle cartridge-style shower valves. If you have a two or three-handle setup, you may be dealing with stems, seats, and springs instead of a cartridge, and the steps are different.
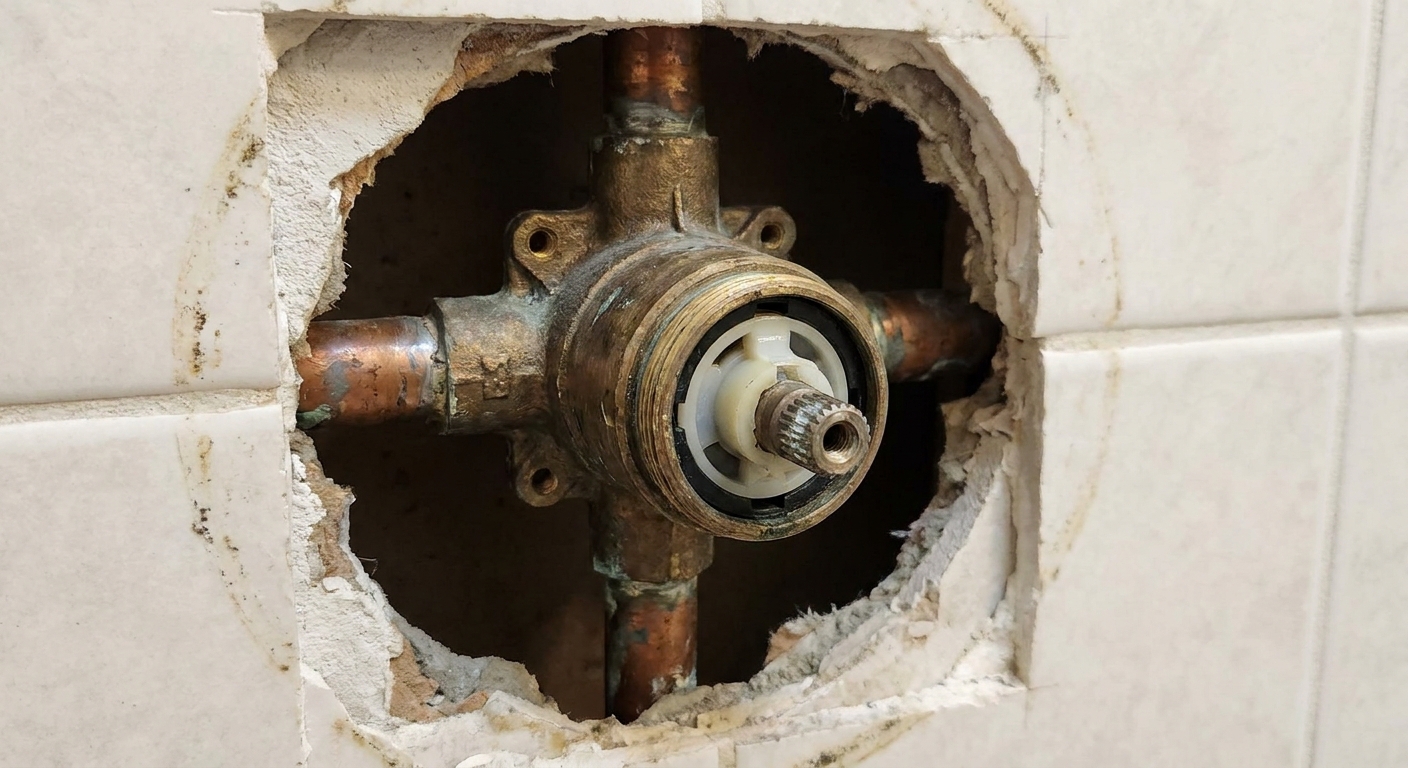
Before you start: confirm it’s a cartridge issue
A shower cartridge is the usual suspect when the shower leaks while the handle is in the OFF position, but it is not the only possibility. A few quick tells:
- Drip from the showerhead after shutoff: steady drip that never really stops (beyond a minute or two of normal drain-down).
- Water seeps behind the handle or escutcheon plate: often a worn cartridge seal or torn O-ring.
- Handle feels stiff, gritty, or inconsistent: mineral buildup or worn internal parts.
Also keep these less-common causes in mind:
- Debris in the valve: grit can get caught on sealing surfaces and cause a drip even if the cartridge is not “worn out.”
- Valve-specific parts: some designs have separate seats and springs, balancing spools, or other internal components that can mimic a cartridge problem.
- Pressure or heat expansion: very occasional drips can happen with high pressure or thermal expansion, even with a healthy valve.
One note: if you only get a brief drip right after shutting off the shower, that can be normal water left in the riser draining out. Give it 5 to 10 minutes. If it continues, it is time to investigate the cartridge and valve internals.
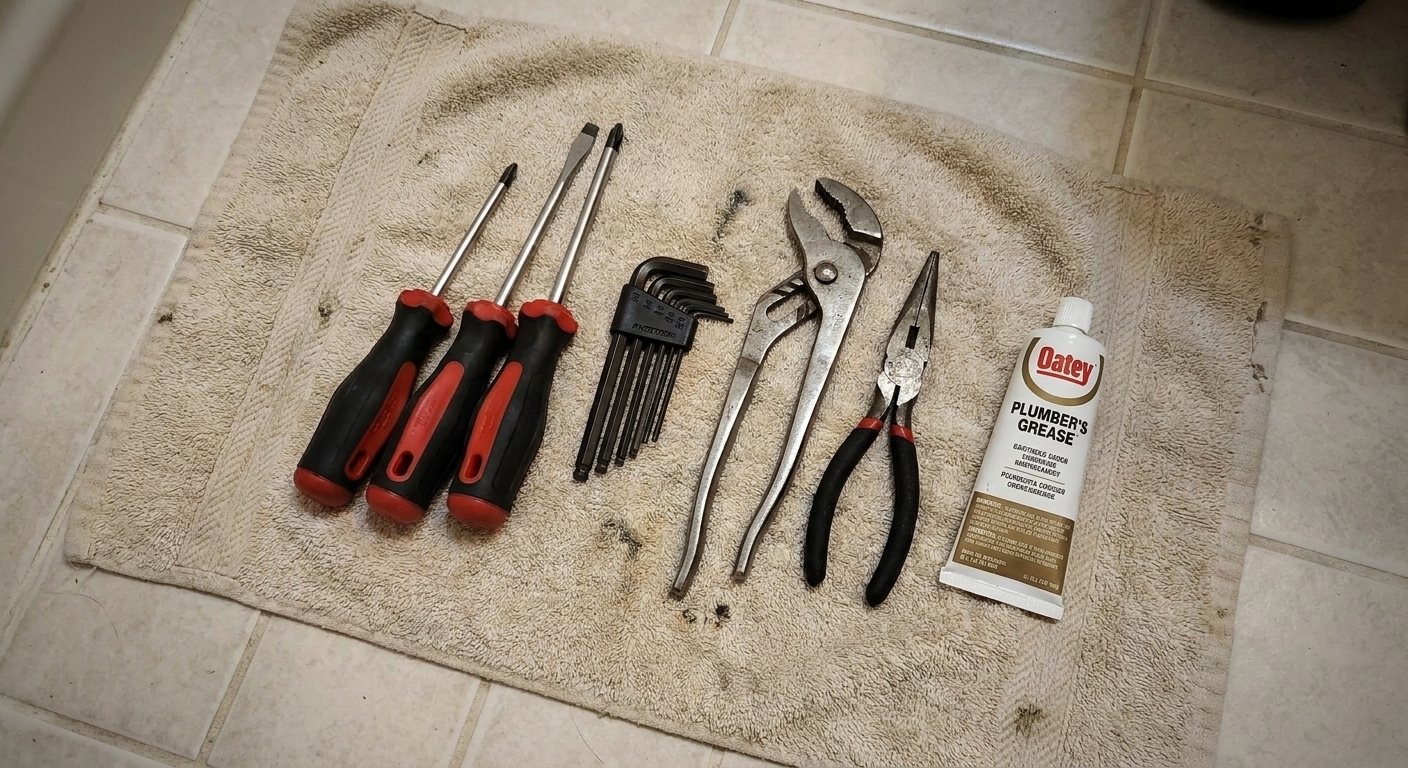
Tools and supplies
- Screwdrivers (Phillips and flathead)
- Allen key set (many handles use a small hex screw)
- Adjustable wrench or channel-lock pliers
- Needle-nose pliers
- Utility knife (to cut caulk at the trim plate, if needed)
- Rags and a small bucket
- Silicone plumber’s grease (for O-rings, optional but helpful)
- White vinegar (for mineral cleanup, optional)
- Replacement cartridge (matched to brand and model)
- Painter’s tape or a rag (to protect finishes from tool jaws)
Safety and shutoff planning
Important: Before you loosen anything on a shower valve, confirm the water is actually off. A shower valve can dump water into an open wall cavity fast, which is a stressful way to spend a Saturday.
You may have one of these shutoff situations:
- Shutoffs built into the shower valve (service stops): often small screws on either side of the valve body behind the trim. They might be flathead, hex, or brand-specific shapes.
- Dedicated bathroom shutoffs: less common, sometimes in a utility room for that bathroom group.
- Main house shutoff: reliable, but you will lose water to the whole house during the repair.
If you are not sure what you have, plan on using the main shutoff. It is the “no surprises” option.
Step 1: Shut off water and relieve pressure
- Turn off the water using the shower’s service stops (if present) or the main house shutoff.
- If you used the main shutoff, open a lower faucet (like a sink on the first floor) for a moment to relieve pressure.
- Go back to the shower and turn the handle to ON to verify the water is truly off and to drain remaining water.
- Return the handle to OFF once the flow stops. (On most single-handle valves, that means the neutral, centered off position.)
- Stuff a rag in the bottom of the shower area near the valve wall if you are working over an open area where tiny screws can drop. You do not want to be on hands and knees searching for a set screw.
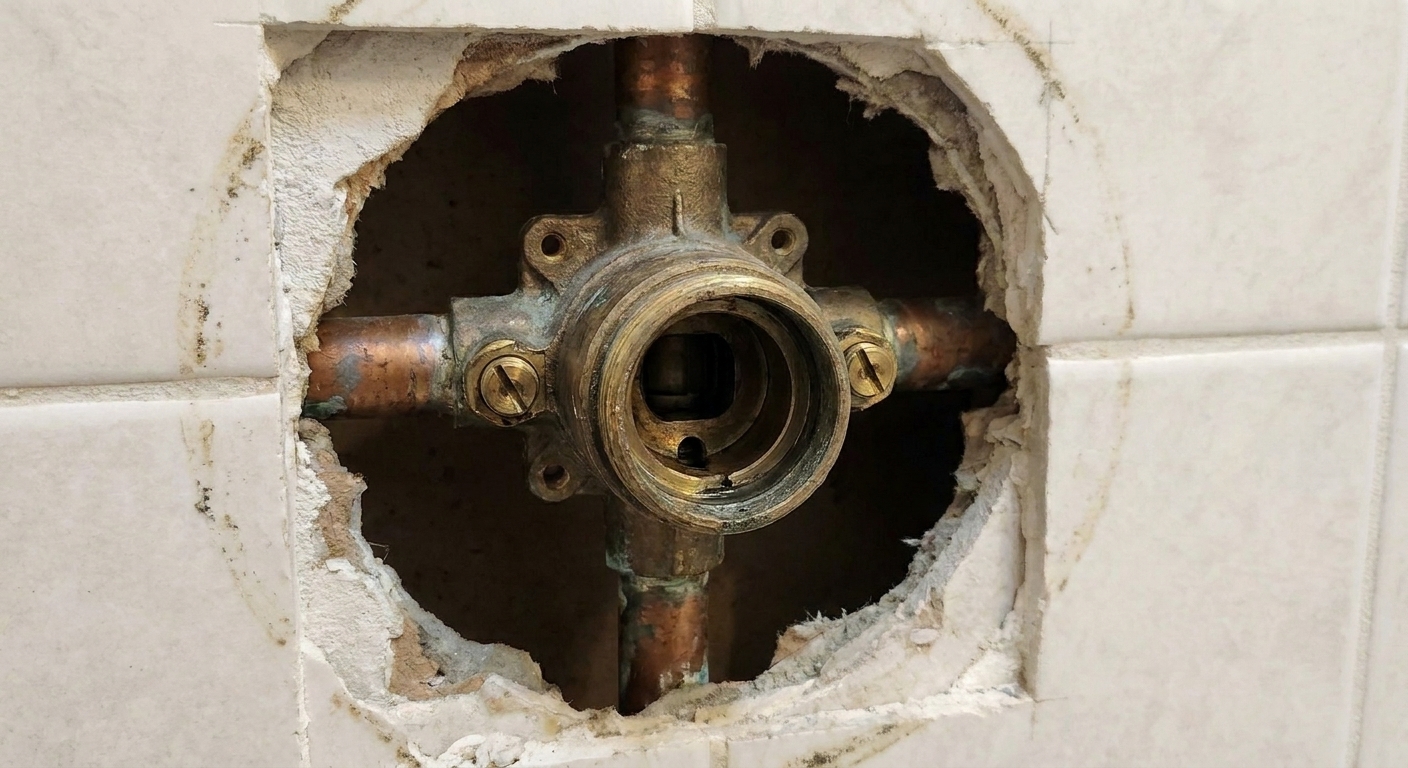
Step 2: Remove the handle
Handles vary, but most come off one of two ways:
- Set screw underneath or on the side: use the correct Allen key, back the screw out a few turns, then pull the handle straight off.
- Center cap and screw: pop off the decorative cap with a small flathead, remove the screw, then pull the handle off.
If the handle is stuck, wiggle and pull evenly. Mineral buildup can glue it in place. A gentle twist helps. Avoid prying hard against tile or fiberglass.
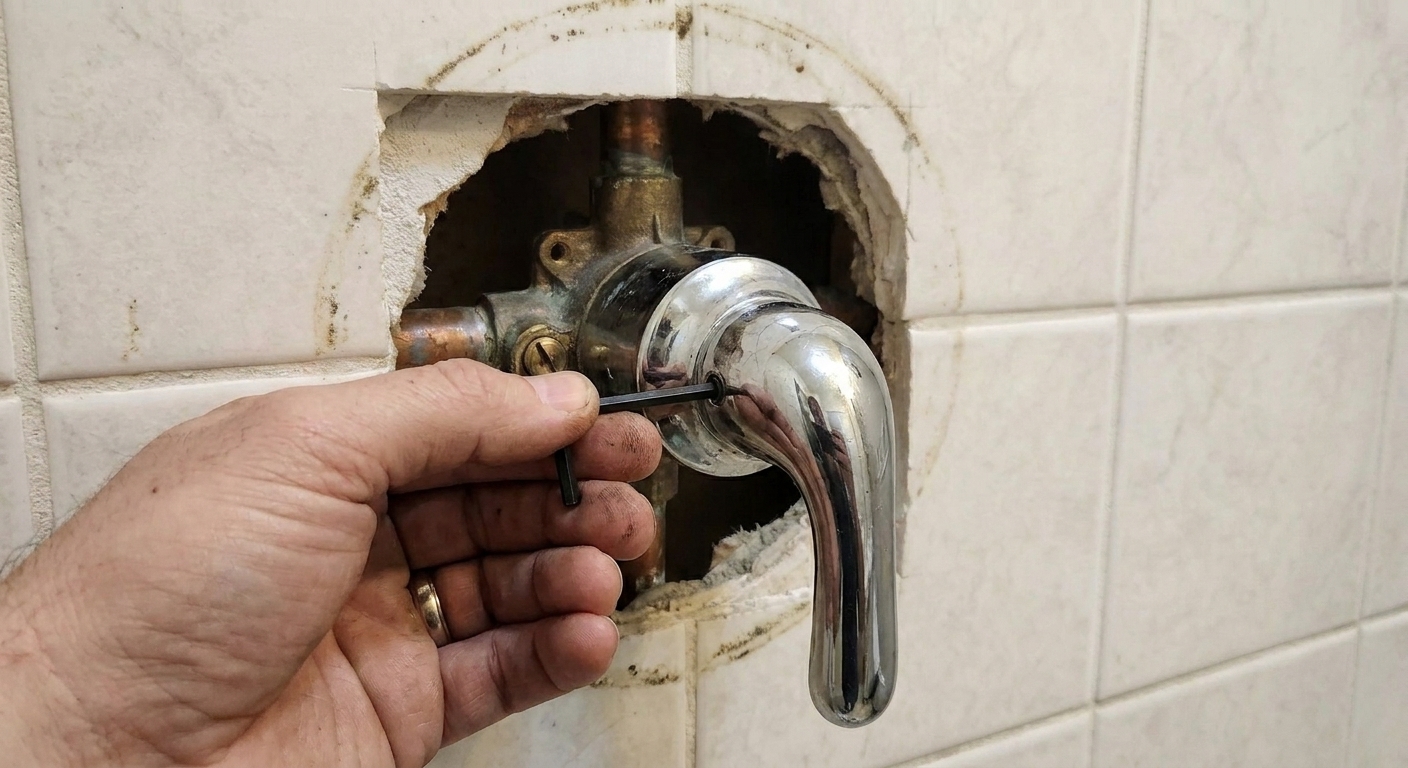
Step 3: Remove the trim plate and sleeve
Behind the handle you will usually find:
- A decorative sleeve or temperature limit stop piece (plastic or metal)
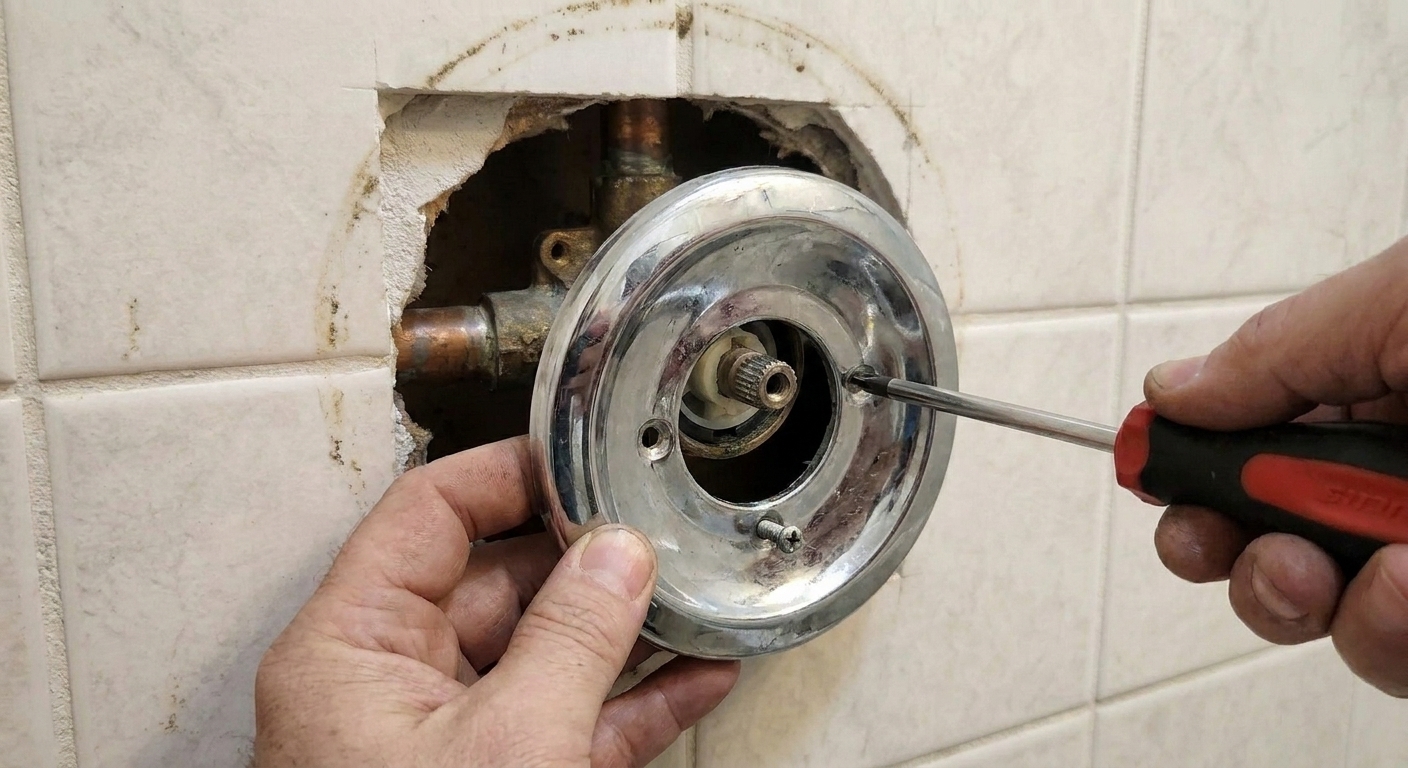
- An escutcheon plate (the big cover plate) held by two screws
- Before you pull anything apart, take a quick photo of the parts and their order, especially the temperature limit stop. It is easy to put it back wrong.
- Remove any sleeve pieces by sliding them forward off the valve stem.
- Unscrew the escutcheon plate screws.
- If the plate is caulked to the wall, score the caulk with a utility knife and gently pull the plate away.
Have a rag ready. A little water trapped in the valve cavity is normal.
Step 4: Find the retainer
Cartridges are held in place a few common ways:
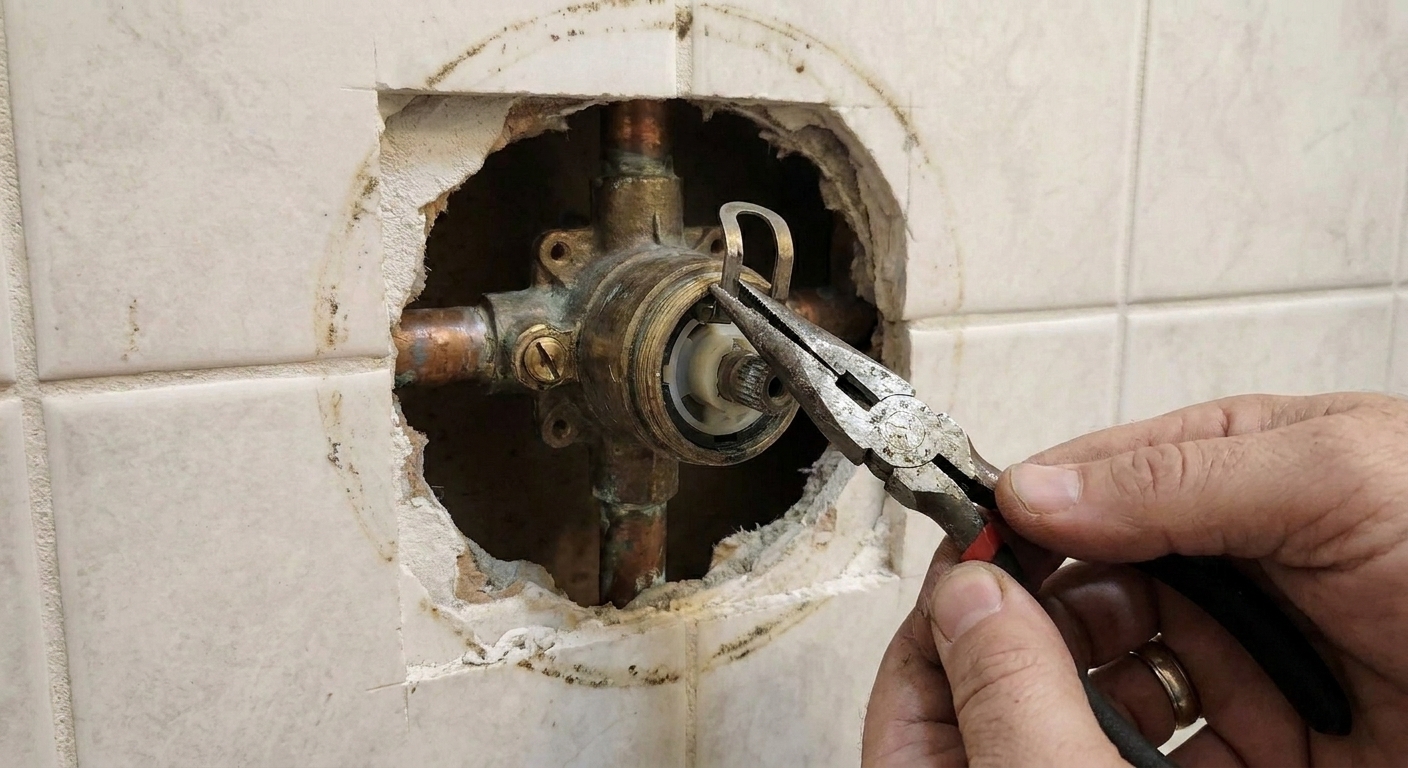
- Retaining clip (U-shaped metal clip): you pull the clip straight up and out.
- Threaded retaining ring or bonnet nut: you unscrew a ring that holds the cartridge in.
- Integrated cap: less common, but the idea is the same, remove whatever locks it in place.
Watch out: Do not force the wrong part. If something is not moving, look again for a hidden clip, a small screw, or a ring you missed. Forcing brass valve bodies is how threads get ruined.
If you are loosening a bonnet nut or a chrome sleeve, protect the finish. A couple wraps of painter’s tape on the tool jaws (or using a strap wrench) can save you from turning a clean trim piece into a scratched one.
Step 5: Pull the old cartridge
This is the part that can be easy or stubborn, depending on age and mineral buildup.
- Remove the retaining clip or retaining ring.
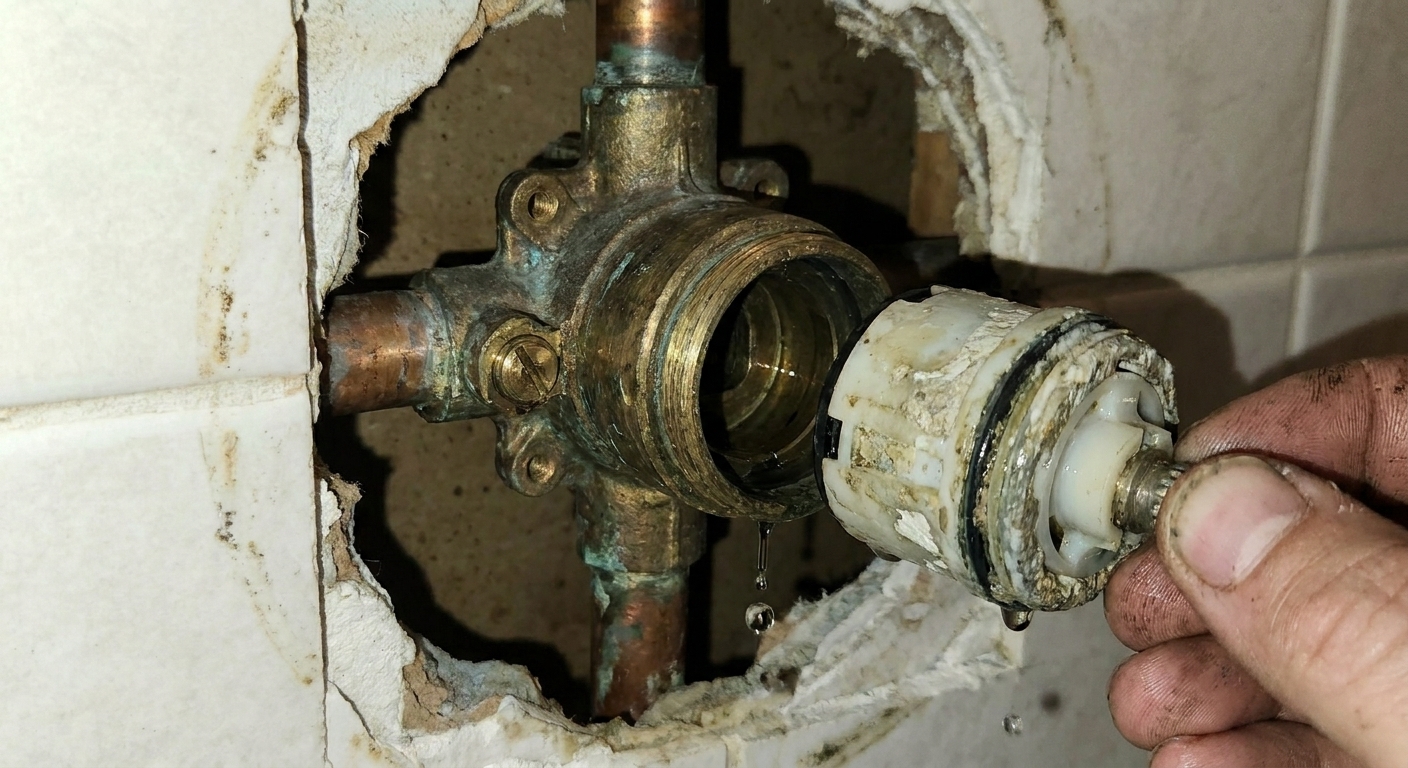
- Grasp the cartridge stem and pull straight out while gently wiggling left and right.
- If it is stuck, try rotating it slightly (if your valve style allows) to break mineral bonds, then pull again.
If it still will not budge: stop and reassess. Some cartridges require a dedicated puller tool for that brand.
Also, if you have a plastic cartridge in a metal body, aggressive twisting can snap it. At that point, using the right puller is cheaper than turning your valve into a wall-opening project.
Step 6: Match the new cartridge
This is where most DIY trips go sideways. “Close enough” is not close enough with cartridges.
Use these methods to match it:
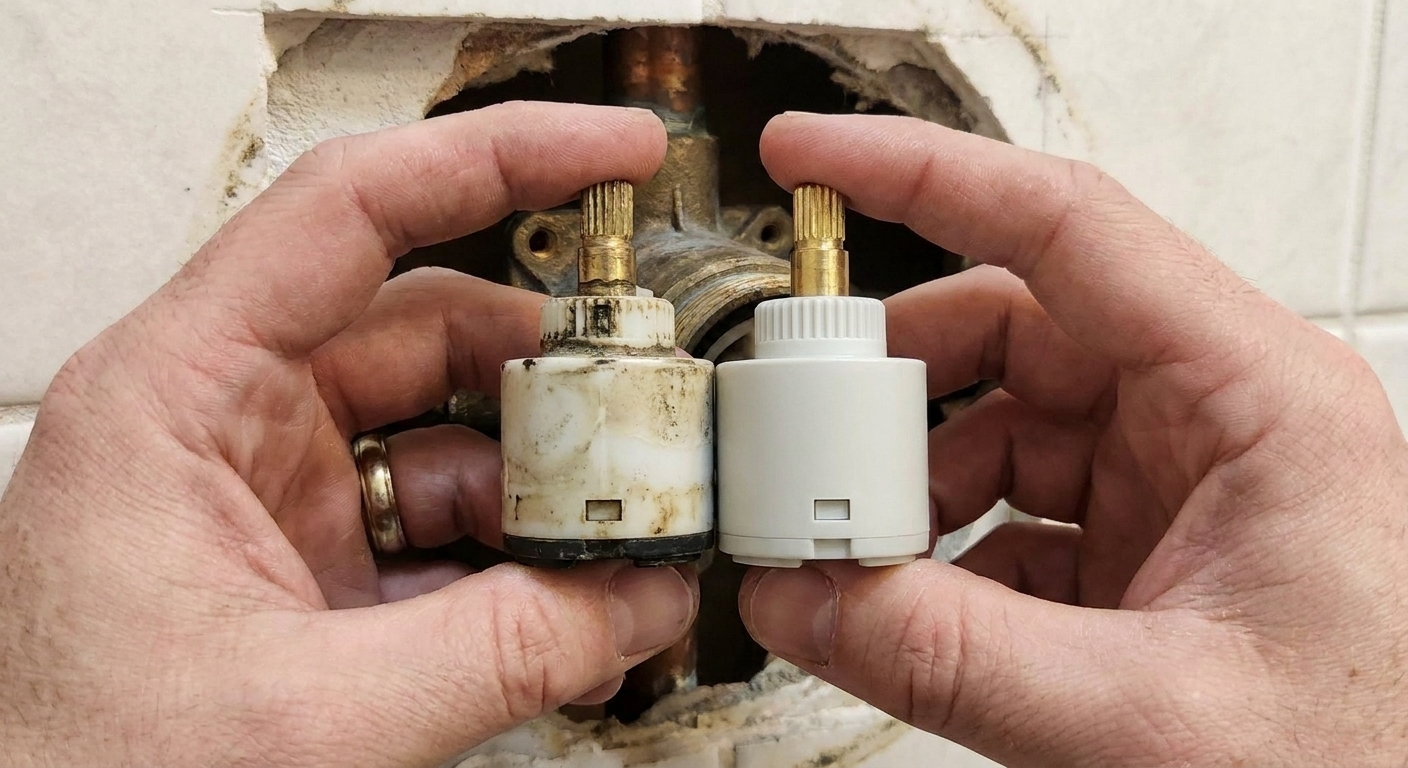
- Bring the old cartridge to the store and match by shape, length, tabs, and stem style.
- Check the valve brand: many trim plates or handles have a brand mark. Sometimes the valve body does too.
- Look for numbers stamped on the cartridge or valve body.
Pay attention to:
- Overall length and diameter
- Tab locations and alignment keys
- Stem shape (D-shaft, splined, square)
- Whether it is pressure-balancing or thermostatic (different animals)
Step 7: Clean the valve body
Before the new cartridge goes in, take 2 minutes to clean the valve cavity:
- Wipe out loose debris with a rag.
- If you see mineral crust, a rag dampened with white vinegar can help dissolve it.
- Check for old O-ring fragments or bits of rubber.
You want the new cartridge to slide in smoothly and seat fully. Dirt or mineral chunks can keep it from sealing.
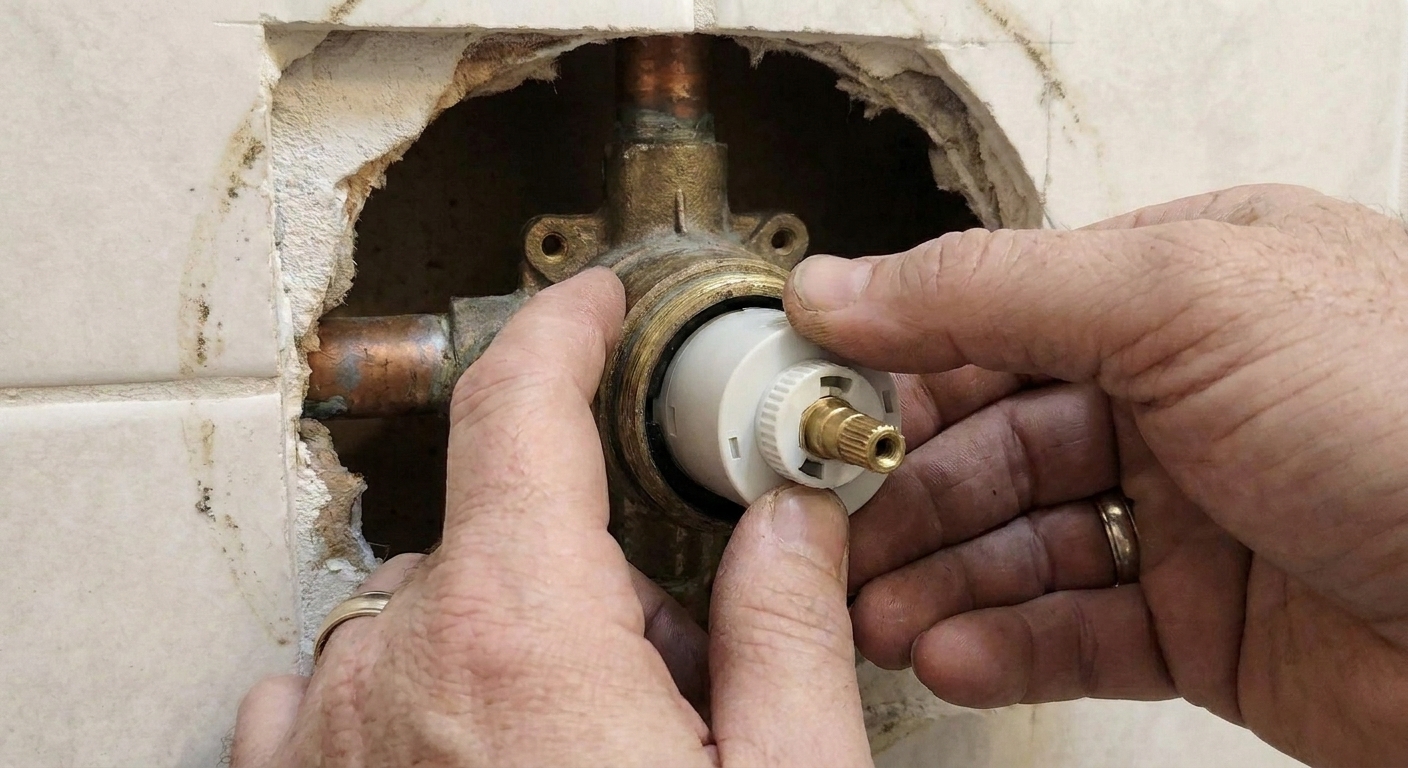
Step 8: Install the new cartridge
- Lightly coat O-rings with silicone plumber’s grease if the manufacturer allows it. Do not use petroleum-based grease.
- Align the cartridge tabs with the matching slots in the valve body.
- Push the cartridge straight in until fully seated.
- Reinstall the retaining clip or threaded ring.
If the cartridge is not fully seated, the retaining clip often will not slide in cleanly. That is your clue to pull it back out, realign, and try again.
Step 9: Test for leaks
This is my favorite “save yourself time” step.
- With the trim still off, slowly turn the water back on (service stops or main).
- Keep the valve area accessible so you can watch for leaks.
- Turn the valve on briefly, then off.
- Look closely around the cartridge and valve body for any seepage.
If you see water escaping around the cartridge area, shut the water back off and recheck seating, the retaining clip, and cartridge alignment.
Step 10: Reinstall trim and handle
- Reinstall the escutcheon plate. If it was caulked, you can apply a small bead of bathroom-grade silicone around the top and sides. Many pros leave the bottom uncaulked so any future leak can show itself instead of trapping water in the wall. That said, follow the trim manufacturer’s guidance and any local requirements for your wall type. The tradeoff is visibility of leaks versus maximum wall sealing.
- Slide the sleeve and any limit-stop parts back on the same way they came off.
- Reinstall the handle and tighten the set screw or center screw.
Finish by running the shower through hot and cold and confirming smooth operation and full shutoff.
Do not skip this: confirm your temperature limit stop still does its job. Turn the handle to full hot and make sure the maximum temperature is safe, especially if kids or guests use the shower.
Troubleshooting
The shower still drips after replacement
- Wrong cartridge: most common. Same brand does not always mean same cartridge.
- Cartridge not fully seated: the valve may not shut completely.
- Debris on the sealing surfaces: shut the water off again, pull the cartridge, and clean and flush the valve body.
- Other internal parts: on some valves the issue may be a worn seat and spring set, balancing spool, or another service part.
- Damaged valve body seat: less common, but possible on older valves. This may require a pro evaluation or a valve replacement.
Hot and cold are reversed
- Some cartridges can be installed rotated 180 degrees. If your hot and cold are reversed, follow the manufacturer’s orientation marks and reinstall correctly.
I cannot remove the cartridge
- Stop before you break it. Many brands sell a cartridge puller tool made for that valve. If the cartridge snaps inside the valve, the repair gets much harder fast.
When to call a plumber
I am all for DIY, but I am also all for not turning a small drip into a wall repair. Consider calling a plumber if:
- You cannot locate a reliable shutoff or the main shutoff does not fully stop the water.
- The cartridge is seized and you do not have the correct puller.
- The valve body is cracked, corroded, or leaking behind the wall.
- You replace the cartridge and still have leaking, suggesting a deeper valve issue.
FAQ
How long does this take?
If everything cooperates, 30 to 90 minutes. If the cartridge is stuck or the trim is complicated, it can take longer.
Do I need to shut off water to the whole house?
Not always. Some shower valves have service stops you can close behind the trim. If you do not have them, the main shutoff is the safest bet.
Should I replace the showerhead too if it’s dripping?
Most often, no. A drip at the showerhead when the valve is off usually points upstream to a valve sealing issue, which often means the cartridge. That said, a short-lived drip can just be normal drain-down, and occasional weeping can be influenced by mineral buildup, high pressure, or thermal expansion.
Can I reuse the old retaining clip?
In most cases yes, as long as it is not bent or rusted. Make sure it seats fully in its groove.