Multiple slow drains usually mean a bigger clog than hair in one shower. Learn the telltale signs of a main drain problem, where to check for a cleanout, saf...
The Homeroom Fix
October 28, 2026
•
By Marcus Delgado
How to Clear a Clogged Basement Floor Drain
Basement floor drain backing up? Learn how to clean the grate and sediment bucket, tell a dry trap from a real clog, snake the line safely, and restore the water seal or trap primer to stop sewer odors.
The first house I worked on as a teenager had a basement floor drain that everyone ignored until laundry day turned the floor into a kiddie pool. My grandpa took one look, handed me a pair of gloves, and said, “This thing is like a gutter for your basement. Treat it like one.” He was right.
A basement floor drain is an indoor floor receptor. It is meant to catch water from a leaky water heater, a washing machine mishap, condensation from a furnace or dehumidifier, or a utility sink overflow. It is not the same thing as a yard French drain, which is an outdoor trench system for groundwater. If your issue is outside pooling water, you are solving a different problem entirely.
Below is how I clear a clogged basement floor drain safely, including the grate, the sediment bucket, a dry or clogged trap, how to snake that line without wrecking it, and how to make sure the water seal (and any trap primer) keeps sewer gas out afterward.
Before you start: what you are working on
Basement floor drains come in a few common setups:
- Grate over a trap (the P-trap is directly below the floor).
- Grate over a sediment bucket (a removable cup that catches grit, lint, and small debris before it reaches the trap and pipe).
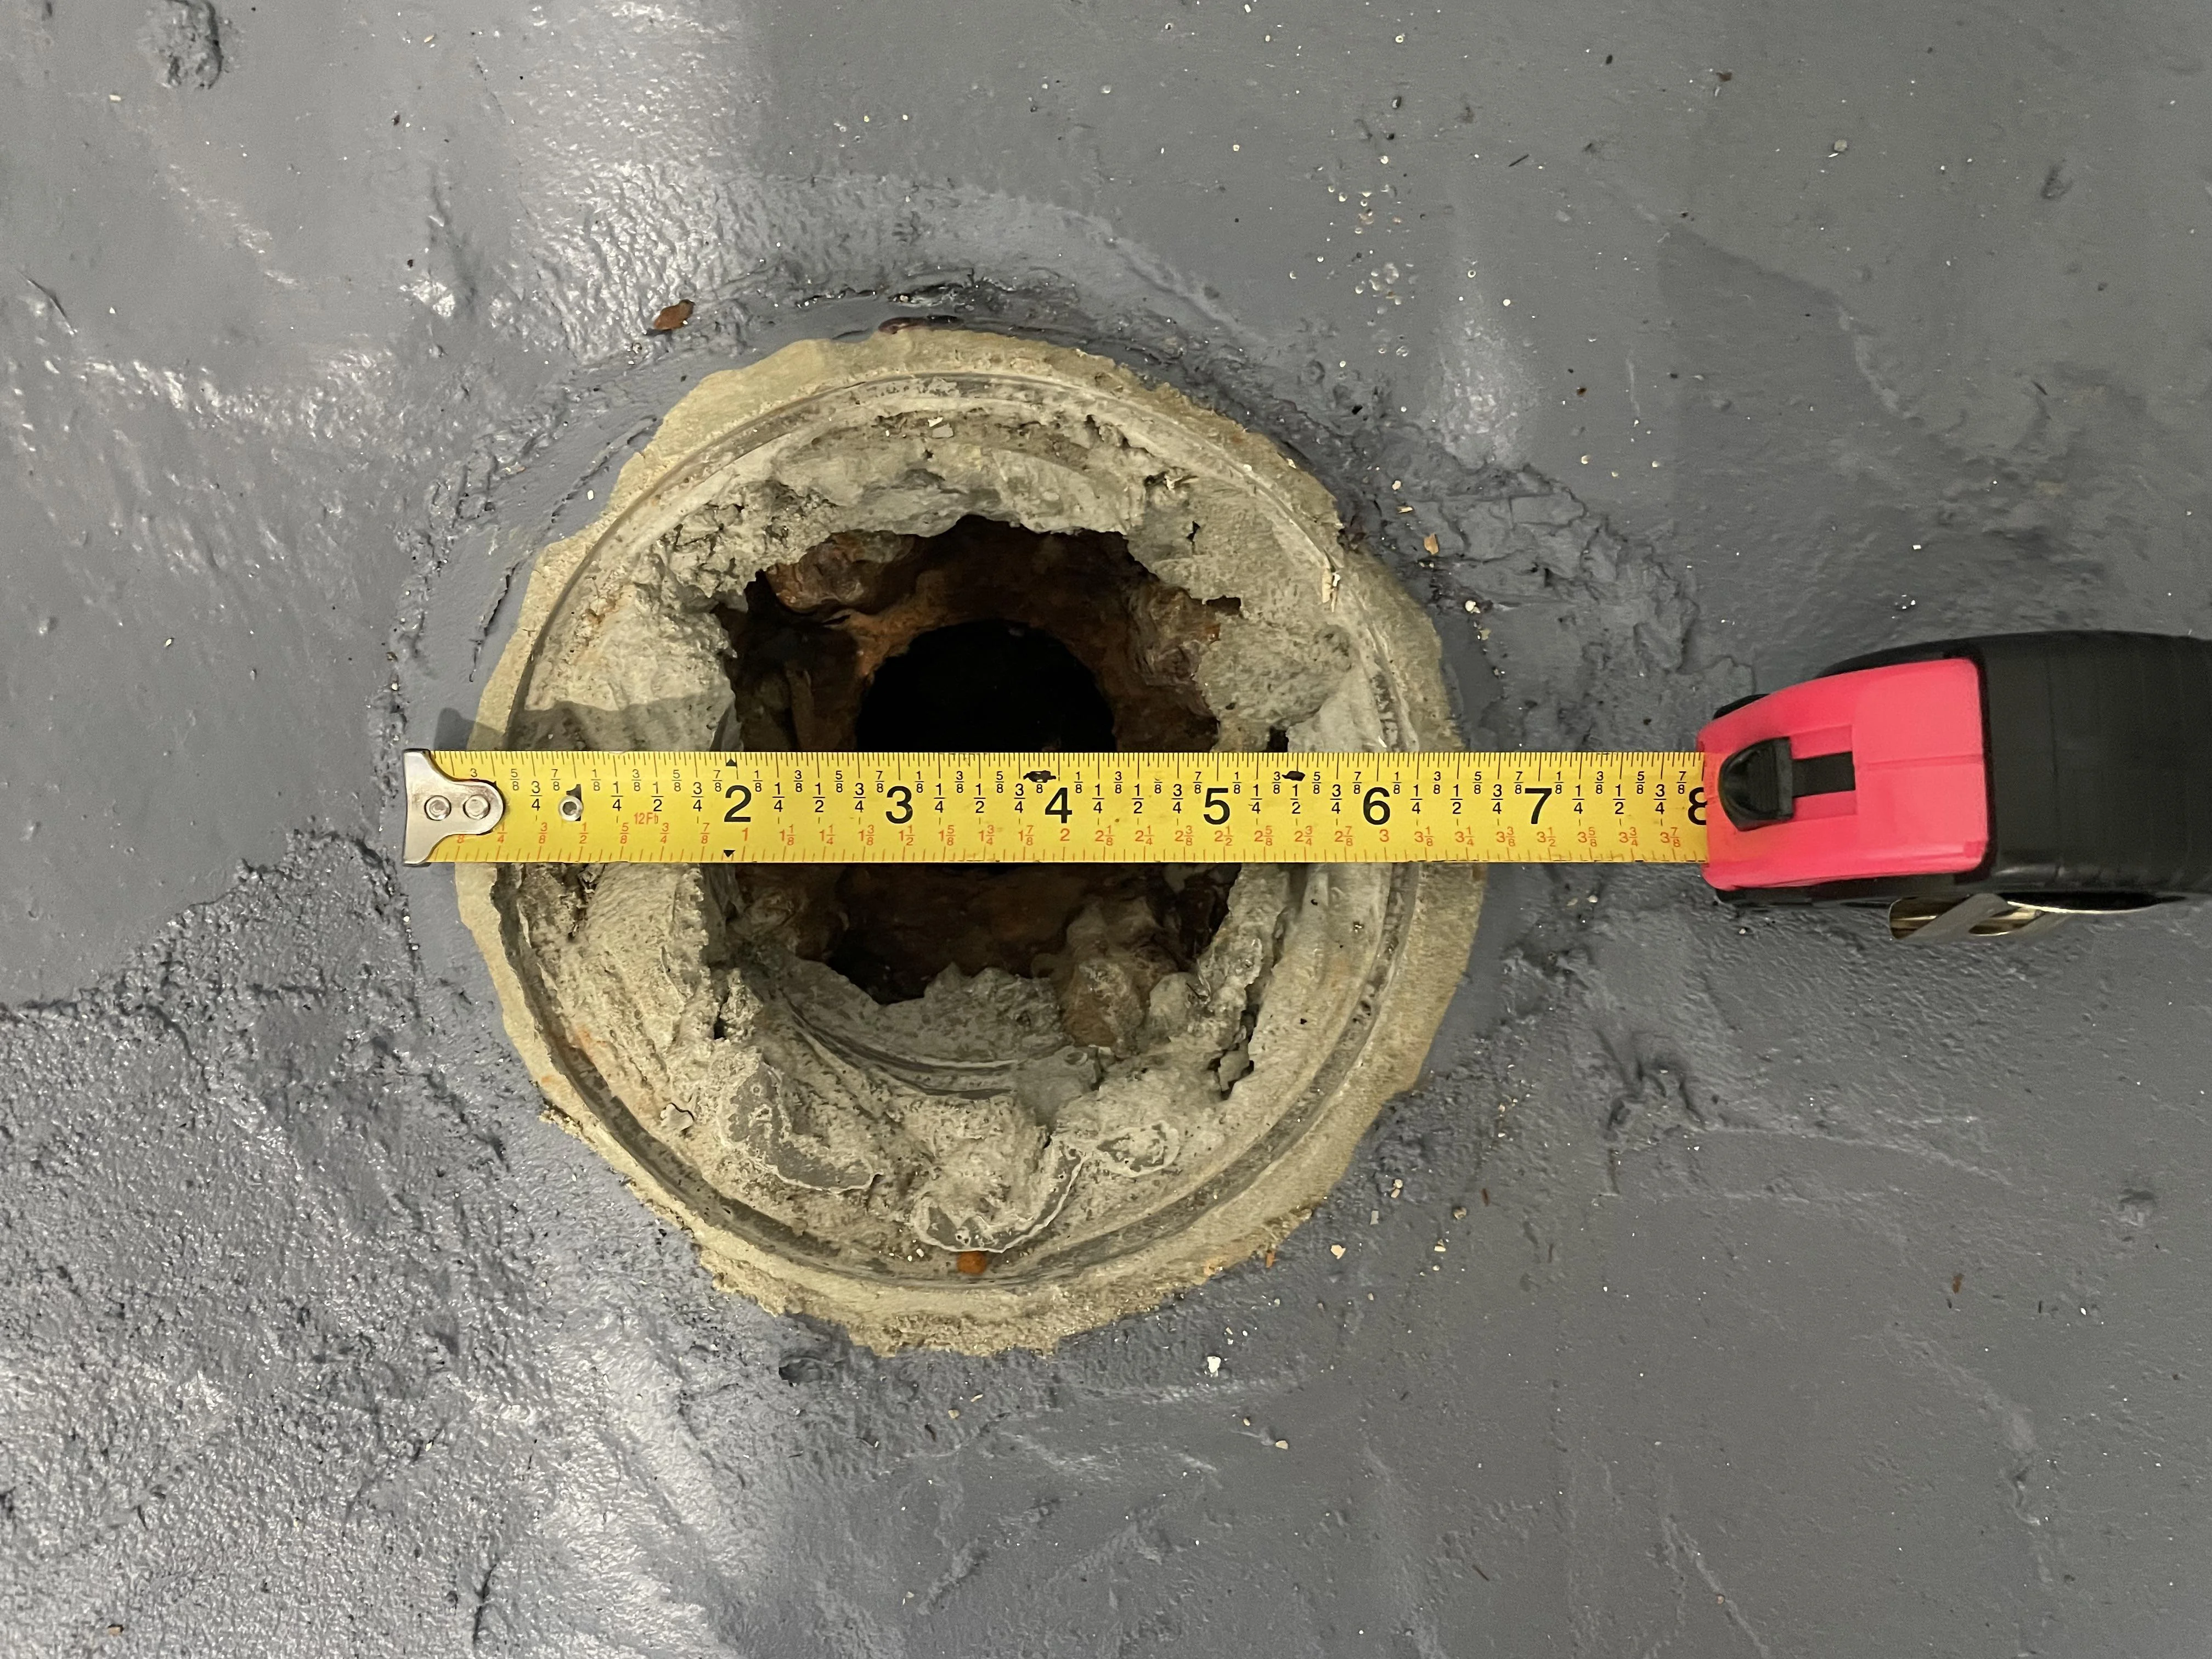
- Older cast iron hub drains that can be crusty inside, sometimes with a cleanout plug nearby.
One important caveat: Some drains do not have a trap right under the grate. The trap can be downstream, or the drain can use an internal trap seal device. The steps below still apply, but keep that in mind when you are looking down the opening and trying to make sense of what you are seeing.
Any of these can clog. In basements, it is usually a mix of grit, laundry lint, soap scum, and mystery sludge, plus rust scale if you have cast iron pipe.
Safety and quick checks
Gear I recommend
- Nitrile gloves and eye protection
- Old towel or rags
- Bucket and small container for sludge
- Flashlight or headlamp
- Flathead screwdriver (or nut driver) for the grate screws
- Wet and dry shop vacuum if you have one
Do this first
- Stop any incoming water. Pause laundry, turn off the utility sink, and shut off the dehumidifier drain hose temporarily.
- If the drain is actively backing up, avoid chemicals. Drain openers are hard on old pipes, dangerous in splash situations, and make snaking more hazardous.
- Pay attention to smell. A strong sewer odor often means the trap is dry (or the primer is not working), not just a clog.
Heads up: If sewage is coming up, not just clean water, you may have a main line issue. Stop using water in the house and call a plumber. Clearing a floor drain will not fix a main sewer blockage.
Step 1: Remove the grate and clean what you can reach
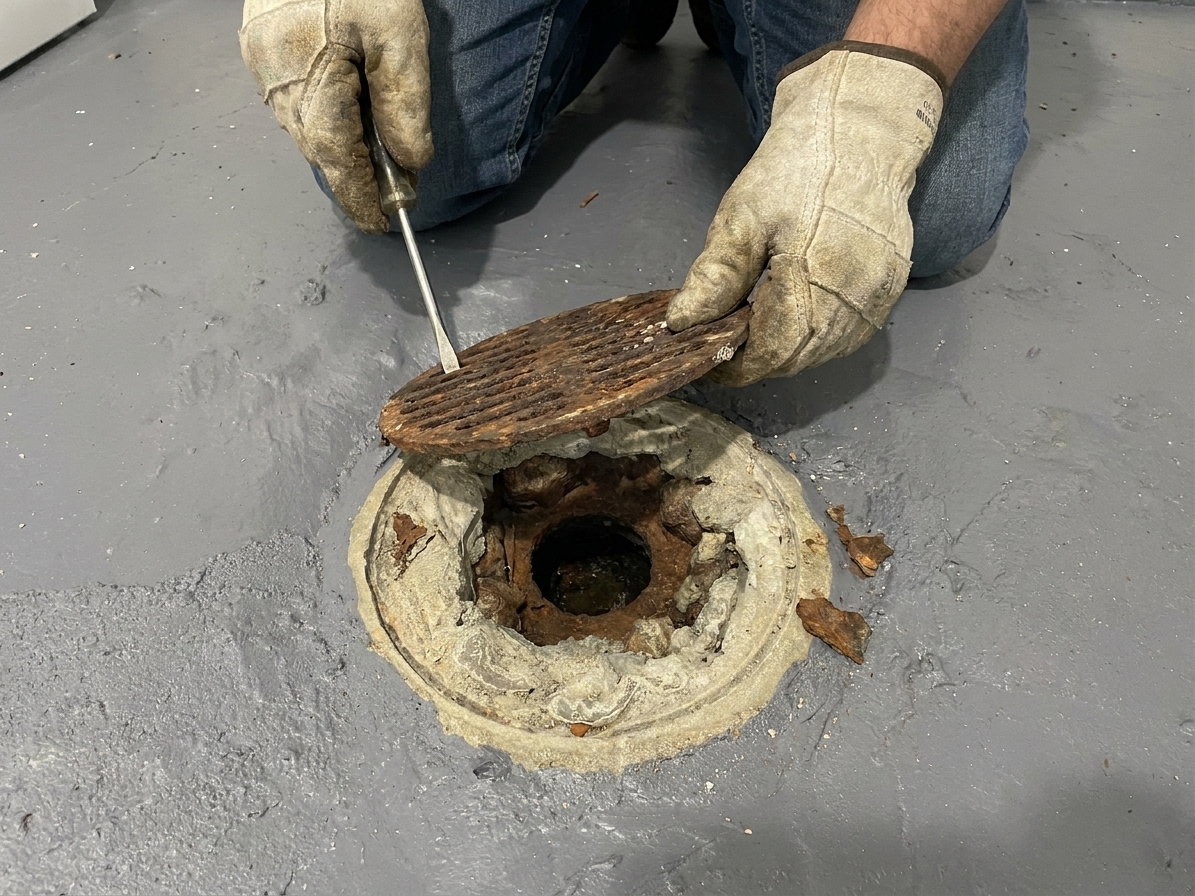
Start with the simple win. A lot of “clogs” are right at the top.
- Back out the grate screws if it is a screw-down type. If it is stuck, a little penetrating oil and patience beats brute force.
- Lift the grate straight up. If it is sealed with gunk or paint, work a flathead screwdriver under the edge and gently pry around the circle.
- Scoop out visible debris. I use a gloved hand and an old plastic cup. Toss solids in a trash bag, not down another drain.
- Shop vac the opening. This is the cleanest way to remove grit and sludge without pushing it deeper.
If you can see standing water right below the grate, that can be normal. A trap holds water to block sewer gas. The key is that the level should be stable, not rising. If the water level creeps up when no fixtures are running, treat it like a backup, not a “normal trap level.”
Step 2: Check for a sediment bucket and clean it
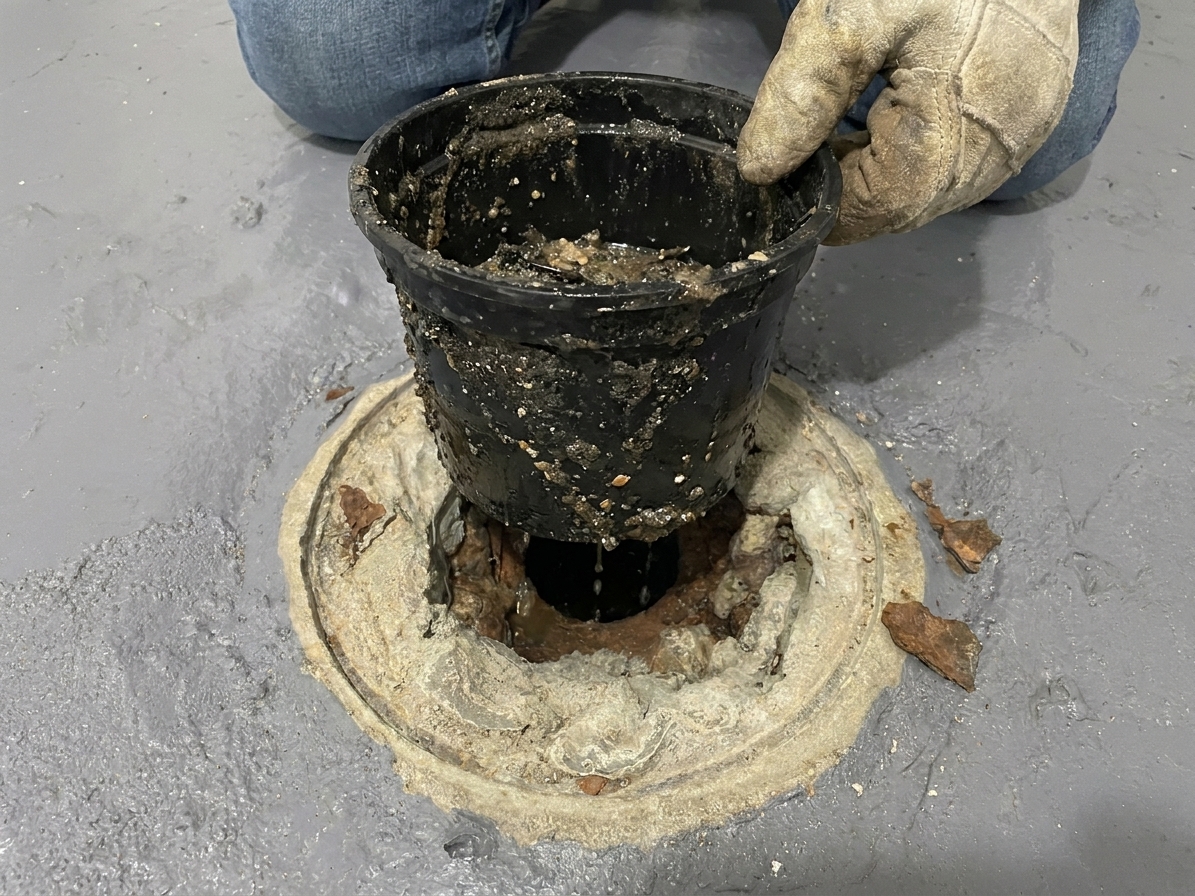
Many floor drains have a removable sediment bucket, especially near laundry or utility areas. If yours has one, it is often the whole problem.
How to tell if you have one
Shine a flashlight down the drain. If you see a cup-like insert with a rim or handle, you have a bucket. Some are metal, some are plastic.
How to clean it
- Lift the bucket straight up. Go slow so you do not slosh muck everywhere.
- Dump solids into the trash.
- Rinse the bucket in a utility sink or outside with a hose.
- Wipe the drain body clean where the bucket seats. That rim needs to sit flat.
- Reinstall the bucket fully seated.
Pro tip: If the bucket is missing, broken, or sitting crooked, the drain can clog faster and smell worse. Replacements exist for many styles, but matching can be tricky in older homes.
Step 3: Dry trap or real clog
Dry trap symptoms
- Sewer odor comes and goes, especially in winter when the basement air is dry
- The drain is not actually slow, it just smells
If the trap looks empty, pour enough water to restore the seal. In most homes that is somewhere around a quart to a gallon. Then wait a few minutes and see if it holds. If the water level drops within a few minutes, the trap may be siphoning, leaking, or the drain may connect oddly, which is a job for a plumber to diagnose.
Clogged symptoms
- Water stands at the top of the drain and drains very slowly
- You see heavy sludge buildup just below the opening
- It backs up when you run nearby fixtures like a utility sink
Before you snake, try flushing the trap with very hot tap water. I avoid repeated boiling-water dumps. It is an easy way to turn a small mess into a bigger one if you splash yourself, and extreme heat is not great for some plastics and old, stressed drain bodies.
- Run the hot tap until it is as hot as it gets.
- Pour hot water steadily into the drain.
- Follow with another bucket of clean water to see if flow improves.
This can loosen soap scum and light grease. It will not beat a packed lint and grit plug, but it is worth trying.
Step 4: Snake the line safely
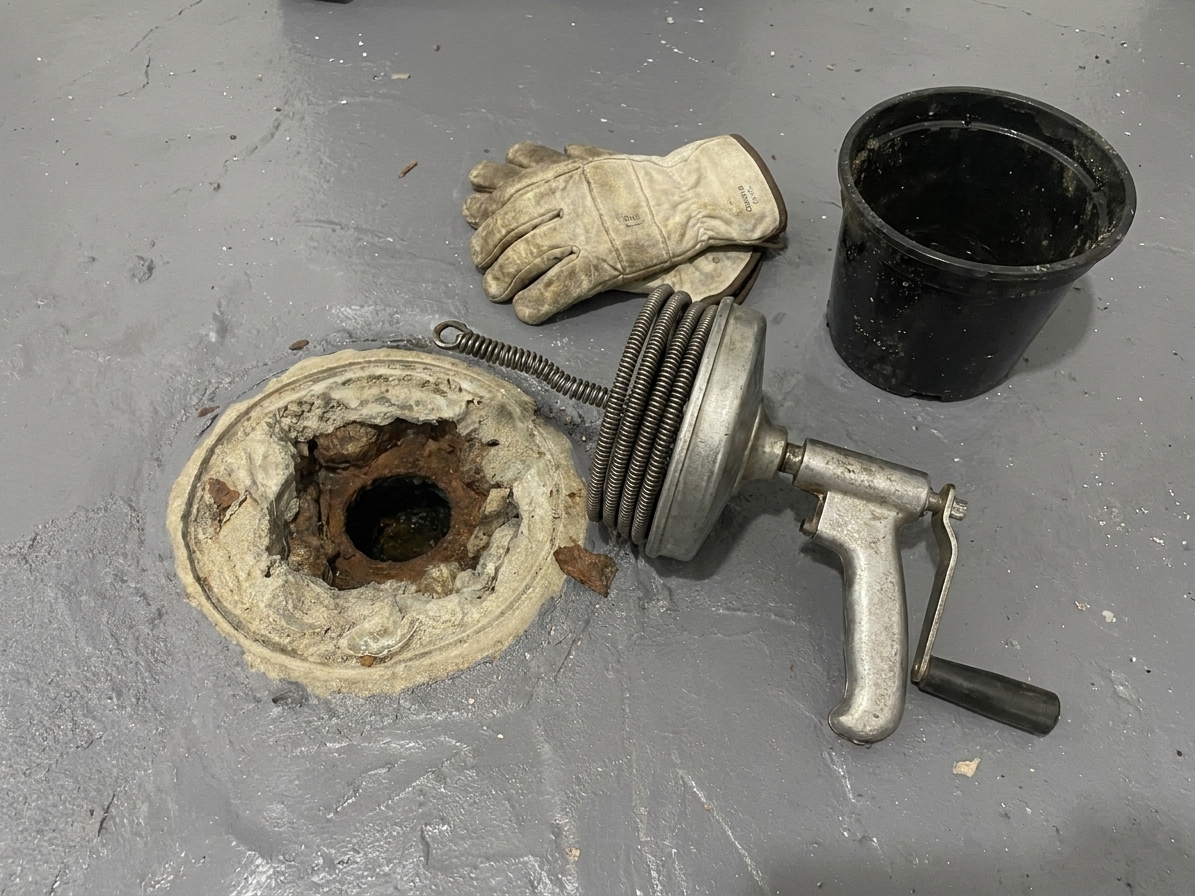
A basement floor drain often runs a short distance before tying into a larger line, but the exact length varies by house. Either way, that first stretch is a favorite place for gunk to sit.
What kind of snake to use
- Hand auger (good for 1 1/4 inch to 2 inch lines and shorter runs)
- Small power snake (useful, but it can damage old piping if you get aggressive)
If your house has older cast iron or you are new to snaking, start with a hand auger. It is slower, but it gives you better feel.
How to snake without making things worse
- Remove the sediment bucket if you have one, so you can get the cable into the pipe, not just into the bucket well.
- Feed the cable gently. You are trying to find the path of the pipe, not drill a new one.
- When you hit resistance, stop and work it. Crank a few turns, pull back slightly, then advance again. Think “tease it apart,” not “ram it through.”
- Do short pulls to clean the cable. Wipe slime off into a trash bag as you go so you do not redeposit it.
- Do not force around hard stops. A hard stop can be a fitting, not a clog. Forcing can kink the cable or damage the pipe interior.
Once you think you broke through, run water into the drain for a couple minutes. Then do a real test. I like a full 5-gallon bucket poured in fairly quickly. The water should not pool up to the rim.
Marcus rule: Never run a power snake blind if you suspect the drain body is cracked, badly rusted, or loose in the concrete. A little patience now is cheaper than a floor drain replacement later.
Step 5: Flush and confirm
A drain can seem “cleared” but still be coated with gunk that will grab the next batch of lint and plug again next week.
My quick confirmation routine
- Pour a full bucket of water in fairly fast. Watch the surface level. It should not rise toward the top.
- Run hot tap water for a minute or two, then follow with cool water. This helps carry away loosened debris.
- If you have a shop vac, vacuum out any remaining sludge in the drain body before reinstalling the grate.
Step 6: Restore the water seal
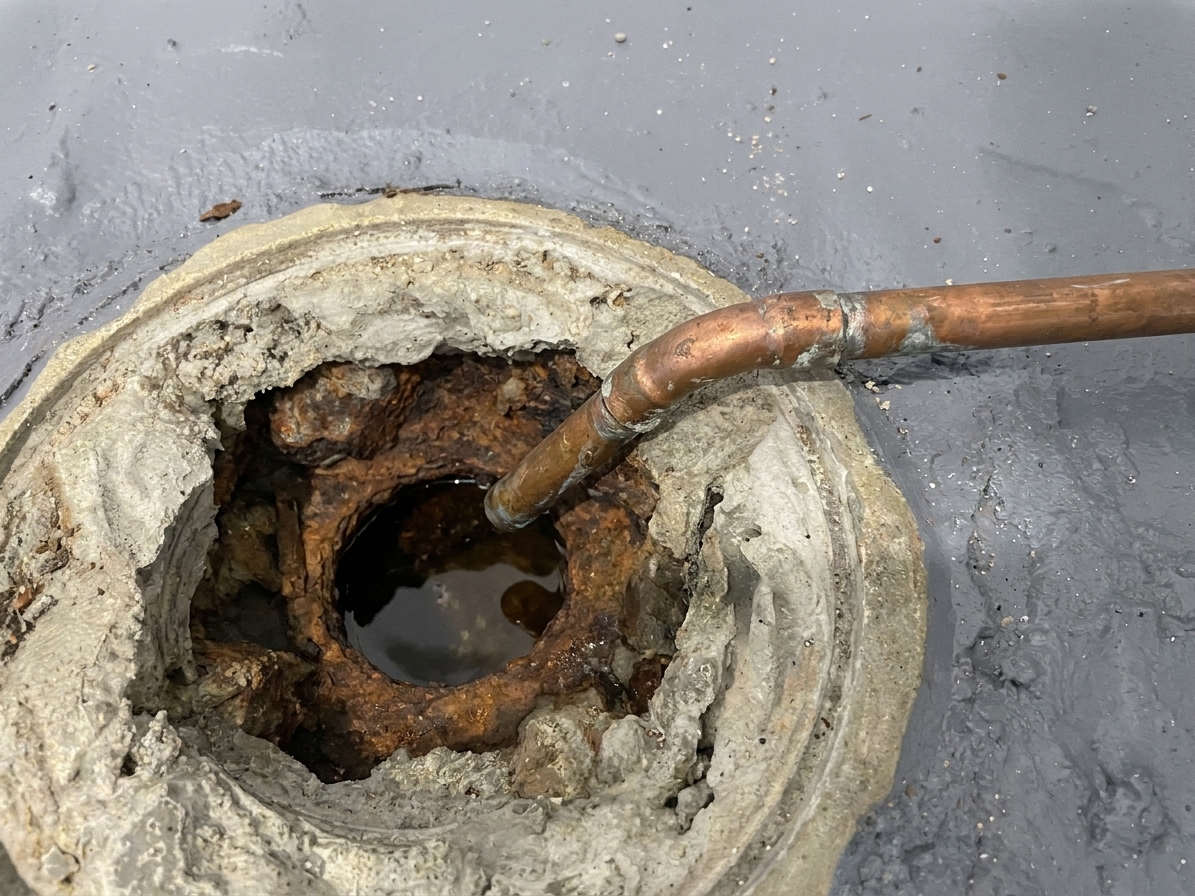
Your floor drain should have a water seal in a trap, or another type of seal, to keep sewer gas out. If that seal dries out, odors show up fast. That is where trap primers come in.
What a trap primer does
A trap primer is a device or small water line that periodically adds a little water to the floor drain trap so it does not dry out. Some are tied to a nearby sink, laundry, or a dedicated primer valve.
Signs the primer is not working
- The drain smells fine right after you add water, then starts smelling again after a week or two
- You never see any sign that water is being added automatically
What you can do
- Top off the trap. Add enough water to restore the seal. If this drain rarely sees water, I tell people to add some once a month, especially during heating season.
- Look for a primer line. You might see a small tube feeding into the drain body. If it is disconnected or clogged with mineral buildup, that can be the culprit.
When to call a plumber: If you suspect the primer valve is failed, missing, or incorrectly piped, get a pro involved. Primers tie into potable water and drainage rules vary by area.
Floor drain vs cleanout
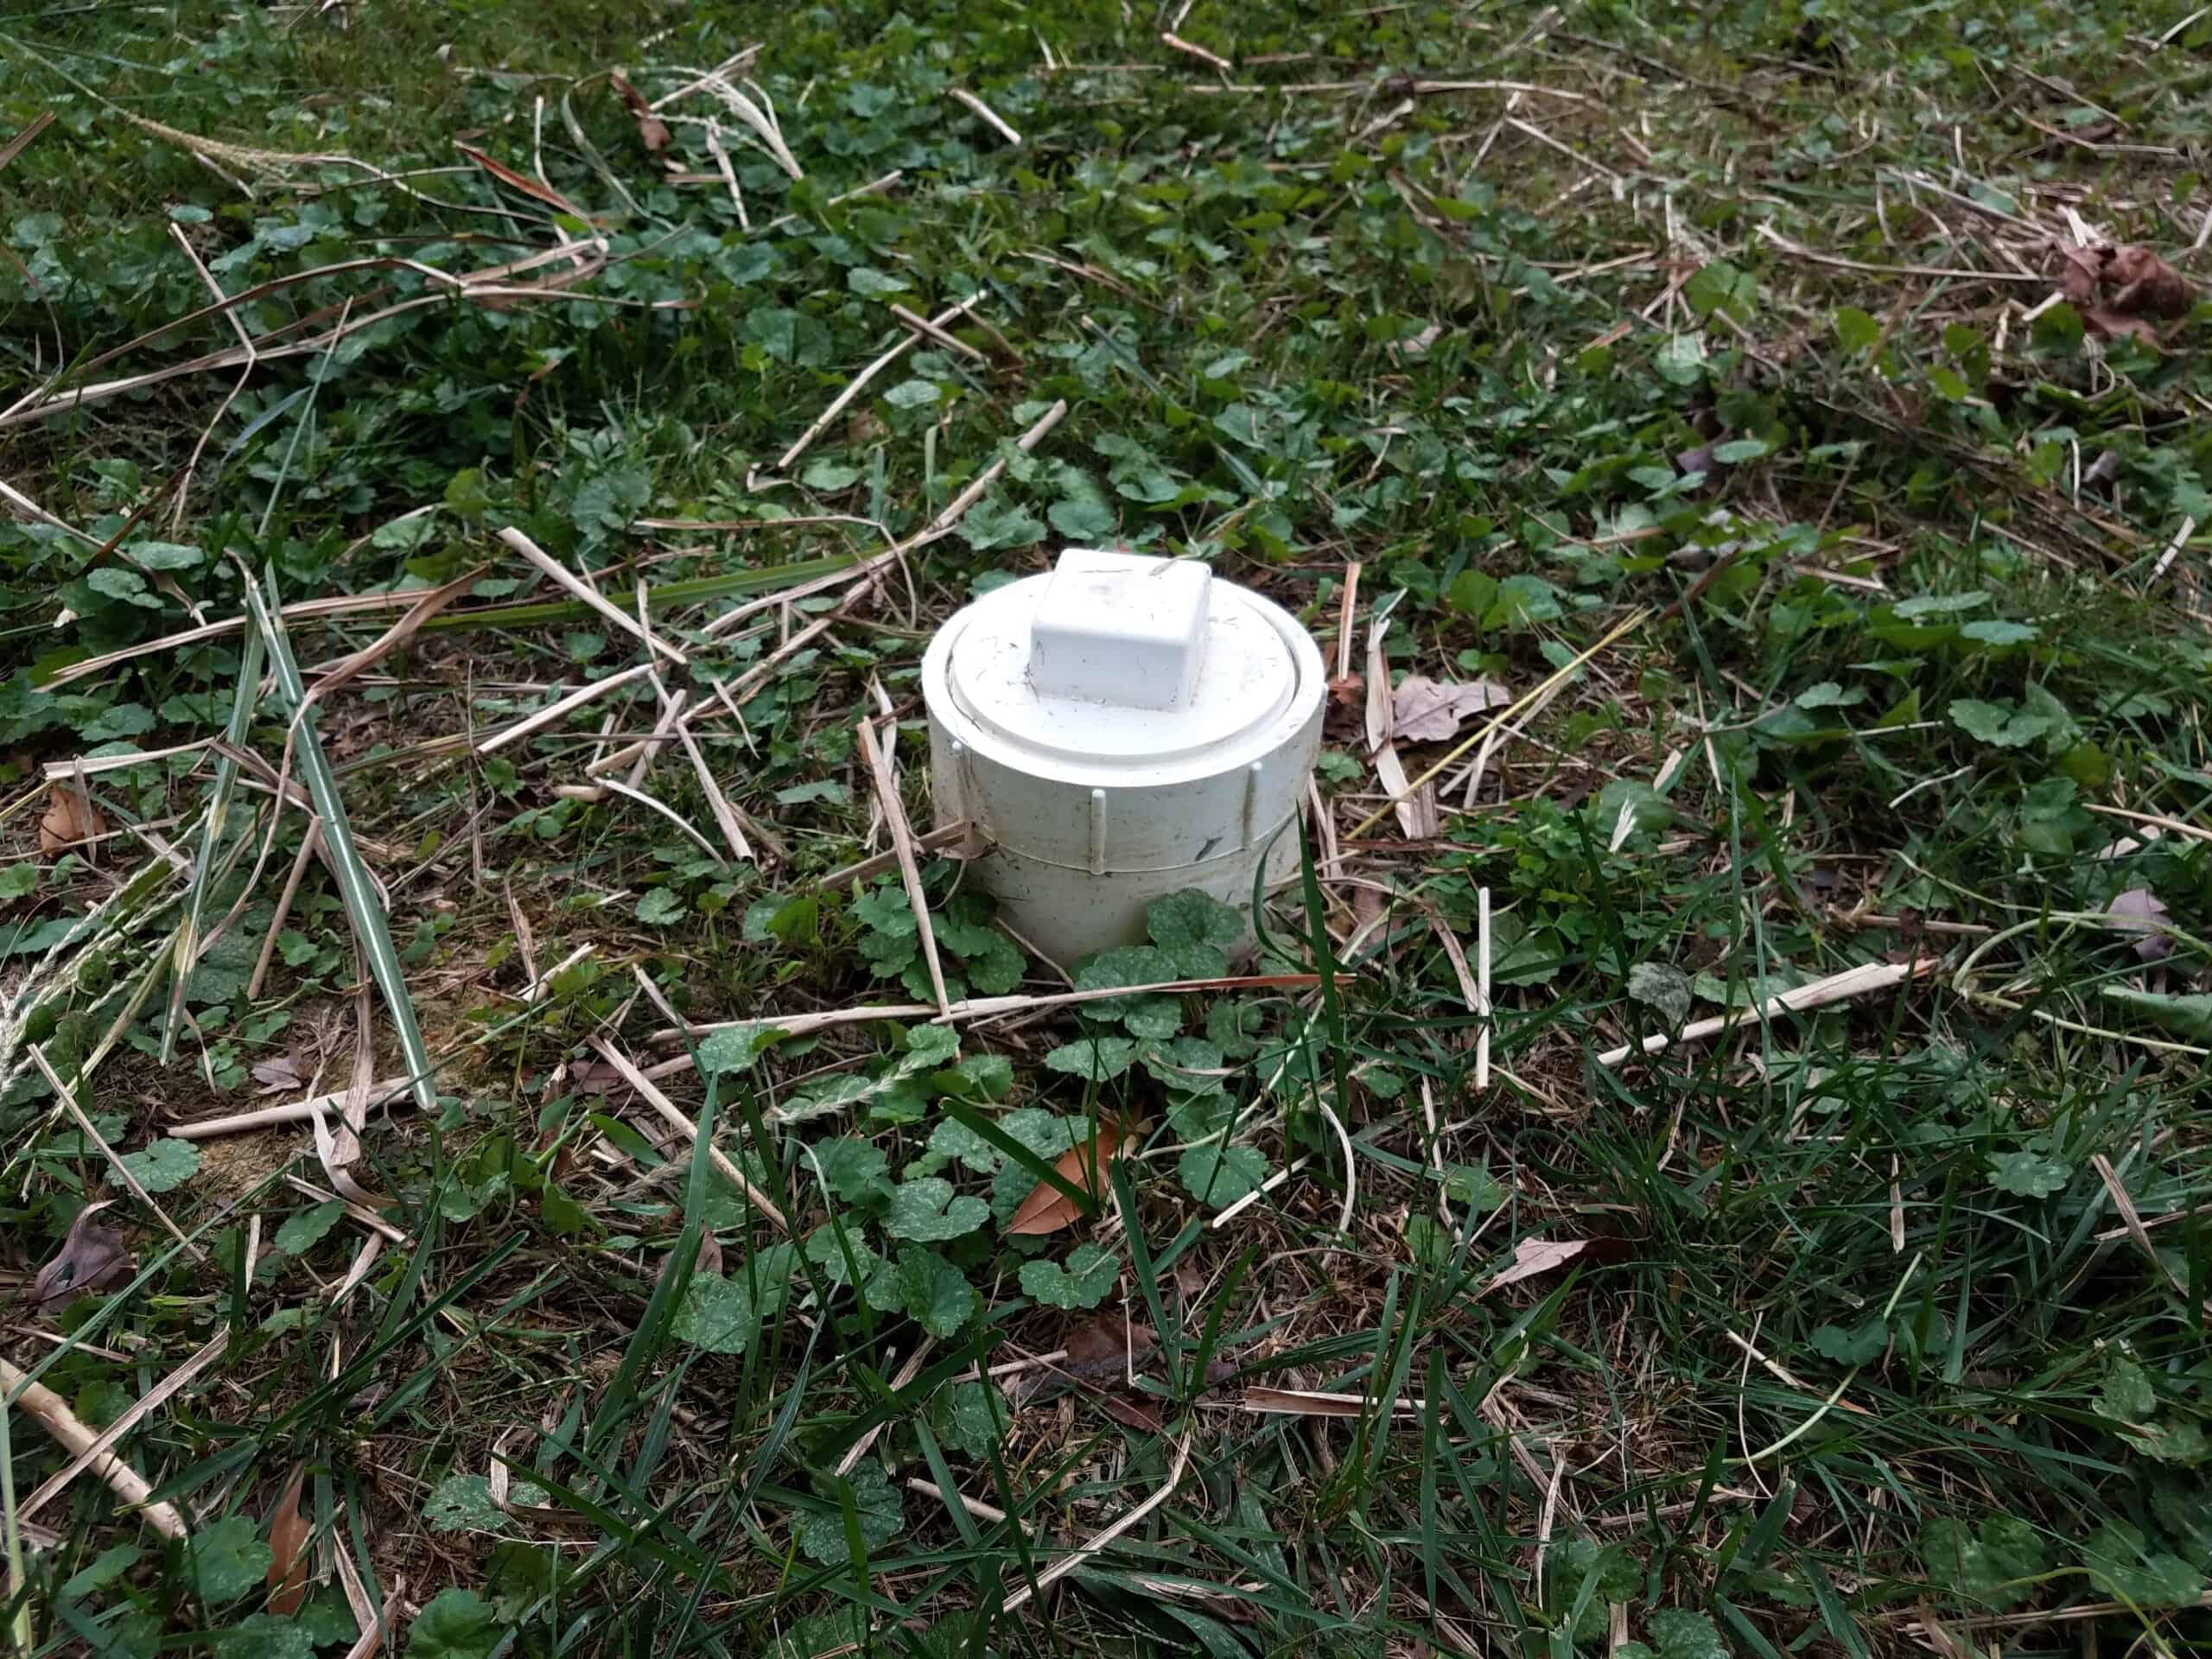
Some basements have a cleanout plug near the floor drain, or on the same branch line. If you have repeated backups or you cannot get a snake to feed cleanly through the drain body, a cleanout can be the better access point.
- Floor drain opening: Fine for cleaning the bucket, trap area, and light clogs, but tight turns and old cast iron can make it awkward.
- Cleanout plug: Often gives a straighter shot down the pipe. If you are not sure what you are looking at, do not remove random plugs in a hurry. Call a plumber.
Should you use a plunger?
Usually, no. Floor drains are hard to seal, and plunging can shove sludge deeper into the line. That said, if you have a clear water seal (not an empty drain body), you can sometimes get a quick win using a small plunger and a tight seal around the grate opening. If it does not respond quickly, stop and switch to cleaning and snaking.
Common causes of clogs
- Laundry lint (especially if a utility sink dumps into the floor drain area or if a washer discharge ever spilled repeatedly)
- Grit and sand tracked in from outside, plus concrete dust from projects
- Soap scum and general sludge
- Rust scale from older cast iron piping
- Paint and thinset leftovers from DIY work that should never go down a drain
If you do a lot of messy projects, treat the floor drain like a last line of defense, not a dump site. It is a plumbing connection to your home’s drainage system.
When the drain is not the problem
Sometimes the floor drain is just the lowest opening, so it is where you notice trouble first.
Call for help if you see this
- Multiple drains in the house gurgle or back up around the same time
- The basement floor drain backs up when you flush toilets or run lots of water upstairs
- Standing water includes sewage or toilet paper
- You cannot get a snake to advance more than a couple feet, or it comes back with heavy roots or thick black buildup repeatedly
- You have repeated basement backups and no backwater valve or backflow protection
If sewage has come up more than once, talk to a plumber about the bigger picture. A camera inspection can confirm what the line is doing, and in some situations a backwater valve is worth discussing.
Where does it drain to?
People ask this because it changes what “normal” looks like. Many basement floor drains tie into the sanitary sewer, but some homes route them to a storm lateral, an ejector system, or even toward a sump setup depending on age, location, and past remodels.
Clues you can look for:
- Sump pit nearby: Some floor drains are piped to discharge near a sump basin, but it is not a guarantee.
- Backups look like sewage: That points toward sanitary sewer involvement.
- You want certainty: A plumber with a small camera can confirm the route in one visit.
Maintenance
- Every month or two: Lift the grate and vacuum out loose debris.
- Every few months: Add some water if it rarely sees water, to keep the seal.
- After big DIY messes: Vacuum around the drain and do not wash mud, grout, thinset, or paint tools where it can end up in the floor drain.
- Once a year: Pull and rinse the sediment bucket if you have one.
It is not glamorous. But neither is mopping a basement at 10 pm because the drain decided to quit on you.
FAQ
Can I use chemical drain opener in a basement floor drain?
I avoid it, especially in older homes with cast iron. If the drain is slow because of sludge and lint, chemicals often do not solve it, and they make snaking riskier. Physical removal and snaking is safer and more reliable.
Why does my floor drain stink even when it is not clogged?
The most common reason is a dry trap or a missing water seal. Add water to restore the seal. If the smell returns quickly, you may have a trap primer issue or a venting problem.
My floor drain has a bucket. Do I really need it?
Yes. That bucket is doing you a favor by catching grit and debris before it gets into the trap and piping. Clean it and reinstall it seated properly.
Is a basement floor drain connected to my yard drainage?
Often, no, it is part of the indoor plumbing drainage system. But it depends. Some homes tie floor drains to storm lines, ejectors, or other setups. If you need a definite answer, a plumber can trace it or confirm with a camera inspection.